Edit Playout Log
The Edit Playout Log window allows you to view and edit the playout log for a selected date and time range. Use it to manually add or remove items, schedule or unschedule clock items for a range of hours, and import or export the log.
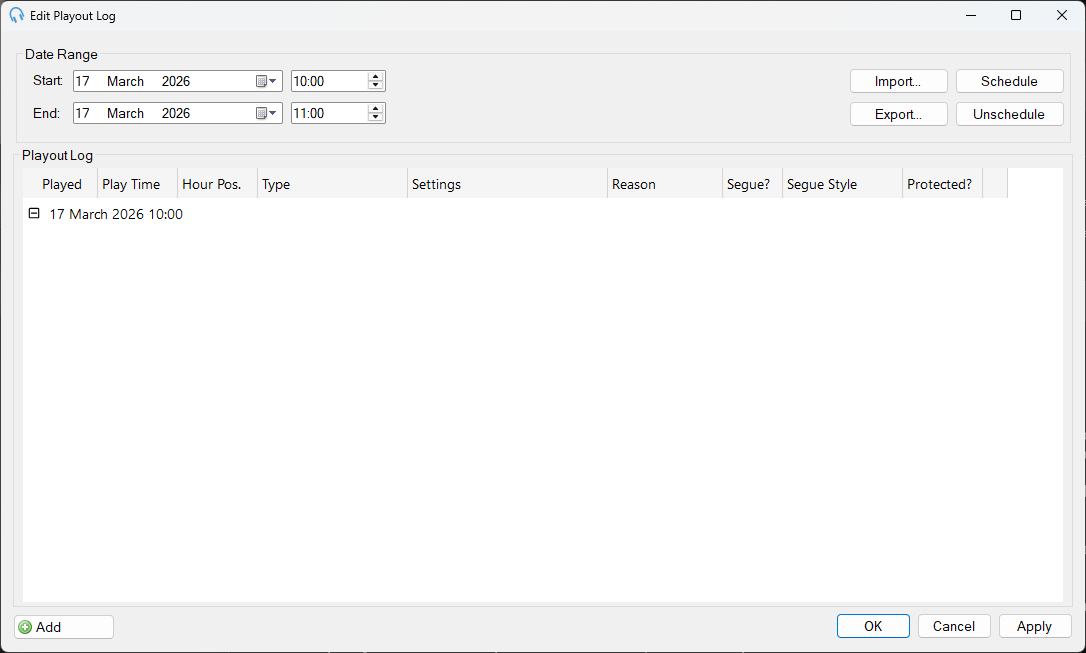
Range start time selector

Use the date and time selectors to show in the playout log list only items that begin on or after the selected time.
Range end time selector

Use the date and time selectors to show in the playout log list only items that begin before the selected time.
Import

Click Import to import a playout log generated by an external scheduler. See Import Playout Log.
Export

Click Export to export the log to the PlayIt Live Playout Log format so it can be imported to another date or time. See Export Playout Log.
Schedule
Click Schedule to schedule clocks for the selected date range. The scheduling engine will generate playout log items from the clock items assigned to each hour in the range. If no clock is scheduled for an hour slot, the playout pattern will be used.
Unschedule

Click Unschedule to remove all scheduled items from the selected date range.
Playout log
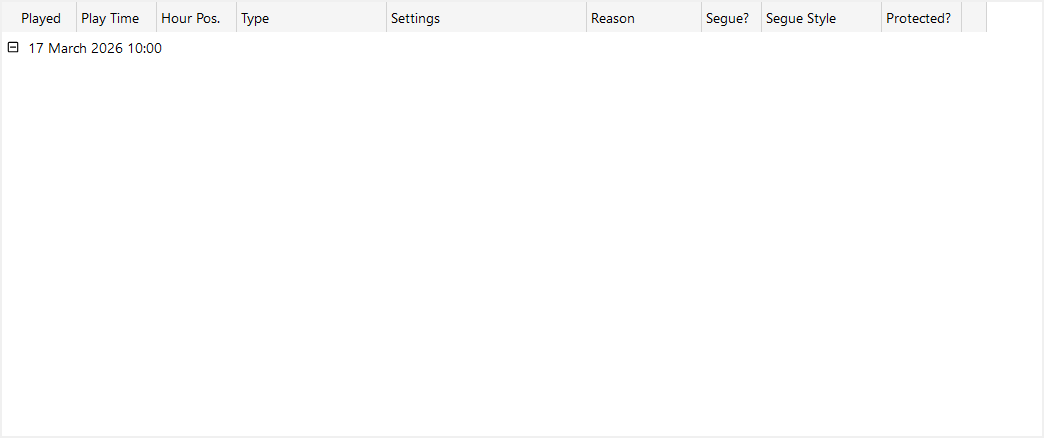
The playout log grid shows all scheduled items in the selected date range. See Edit Playout Log (Scheduled) for a description of the columns and a populated example.
Add
Click Add to manually add a new item to the playout log below the selected item.
OK

Click OK to save changes and close the window.
Cancel

Click Cancel to close the window without saving.
Apply

Click Apply to save changes without closing the window.
Replacing a track
When a scheduled item in the playout log is a track, you can swap it for a different track without re-running the whole log. This is useful when a single scheduled song is no longer suitable, for example the file has become unavailable, you have the wrong version of a song, or you simply want a different track in that slot, but you do not want to unschedule and re-schedule the entire hour.
To replace a track, click the pencil edit icon in the item's Settings cell. For an existing scheduled track item this opens the Replace Track picker, which lists candidate replacement tracks. (For an empty or newly added row, it instead opens the basic Select Track form so you can choose the first track.)

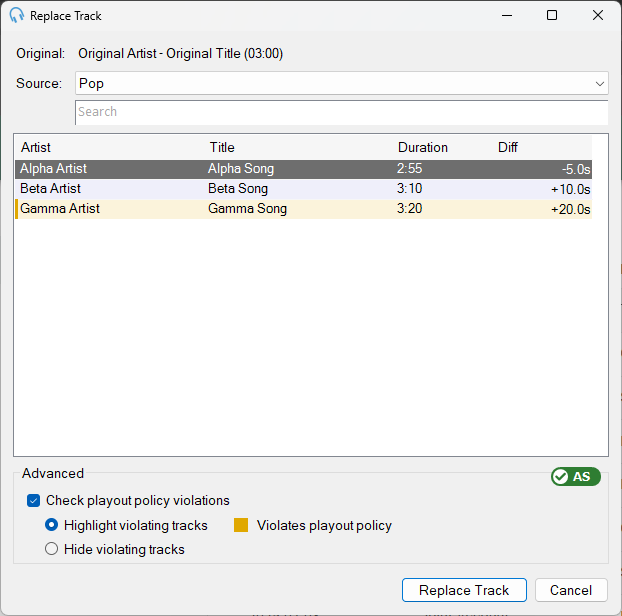
The Replace Track picker shows the original track, a source filter, a search box, and a list of candidate replacements:
Original

The Original: label showing the scheduled track being replaced, with its artist, title and duration.
Source

The Source dropdown used to choose which track group the candidates are drawn from, or All Tracks.
Search

The search box for filtering candidates by artist or title, or with a filter expression.
Candidate list
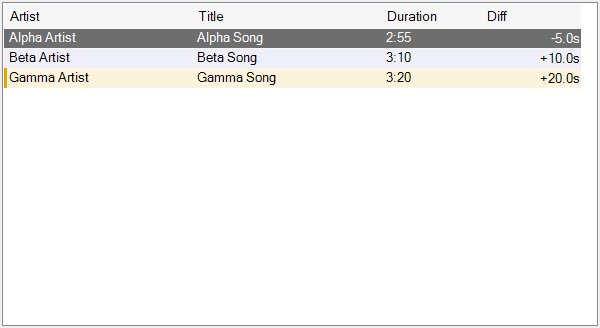
The list of candidate replacement tracks, showing the Artist, Title, Duration and Diff columns. Candidates that would break a scheduling rule are highlighted with an amber tint and left bar.
Advanced

The Advanced section, where you can turn on playout policy violation checking. This is part of the premium Advanced Scheduling module.
Violation legend

The colour legend shown while violating tracks are highlighted, explaining that an amber row Violates playout policy.
Replace Track
The Replace Track button, enabled once a candidate is selected.
Cancel

The Cancel button.
The picker provides:
| Element | What it does |
|---|---|
| Original | Shows the track currently in the log slot, with its artist, title and duration. |
| Source | Limits the candidate list to a single track group, or All Tracks to consider every track. When the track was scheduled from a track group item in the clock, the dropdown is preselected to that source track group, so the replacement candidates start from the same group the track was originally scheduled from. If the track was not scheduled from a track group (for example a specific track item), the dropdown defaults to All Tracks. |
| Search | Filters the candidates. Type plain text to match the artist or title, or use a filter expression such as Artist CONTAINS cher AND ActiveDuration > 180 for more precise matching. |
| Artist / Title / Duration | The candidate's artist, title and duration. You can add or remove columns by right-clicking a column header. |
| Diff | How much longer (+) or shorter (-) each candidate is than the original track, in seconds, helping you pick a replacement of a similar length. The list is sorted by this column by default, so the candidates closest in length to the original appear first. |
Only tracks that are enabled and currently valid (not disabled, and within any start and expiry dates) appear as candidates, and the track currently in the slot is left out of the list. Right-click a candidate to Preview it or view its Track Play History.
Select the replacement you want and click Replace Track (or double-click the candidate). The scheduled item is updated to use the new track in place of the original. Click Cancel to close the picker without making a change.
Checking for playout policy violations
The Advanced section at the bottom of the picker helps you avoid choosing a replacement that would break your scheduling rules. Tick Check playout policy violations and PlayIt Live flags any candidate that would violate a playout policy (for example an artist or title separation policy), or that would be unavailable at the time the item is scheduled to play.
Choose how flagged candidates are treated:
- Highlight violating tracks keeps every candidate in the list but tints the offending rows amber, with a matching left bar. A Violates playout policy colour legend appears beside the option so the highlight is easy to identify. You can still select a highlighted track if you want to override the rule.
- Hide violating tracks removes the offending candidates from the list entirely, leaving only replacements that satisfy your policies.
PlayIt Live remembers your choice, so the picker opens with the same setting the next time you replace a track.
Playout policy violation checking is part of the premium Advanced Scheduling module. If you do not have Advanced Scheduling, the Advanced section is disabled.