Voice Tracking
Purchasing the Voice Tracking module unlocks full voice tracking functionality. Whenever the module is not active, an audio notice plays on air before each voice track, including voice tracks you recorded while it was active. See Without an active Voice Tracking module.
Voice tracking is an industry-standard technique to create the illusion that there is a live announcer sitting behind the desk in a radio studio, when in fact all the audio has been prerecorded and played out automatically. Voice tracking can allow you to record a three-hour show in less than half an hour.
PlayIt Live enables you to do this by inserting Voice Track items into the playout log and recording the audio with your microphone. The recorded audio can then be sequenced with other tracks in the log and tweaked using the Segue Editor. It is also possible to record voice tracks remotely, on another computer, and send these voice tracks to PlayIt Live. For more information on this, see Remote Voice Tracking (Setup).
Inserting voice tracks
Start by dragging tracks into the log for the hour you wish to voice track. Then drag a Voice Track item from the Special Items panel into the log for every voice link you would like to record between tracks.
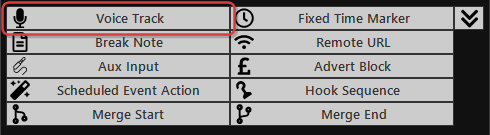
The Special Items panel contains the Voice Track item (highlighted). Drag and drop a Voice Track item into the playout log to insert a voice track placeholder.
A placeholder will be shown in the playout log for each voice track item you need to record.
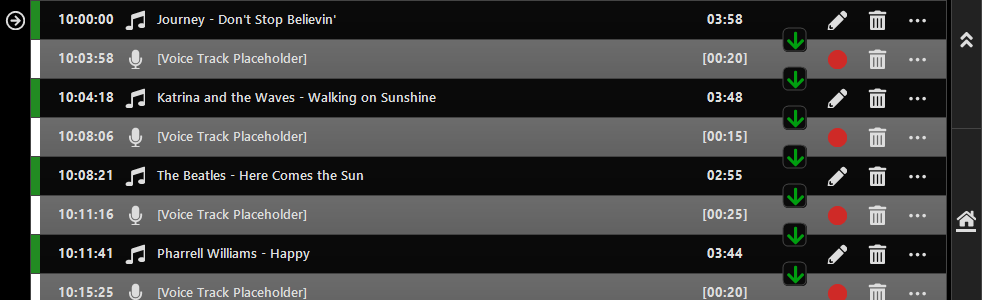
Recording a voice track
Click the red circle record icon  on the voice track you wish to record. The Segue Editor will be shown allowing you to record your voice.
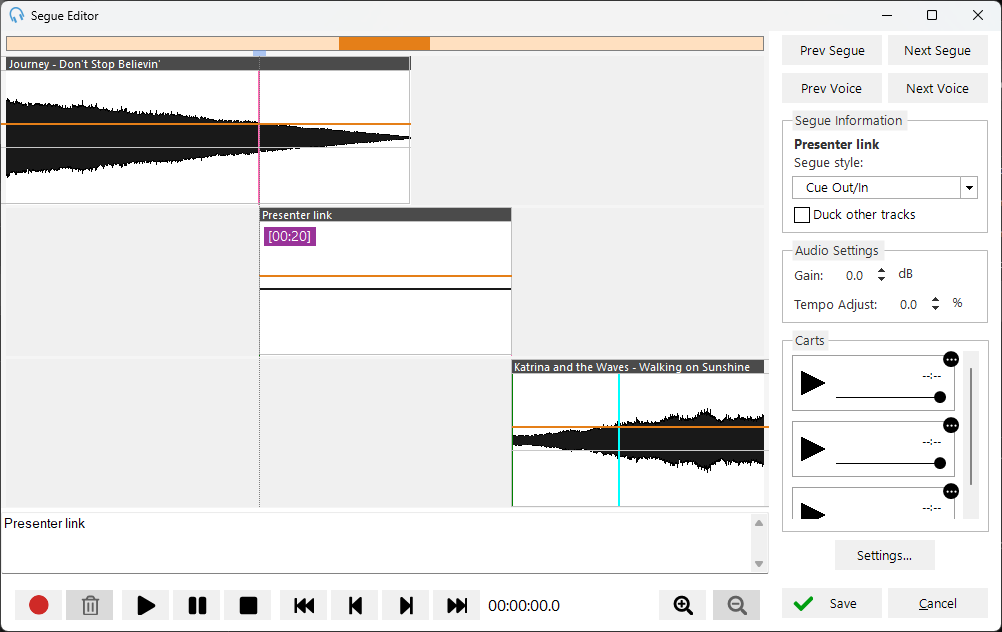
If you are using voice tracking for the first time, go to Settings... and ensure that your microphone device and audition time settings are set up correctly. The audition time is the number of seconds of the end of the previous track you will hear when you start recording your voice track. Remember to click OK to save your settings.
To start recording your voice track, click the Record button, or press the R key.
A pop-up box will be shown if you have not purchased a Voice Tracking module licence. You can still record, but your voice tracks will play with an audio notice until the module is active. See Without an active Voice Tracking module.
Your recording will start and you will hear the end of the previous track. Start speaking to record your voice. The Record button will change to the Play Next button. Click the Play Next button to play the next track after the voice track, or press the R key again. The button will change to the Stop button. Click the Stop button to finish recording, or press the R key one more time.
Editing a voice track
Your Segue Editor view should now look something like this, with the recorded voice track shown in the middle:
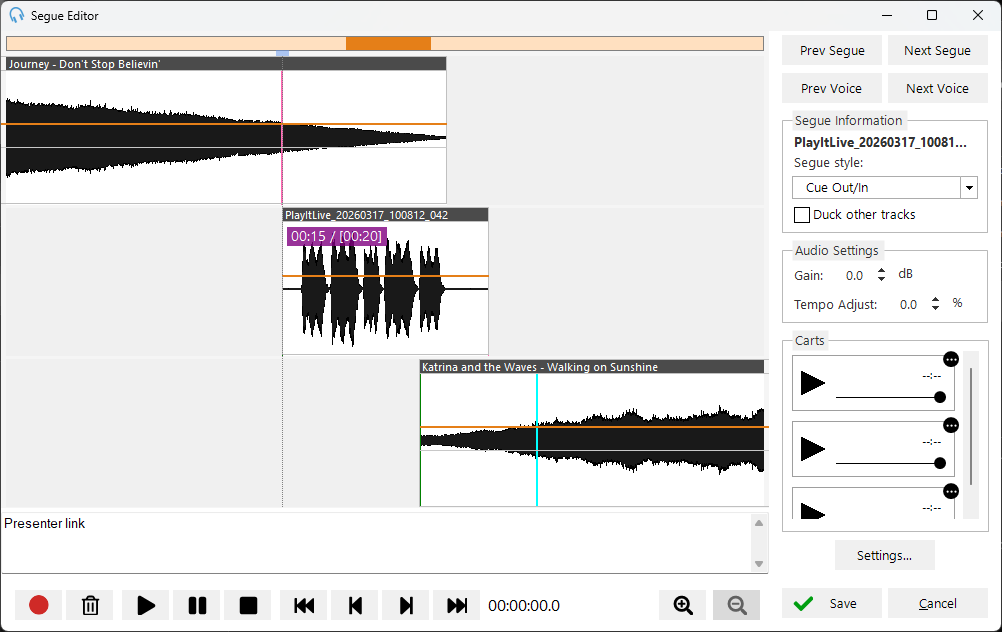
You can trim the audio of the recording by clicking the edges of the waveform to remove any unwanted silence at the start or end of the recording. You can also move the audio around by clicking and dragging the top bar of the waveform and edit the volume by clicking and dragging on the orange fade envelope. If the audio you have recorded is too quiet, use Gain to increase the volume.
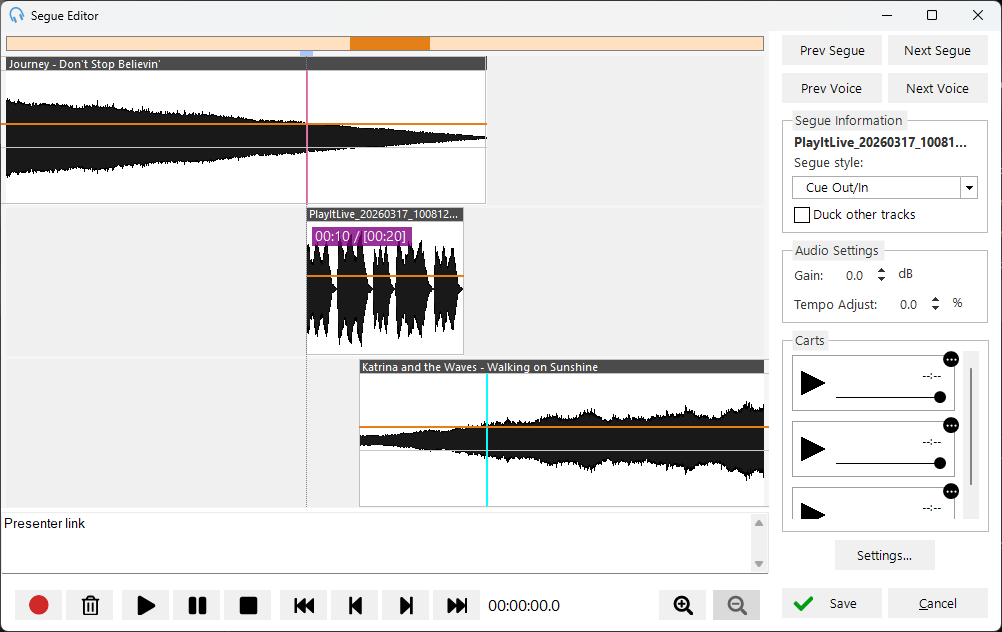
You have now recorded your first voice track. Click Next Voice to save and record the next voice track, or click Save to save and return to the playout log.
Voice tracks in the playout log
The voice track will now be shown loaded into the players if playing next, and shown in the log with the other tracks.
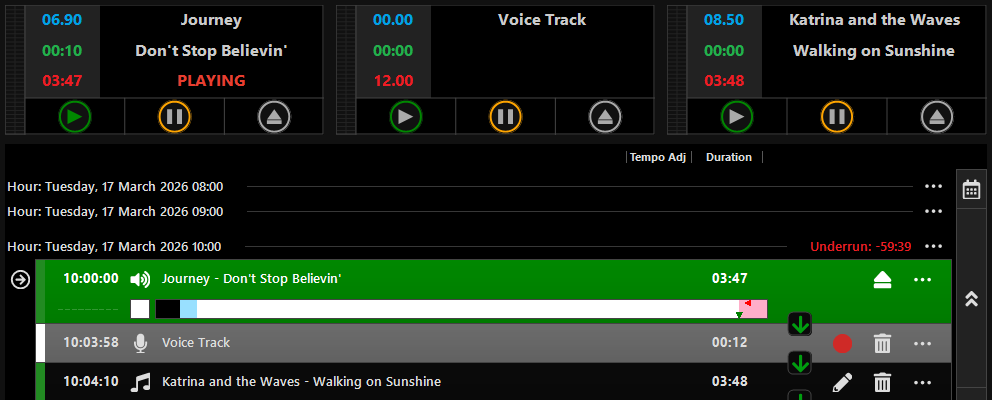
Voice tracks can be recorded as far in advance as you need. Just scroll down the playout log to the required time.
Recording beds and imaging
When recording a voice track item, a Carts section is shown to the right hand side under the Audio Settings section. This can be used to record other audio alongside your voice track, for example, a bed (background music) or imaging such as station idents.
Simply drag and drop an audio file into the cart, or you can use the menu icon to load an existing track, file, or eject the cart. You must ensure carts are loaded before starting to record your voice track. Use the volume slider to adjust the volume of the audio if you want to talk over it.
Without an active Voice Tracking module
You can record voice tracks without the Voice Tracking module, but PlayIt Live adds an audio notice when they play. This happens whenever the module is not active:
- before you have purchased it,
- after your subscription has expired and its 2-day grace period has ended.
What happens on air
When a recorded voice track plays and the module is not active, PlayIt Live plays an audio notice asking you to purchase the module. The notice is heard on air, and it plays with every voice track that airs while the module is not active.
Each recorded voice track in the playout log also shows a red warning: Voice tracking feature not licensed: Voice track will be preceded by an audio notice.
The notice is added when the voice track plays, not when it is recorded
The audio notice is never part of the recording. PlayIt Live checks the module at the moment each voice track goes to air, not at the moment it was recorded. This means:
- Voice tracks recorded while your module was active still play with the notice if they air at a time when the module has expired. This includes shows you recorded in advance.
- The notice is applied for as long as the module is not active, to every voice track that plays during that time.
- Once the module is active again, the same voice tracks play without the notice. You do not need to re-record them.
Keep your subscription active
To keep your voice tracking uninterrupted, keep your Voice Tracking subscription active for as long as you have voice tracks scheduled to air. If you record shows in advance, check that your subscription will still be active on the date each show plays, not just on the date you record it. If you have turned off automatic renewal, renew before the end date shown in your PlayIt Software account.
A grace period of 2 days is already added to your Voice Tracking subscription end date. It is there to allow for delays in processing a renewal payment, and it should not be relied upon to keep voice tracks playing without the notice. The end date shown in PlayIt Live includes these 2 days, so it is 2 days later than the subscription end date shown in your PlayIt Software account. Plan your renewal around the date in your account, not the later date in PlayIt Live. Once the grace period ends, the notice is applied to every voice track that plays, including voice tracks recorded during the grace period.
You can check the status of the module at any time on the Voice Tracking tab in Settings. See Voice Tracking settings.