Remote Voice Tracking Usage
Purchasing the Voice Tracking module unlocks full remote voice tracking functionality. Whenever the module is not active, an audio notice plays on air before each voice track, including remote voice tracks recorded while it was active. See Without an active Voice Tracking module. Remote voice trackers can send voice tracks to PlayIt Live without needing the module themselves. The number of users who can connect concurrently is determined by the number of users selected when purchasing. With the Premium Module Bundle, an unlimited number of remote voice tracking users can connect at the same time.
This page explains how to perform remote voice tracking into PlayIt Live via a web browser. You will need:
- The remote access URL of your station. This usually ends with
.playitradio.comand must start withhttps://. - Username
- Password
- A Chrome-based web browser such as Google Chrome, Microsoft Edge, or Vivaldi. These are available on any operating system.
Connecting to PlayIt Live
Visit the remote access URL in a web browser. Select Remote Voice Tracking.
The Remote Voice Tracking option on the PlayIt Live remote access landing page, shown as a large button with a microphone icon.
Enter your Username and Password and click Log In.
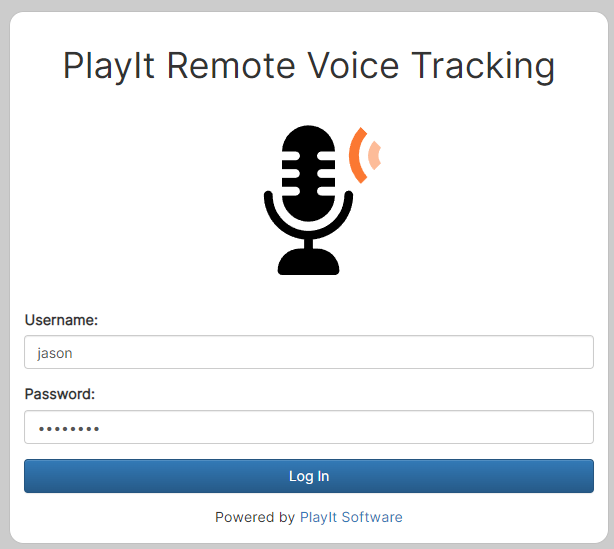
The PlayIt Remote Voice Tracking login page with Username and Password fields and a Log In button.
Selecting a voice tracking slot
Select the voice tracking slot you wish to voice track into.
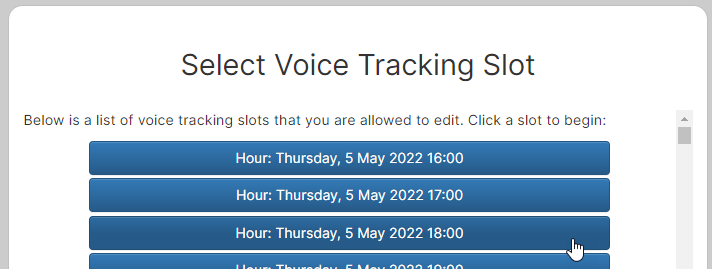
The Select Voice Tracking Slot page showing a list of available hour slots as blue buttons, each labeled with the date and time.
If there are no voice tracking slots available you will see the following message. Your station programmer must ensure there are voice tracking placeholder items in the hours you need to voice track.

A message stating 'No slots available' with instructions to contact your administrator and ensure voice track placeholders exist in the playout log.
The remote voice tracking interface
After selecting a slot, the playout log items in the hour will be downloaded and the browser will begin to download the start and end of the audio for each of the tracks in the hour. Once the download has finished, the Downloading indicator will disappear.
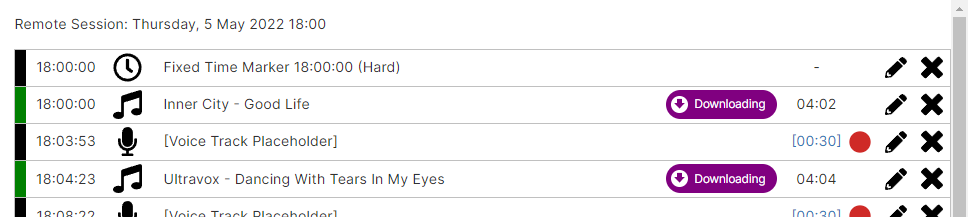
The remote voice tracking playout log showing tracks with their scheduled times, a purple 'Downloading' indicator next to tracks still being downloaded, and voice track placeholders with red record buttons.
On the right hand side, you will see the Session Controls section. Here you can switch to a different hour slot or end the remote session. It is important to end the remote session after you have finished so that other voice trackers can connect. The number of people who can connect at the same time depends on the Voice Tracking license of the station you are connecting to, so if you are unable to connect you may need to wait for another voice tracker to finish, or contact your station administrator. The Update queue shows the commands that are being sent to the server. If these are showing as "Processed" you know these are being accepted successfully by the remote voice tracking server.
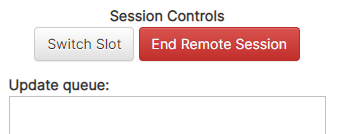
The Session Controls panel showing a 'Switch Slot' button, an 'End Remote Session' button, and the Update queue area.
Recording a voice track
Click the red circle Record icon next to a Voice Track Placeholder item to launch the segue editor.

A voice track placeholder row in the playout log with a red arrow pointing to the record button on the right side.
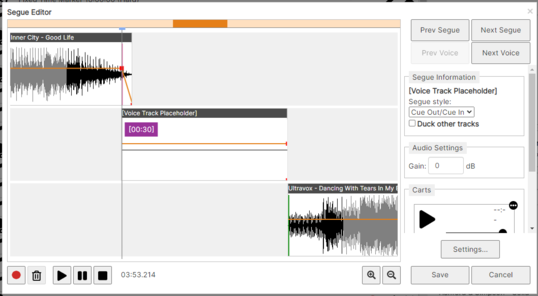
The web-based Segue Editor showing three audio waveforms stacked vertically (previous track, voice track placeholder, and next track), with playback controls at the bottom and segue settings on the right.
If this is the first time you have used voice tracking you will be prompted to allow the browser to access your microphone. You must click Allow.
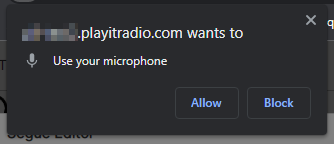
A browser permission dialog asking to use your microphone, with Allow and Block buttons.
Select the Playback device that will be used to play the audio and the Microphone device used to record. You should choose a microphone device that does not record the playback and you should wear headphones so the audio from the computer is not picked up by the microphone. Click Save Changes.
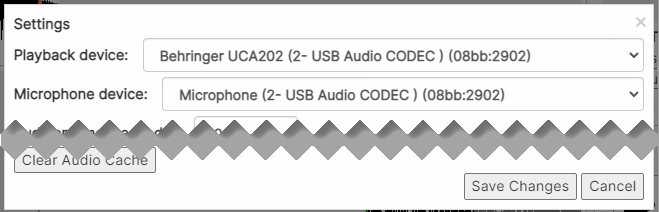
The Settings dialog showing dropdown menus for Playback device and Microphone device selection, with a Clear Audio Cache button and Save Changes/Cancel buttons.
To start recording your voice track, click the Record button, or press the R key.
The end of the previous track will start playing and your microphone will be recorded. Speak as the track is finishing. When you are ready to play the next track, click the Play Next button  , or press the R key again. Finish recording your voice track, then click the Stop button
  , or press the R key one more time.
Depending on the performance of your computer, the browser may need to finish encoding your recorded audio. Once encoding has finished, the interface will be ready to use again.
Editing a recorded voice track
After recording, the voice track waveform will appear in the segue editor between the previous and next tracks.
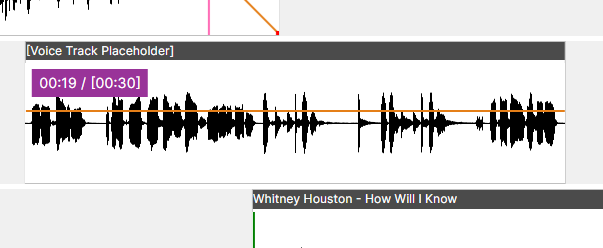
The Segue Editor showing a recorded voice track waveform between the previous and next tracks, with a purple duration label showing the recording length.
Click anywhere in the timeline to place the playback marker and click the Play button (or spacebar) to start playing the audio to review your recording. If you wish, you can use the Duck other tracks checkbox on the Segue Information section to bring down the audio of the previous and next track. The attenuation settings used here are the ones configured within PlayIt Live.
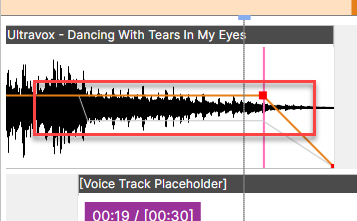
The Segue Editor showing the end of a track waveform with a volume fade-down envelope (orange line) and red square control points where the track overlaps with the voice track below.
You can also manually adjust the volume envelope by clicking on the orange line to create a point and then clicking again on that point to move it. Each point will be shown with a red square. To remove a point, drag the point up or down outside the waveform box.
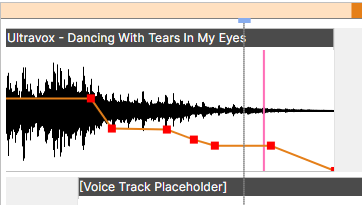
The volume envelope on a track waveform with multiple red square control points on the orange line, creating a custom fade shape.
You can change the overall volume of the track by editing the Gain section under Audio Settings. This is useful if your microphone is particularly quiet. In this case you would increase the gain value.
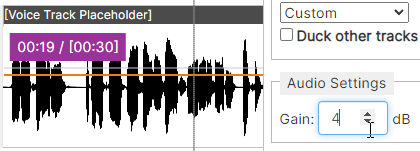
The Audio Settings section showing a Gain field set to 4 dB, next to a voice track waveform.
You can move your voice track recording relative to the previous or next item. To do so, click the title bar (where it says [Voice Track Placeholder]) and drag it to the desired location. If you move it from the left-hand side of the track, it will move relative to the previous track. If you move it from the right-hand side of the track, it will move relative to the next track. Moving a track is useful if you missed the point where you wanted to finish speaking and wanted to correct it without re-recording.
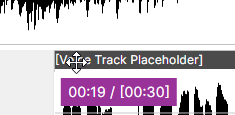
The title bar of a voice track being dragged, shown by the cursor grabbing the '[Voice Track Placeholder]' label.
Saving and finishing
Once you have finished recording and tweaking your voice track segue, click Next Voice to advance to the next voice track item to record. Once you do this, the voice track you just recorded along with the segue information will be sent to the voice tracking server ready to broadcast.
Once you have finished with the segue editor, click Save Changes at the bottom.
You will notice in the main interface that the Update queue is populated with processed commands.
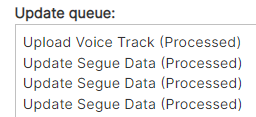
The Update queue section showing a list of processed commands including 'Upload Voice Track (Processed)' and several 'Update Segue Data (Processed)' entries.
It is worth regularly checking this to ensure the queue is being processed as expected.
Adding more voice tracks
To add more voice tracks to the hour, drag and drop the Add Voice Track button to where you want to add the voice track. If you click the button, the voice track will be added to the end of the hour.

The 'Add Voice Track' button with a microphone icon, being dragged into position in the playout log.
Track list
You can see a list of the tracks available on the remote voice tracking system that you can drag and drop into the hour. You can also filter by track group or use the search box.
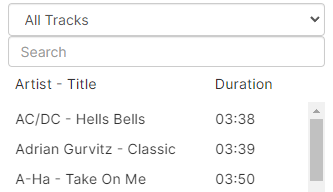
The Track List panel showing a dropdown filter set to 'All Tracks', a search box, and a list of available tracks with Artist, Title, and Duration columns.
Re-ordering the hour
Click and drag any item row to move it within the hour.
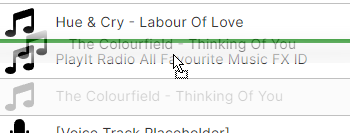
Items in the playout log being reordered by dragging. A track is shown being moved to a new position between other tracks.
Segue editor carts
In the segue editor, the Carts feature allows you to record audio from your computer straight into your voice track. This is useful if you want to include a bed (background music) or a station ID (jingle). Carts are located on the right-hand side of the segue editor.
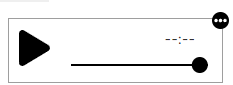
An empty cart slot with a play button and a volume slider.
To load a track, you can either drag and drop a track from your file system into the player, or you can click the menu icon (three dots) and select Load File...
Click the Play button to play the cart while recording a voice track and the cart will be included directly in the recording. Drag the slider on the cart to adjust the volume of the cart if it is too loud to talk over.
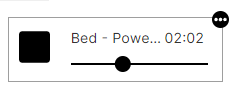
A cart slot loaded with a bed track, showing the track name, duration (02:02), and a volume slider.
Audition time
The audition time is the amount of time the segue editor will play of the end of the previous track before you need to speak. This can be changed under the Settings button on the Segue Editor. If you increase the Audition Time, you will need to click Clear Audio Cache and refresh the browser to download more audio, otherwise you will hear silence if not enough audio has been downloaded.
Finishing up
Remember to end your remote session by clicking the End Remote Session button so others can connect, if necessary. If there are any pending items in the update queue, it will wait for these to finish before logging you out. Do not close your browser until these have finished, otherwise your hour may be incomplete.
Troubleshooting
If you are having trouble connecting to your station's remote access URL, try visiting https://playitradio.com and pasting the address into the box and clicking Connect.
If you see the following error message, please contact your station administrator. The server has not been correctly configured for browser-based remote voice tracking.

An error message on a pink background stating 'A secure (HTTPS) connection is required to use Remote Voice Tracking in the browser. Please contact your administrator to select Use HTTPS under Advanced options when starting the server.'