Exporting Logged Tracks
The Export to CSV... button downloads the tracks for the date range you are viewing as a CSV (comma separated values) file, which opens in Microsoft Excel, Google Sheets or any spreadsheet application.
Exporting to CSV
A typical job is preparing a monthly royalty return. To export a full calendar month:
- On the Logged Tracks page, set the date range to cover the month. Click Custom, set the start date and time to the first day of the month at
00:00and the end date and time to the first day of the following month at00:00, then click Go. (For shorter periods you can use the Past 7 days or Past 30 days buttons instead.) - Click Export to CSV.... A dialog appears so you can choose which fields to include in the file.
- Tick the fields you need, then click Export. The CSV file downloads to your browser, named after the date range, for example
logged-tracks-2026-05-01-000000-to-2026-06-01-000000.csv.
The export always covers the date range currently selected on the page, so set the range before you export.
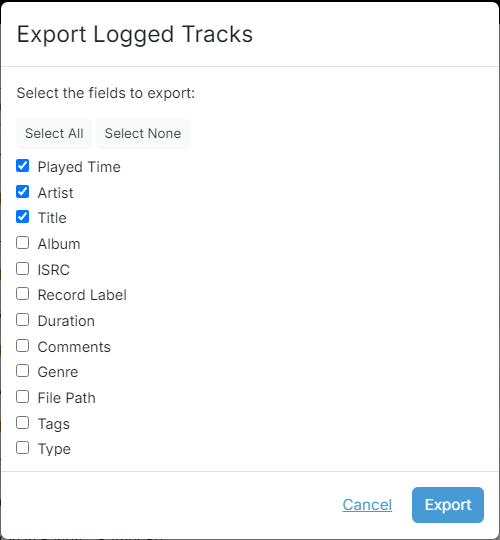
Select All / Select None

Tick or clear every field at once with Select All and Select None.
Field checklist
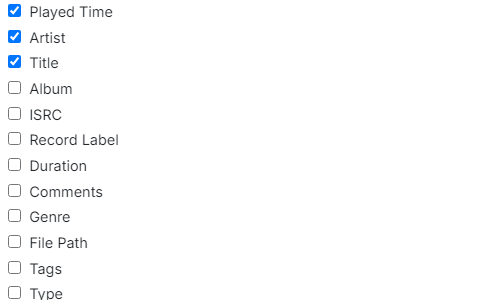
The available fields, each with a checkbox: Played Time, Artist, Title, Album, ISRC, Record Label, Duration, Comments, Genre, File Path, Tags and Type. Played Time, Artist and Title are ticked by default; the rest are unticked.
Export button

Export downloads the file once at least one field is ticked; Cancel closes the dialog without exporting.
Choosing which fields to export
The dialog lists every field that can be written to the CSV. By default Played Time, Artist and Title are ticked, which is enough for a basic proof-of-play return. PlayIt Manager remembers your selection in your browser, so the next time you export it offers the same set of fields.
Use Select All to tick every field or Select None to clear them, then tick the individual fields you want. The available fields are:
- Played Time - the date and time the track went to air.
- Artist and Title - the performer and track name.
- Album - the album the track is from.
- ISRC - the International Standard Recording Code, often required by royalty bodies to identify a specific recording.
- Record Label - the label that released the recording.
- Duration - the length of the track.
- Comments - any notes stored against the track.
- Genre - the track's genre.
- File Path - the location of the audio file.
- Tags - any tags applied to the track.
- Type - the kind of item, for example a song or a jingle.
For a royalty submission you would typically add fields such as ISRC, Record Label, Album and Duration alongside the defaults, because these are the details collection societies ask for.
The Export button is enabled as long as at least one field is ticked. Click it to download the file; the dialog closes and the CSV is saved by your browser. Each row in the file is one play, in the order it went to air, with one column per field you selected.