Your First Voice Tracked Show
When you first start PlayIt VoiceTrack you are presented with an empty main window, ready for you to build your first show.
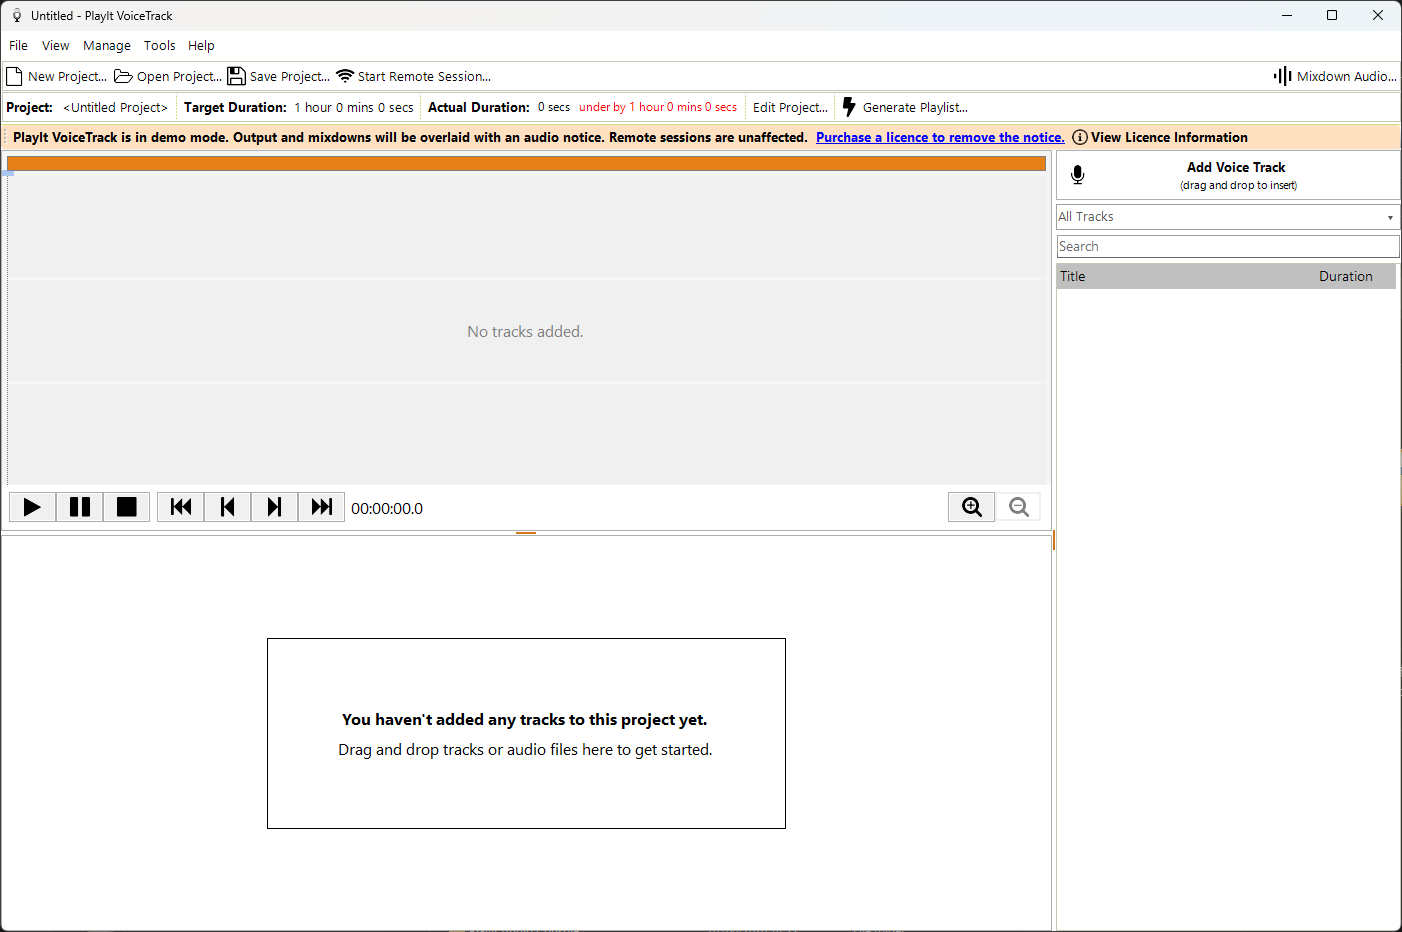
PlayIt VoiceTrack on first launch: no project loaded, no tracks in the library, and the demo-mode banner visible.
PlayIt VoiceTrack requires the Voice Tracking module from PlayIt Software. If you have not purchased the module, the software runs in demo mode. Any audio output or mixdown is periodically overlaid with an audio notice and a banner is shown at the top of the main window. Click the link in the banner to purchase a licence and remove the notice.
Adding music
To get started with your first show you need to add some music. Drag and drop audio files from your computer, for example your Music folder. PlayIt VoiceTrack does not copy the files, it links to them where they are, so leave them in place until you have finished the show and mixed it down:
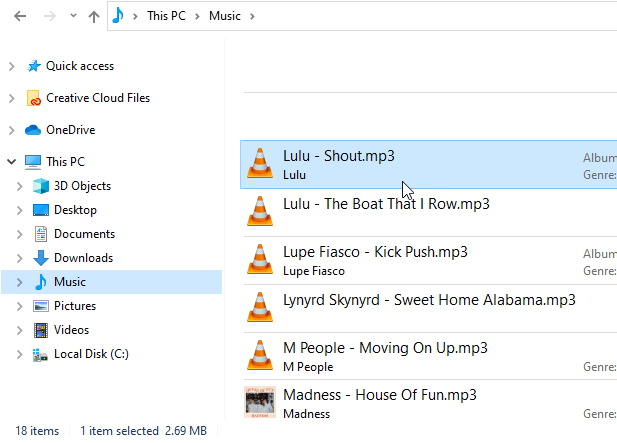
Drag and drop audio files from your computer into PlayIt VoiceTrack.
You can also manage all your music tracks from within PlayIt VoiceTrack from Manage Tracks. If you have already added tracks to PlayIt Live, select PlayIt Live as the data source to use its library.
Drop the files or tracks into the Playlist area. The drop area highlights in green and the cursor shows a copy indicator while you drag over it:
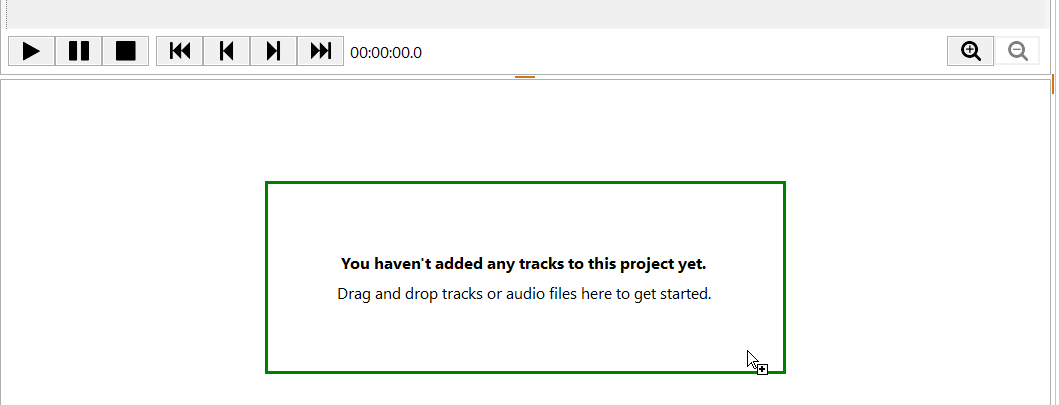
The Playlist drop area highlights green when files are dragged over it.
Continue to add tracks until you have all the music you need. As you add tracks, the Multi Track View at the top fills with a waveform representation of each track. The start and end of each track is analysed for silence to provide a default segue. Use the mouse wheel or the zoom buttons to zoom in, and drag the orange bar to pan through the project.
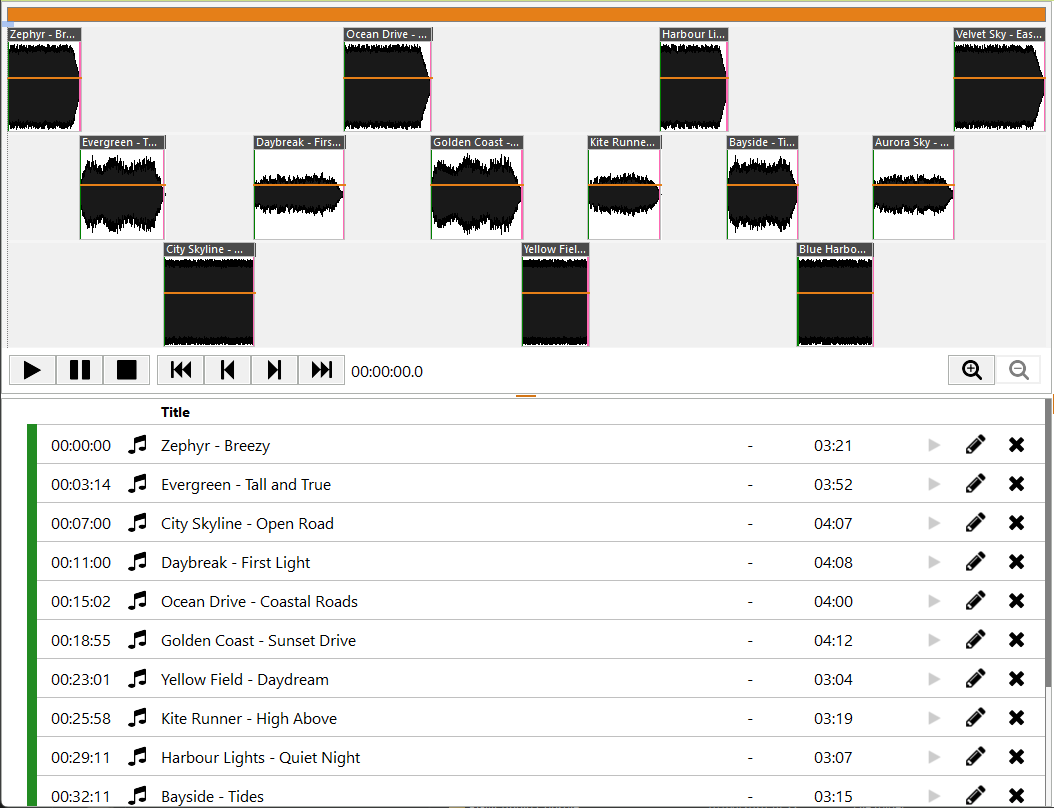
The Multi Track View visualises each track and how it segues into the next, with the playlist below listing every track.
When you zoom in, the orange bar at the top of the Multi Track View becomes a draggable pan handle. Drag it left and right to scroll through the project.
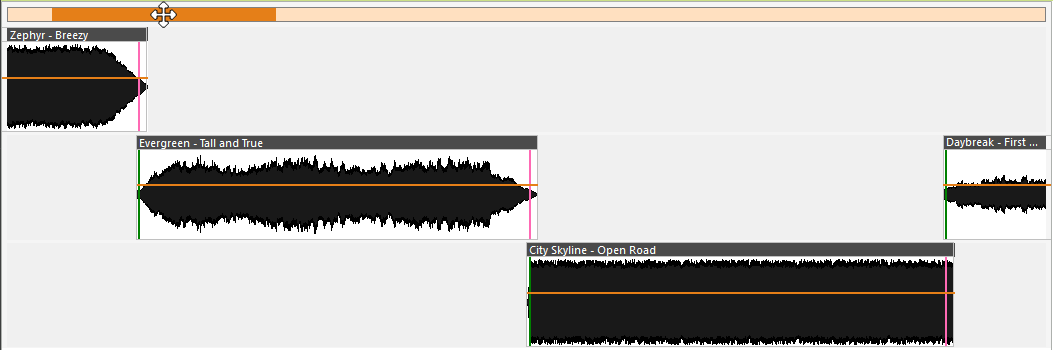
Drag the orange pan handle at the top of the Multi Track View to scroll through a zoomed-in project.
Adding voice tracks
Now that you have songs, it is time to record some voiceover links between them. Click and hold the Add Voice Track button on the right side of the main window.
Click and hold the Add Voice Track button to begin the drag-to-insert gesture.
Keep the mouse button held down and drag the pointer into the Playlist. A green insertion line appears between the two tracks where the voice track will be inserted. Release the mouse button to drop it in.

The green insertion line shows where the new voice track will land when you release the mouse.
Continue inserting voice tracks between the songs you want to talk between. By default each voice track is inserted with a placeholder duration of one minute, shown in square brackets, for example [01:00]. Click the placeholder duration to change it to whatever time you want to allow.
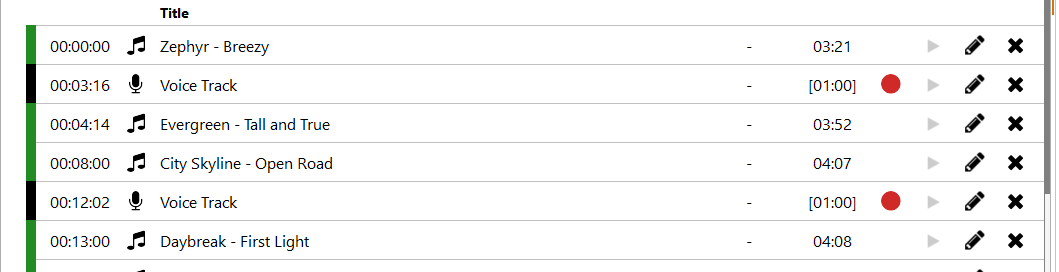
The same playlist with blank voice track placeholders inserted between songs, each showing a one-minute placeholder duration ready to record.
To set up recording for a voice track, click the red record button on the voice track row in the playlist. This opens the Segue Editor focused on that voice track.

Click the red record button on a voice track row to open the Segue Editor for that voice track.
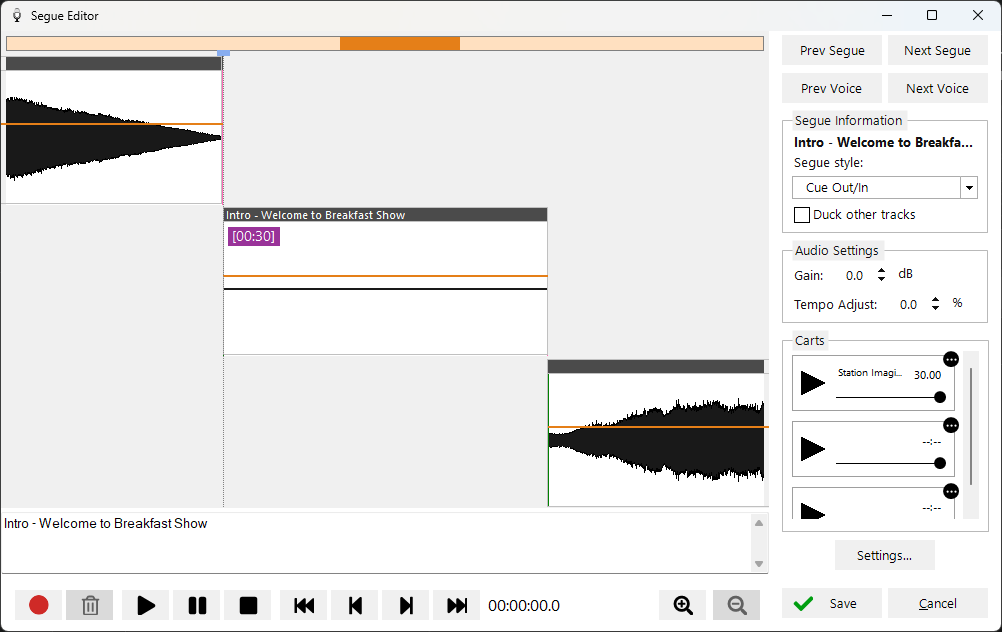
The Segue Editor opens on the voice track with an empty waveform, ready to record.
Selecting your microphone device
The first time you use the segue editor for recording, you should choose the audio device that represents your microphone. Click the Settings button in the segue editor and review the audio device selections.

Open the Settings window from the segue editor to assign your microphone.
The Settings window opens on the General tab. Under Audio Device Assignments, set the Microphone Recording device to the input that represents your microphone.

Set the Microphone Recording device to the input that represents your microphone.
The selected microphone device should be one that records only your microphone and does not include any music playback. Click OK to confirm any changes.
Recording the voice track
Click the Record button to start recording. Your voice track begins recording and the audio from the end of the preceding track begins playing. Speak into your microphone to record over it.
Click the button again to play the next track in. Click the button a final time to finish recording and stop playback. The button icon changes as you cycle through the states:  Record,
  Play next, and
  Stop.
Stop.
Tip: Press R on the keyboard to cycle through Record → Play next → Stop actions for fast operation.
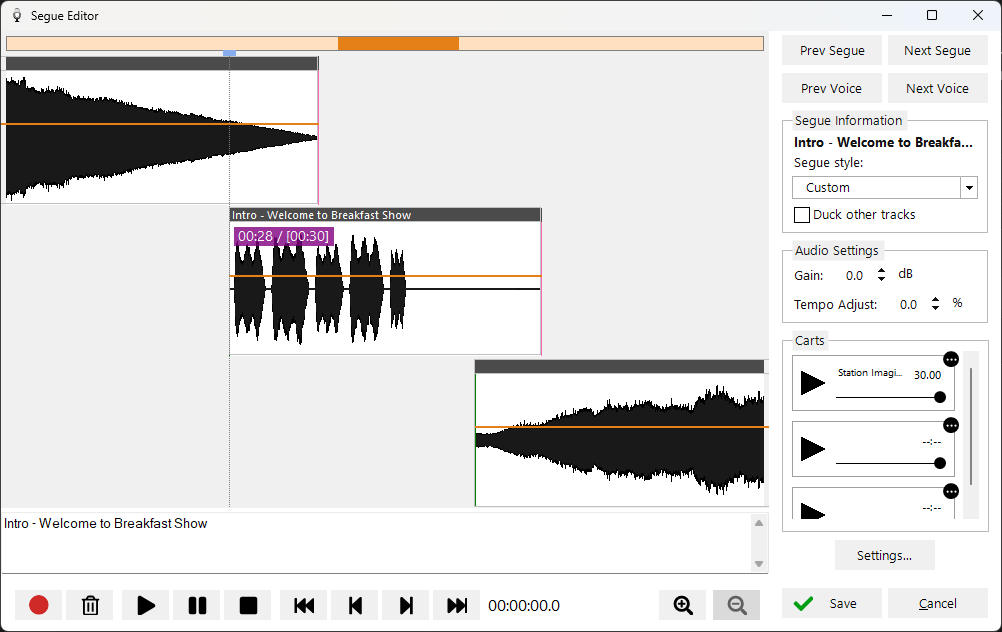
After recording, the waveform of the voice track is visible and ready for trimming and adjustments.
Trimming tracks
As the voice track is recorded you will see the waveform being produced. Once stopped, you can trim the start and end of the recording by dragging the start and end of the waveform container.
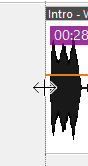
Drag the start (left edge) of the waveform container to trim the beginning of the recording.
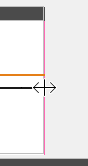
Drag the end (right edge) of the waveform container to trim the trailing silence off the recording.
Adjusting voice track volume
If the voice track you have recorded is too quiet, raise its level using the Gain setting. Click the voice track waveform to select it, then increase the Gain value in the Audio Settings panel by a few dB. The waveform redraws to show the higher level.
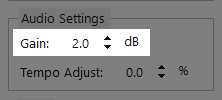
Click the voice track to select it, then increase the Gain by a few dB to raise the level of the recording.
Changing track segue
You can move any track by dragging the top bar of the waveform container. If you move the waveform from the start (i.e. left end) it will be moved in relation to the previous track. If you move the waveform from the end (i.e. right end) it will be moved in relation to the next track. This ensures that track segues remain anchored to their respective tracks unless you explicitly want to change the segue.
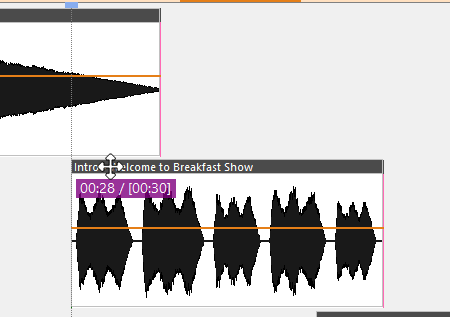
Drag the top bar of the waveform to change how the track segues with the previous or next track.
Fade tracks and changing volume
Once the recording has been completed, you will need to modify the volume of the tracks if you are talking over them. You can do this by clicking on the orange line which represents the volume envelope. This will create an envelope point which you can move to a specific volume at a specific time. Create multiple points to reduce the volume and fade the volume:
- Select the first point
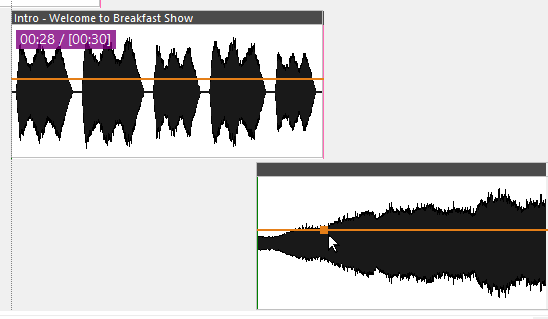
Click the orange volume envelope line to create and select the first point.
- Click the line before the point and drag the volume down
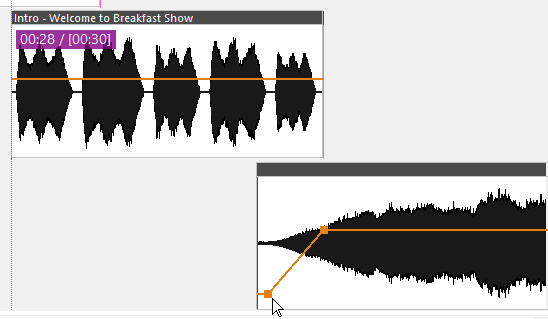
Click the line before the first point and drag down to create a second point and lower the music ahead of it.
This will update the waveform so you can visually see the volume is lower before the fade up after the vocal has finished.
Listening again
Use the playback controls to listen to the output:

Play, pause, skip and seek through your project from the main window.
Recording a bed (background music) with your voice track recording
When recording a voice track, you will see a Carts section on the right hand side. This can be loaded with an audio file, such as a bed for playing under your voice. You can load the audio file by dragging and dropping it from the file system, or you can use the  (more options) menu in a cart slot and choose Load Track… to load a track from the music database. Click the Play button to start playing the cart while recording your voice track. The cart audio will be mixed in with your voice recording. Please ensure you have loaded the cart before starting the voice track recording.
Recording next voice track
To record the next voice link, click the Next Voice button:
Use the Next Voice button to advance through the unrecorded voice tracks.
Repeat the process to record all the voice links.
Click the Save button to save changes and exit the segue editor.

Click Save to commit your segue changes and return to the main window.
Reviewing
The Multi Track View at the top will show all the tracks and voice tracks in the project.
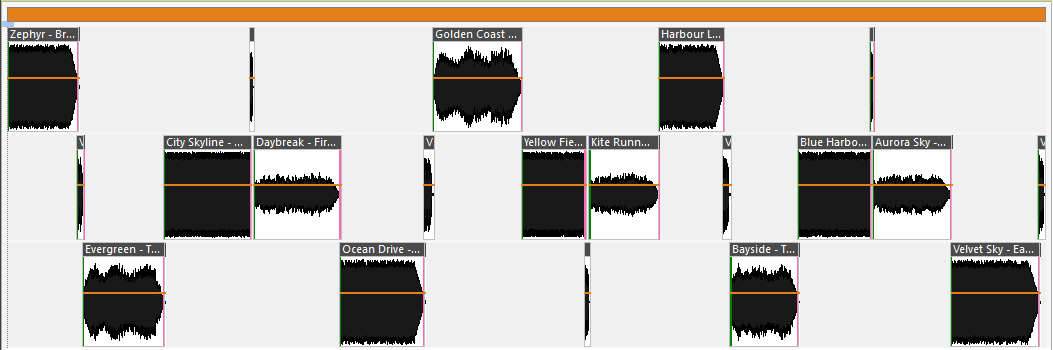
Review the whole project in the Multi Track View.
You can double click on any track in the playlist or multi track view to edit the segue or re-record a voice track.
Saving
You should save your project regularly by clicking the Save Project... button or pressing Ctrl+S.
Click the Save Project button on the command bar to save your project.
Project information
The bar at the top displays the information about the project. You can edit the project name and also change the target duration if you need to record to a specific time. The red text shows the under/over time of the target duration.

Project name, target duration and over/under indicator.
Mixing down to file
Once you are happy with the sound of your show, you can mix the audio down to a single audio file. Click the Mixdown Audio... button on the command bar.
Click the Mixdown Audio button on the command bar to open the Mixdown Audio dialog.
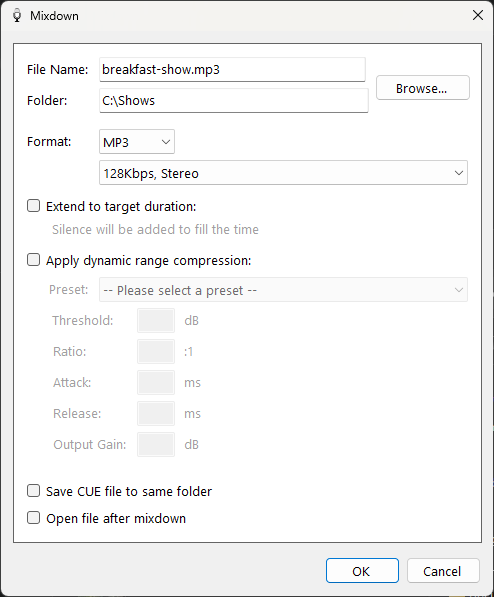
The Mixdown Audio dialog combines the whole project into a single audio file.
Choose a file to mix the project down to. Check the Open file after mixdown checkbox to open the audio file in your default audio player. Click OK to begin mixing down the audio.

Tick this to open the mixed-down audio file automatically.
Once the mixdown process has finished you will have completed your first voice-tracked show.
For more about the mixdown options, including format choice, dynamic range compression and cue files, see Mixdown Audio.
Remember: demo mode
If you have not purchased the PlayIt Software Voice Tracking module required for PlayIt VoiceTrack, the mixed-down audio is periodically overlaid with an audio notice. To remove the notice, purchase a licence at https://www.playitsoftware.com/Products/VoiceTrack.