Segue Editor Window
The segue editor is used to change how tracks are positioned in the project. The segue editor only allows editing of positions of three tracks at a time. Other tracks in the project will not be affected by changes made relative to these tracks. It is possible to move tracks, trim the start and end, and fade tracks in and out or adjust the volume.
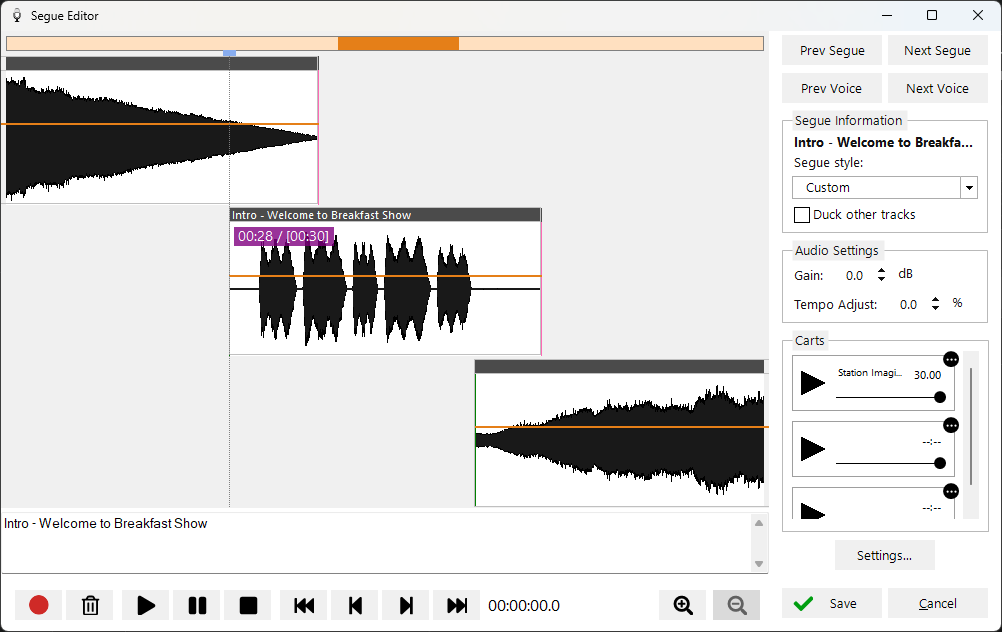
The Segue Editor window showing the waveform, recording controls, segue information, audio settings and carts.
Waveform
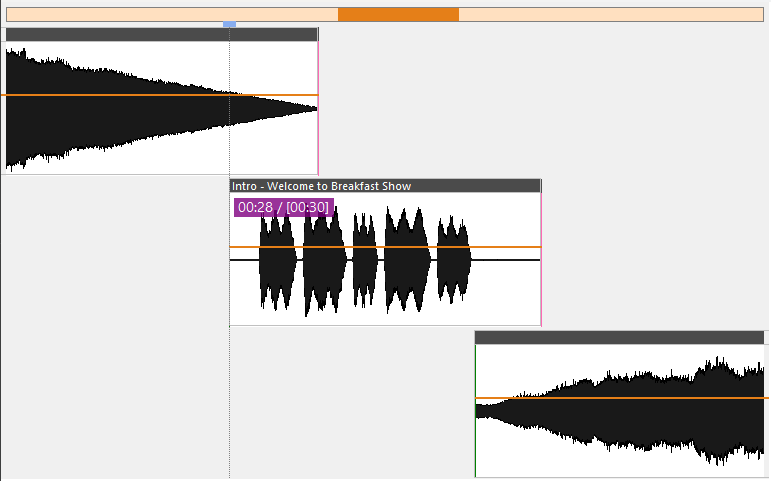
The waveform represents the audio signal. It shows the changes in amplitude over the duration of the track. A thick vertical line shown on the track represents a cue point marker. The Cue In point is shown in green, the Cue Out point is shown in pink and the Intro point is shown in cyan. Cue Points can be changed via Manage > Tracks and editing a track.
Waveform top bar

Drag and drop the top bar of the track to align it with the previous or next track.
Fade envelope
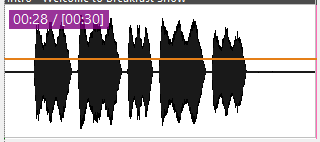
Click the orange line on the waveform to edit the fade envelope. Clicking on the line will create an envelope point. Adding multiple envelope points will allow you to create a shape to adjust the fade volume. To remove a point, drag the point outside the waveform box. A grey line shows the envelope that has been automatically applied because the Duck other tracks option has been checked on another parallel track. The appearance of the waveform changes to show the effective volume with the envelope applied.
Voice track description (Voice track only)

The description entered for the voice track is shown in the text box below the waveforms, so you can see what the link is about while you record it. This is only shown when editing the segue of a voice track that has a description. The description can be set when editing the placeholder duration of the voice track from the playlist.
Recording and playback controls

-
 Record button: start recording from your microphone. The microphone device can be set up from the Settings window. The previous track will begin playing from the end of the track. The amount of audio that you hear at the end of the track is determined from the Audition Time setting. This button is disabled if you are not editing the segue for a voice track.
-
When recording a voice track the record button will change to the Play next button. When this button is clicked the next track will begin playing.
-
When the next track is playing the button will change to a Stop button. When the stop button is pressed the recording and playback will stop.
-
Tip: You can use the
Rkeyboard key to begin recording, play next and stop.
-
-
 Delete recording button: deletes the recording so it can be discarded. This button is disabled if you are not editing the segue for a voice track.
 -
 Play button: start playback from the current playback position.
 -
 Pause button: pause playback at the current playback position.
 -
 Stop button: stop playback and reset to the previously selected position marker.
 -
 Move to start: move the position marker to the start of the view.
 -
 Move back a track: move the position marker to the previous track from the current position.
 -
 Move forward a track: move the position marker to the next track from the current position.
 -
 Move to end: move the position marker to the end of the view.
 -
Current playback position: indicates how long has elapsed in the project.
Zoom controls

As an alternative to using the mouse wheel to zoom the multi-track view, you can use the zoom buttons to zoom in and out.
Previous / Next Segue buttons

Quickly move to the previous or next tracks in the project. These can be used to iterate through each of the tracks in the project efficiently.
Previous / Next Voice buttons

As above, but you will advance to only voice track segues. These can be used to iterate through each voice track and quickly record voice tracks.
Segue Information
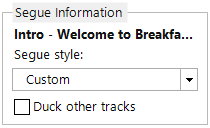
The segue information shows how the selected track will sequence from the previous track into the next track. To see the segue information for the track simply click on the waveform.
The segue style defines specific ways that the track will sequence:
- By default, the segue style is Cue Out/In, this means the cue in of the track will line up with the cue out of the previous track.
- For Sweep Start, the sweeping track will start at the same time as the next track, provided it is short enough to play before the intro point of the next track. If the sweeping track is longer than the intro of the next track, the sweeping track will start before the next track and play up to the end of the intro.
- For Sweep Intro, the sweeping track will finish playing immediately before the end of the intro point of the next track.
- For Custom, you can manually set up how the tracks sequence with each other.
When you move a track by dragging the waveform the segue style will automatically change to Custom.
Note that Sweep Start and Sweep Intro require Intro points to be set on tracks, otherwise Cue Out/In will be used.
The Duck other tracks checkbox can be used to reduce the volume of the previous and next track when this track is played. You can configure the ducking (volume and speed) via the Settings button. When ducking is active you can see the effective track envelope changing to show the volume change.
Audio Settings
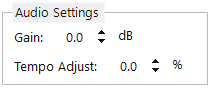
If the audio is too quiet, apply gain to increase the volume. This is particularly useful if your microphone recording is very quiet. You can set the default Gain for voice tracks in Settings.
You can also adjust the tempo of the track here if you need to fit more tracks into your project duration.
Carts (Voice track only)
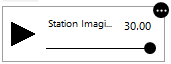
Carts can be used to record other audio into your voice track, for example a bed (background music) or a station ident. You can drag and drop audio from the file system into a cart, or use the load icon to load a track from the database. Click the Play button to play the audio while recording your voice track. Use the volume slider to adjust the volume of the audio if you want to talk over it. Please ensure that you have loaded the cart before recording the voice track.
Settings button

The settings button allows quick access to PlayIt VoiceTrack settings from the segue editor. Here you can edit the audition time or the audio devices for playback or recording.
Save button

Save your segue changes and close the segue editor window.
Cancel button

Discard your segue changes and close the segue editor window.