×
Menu
Index

Edit Track Window

Edit Track Window
 
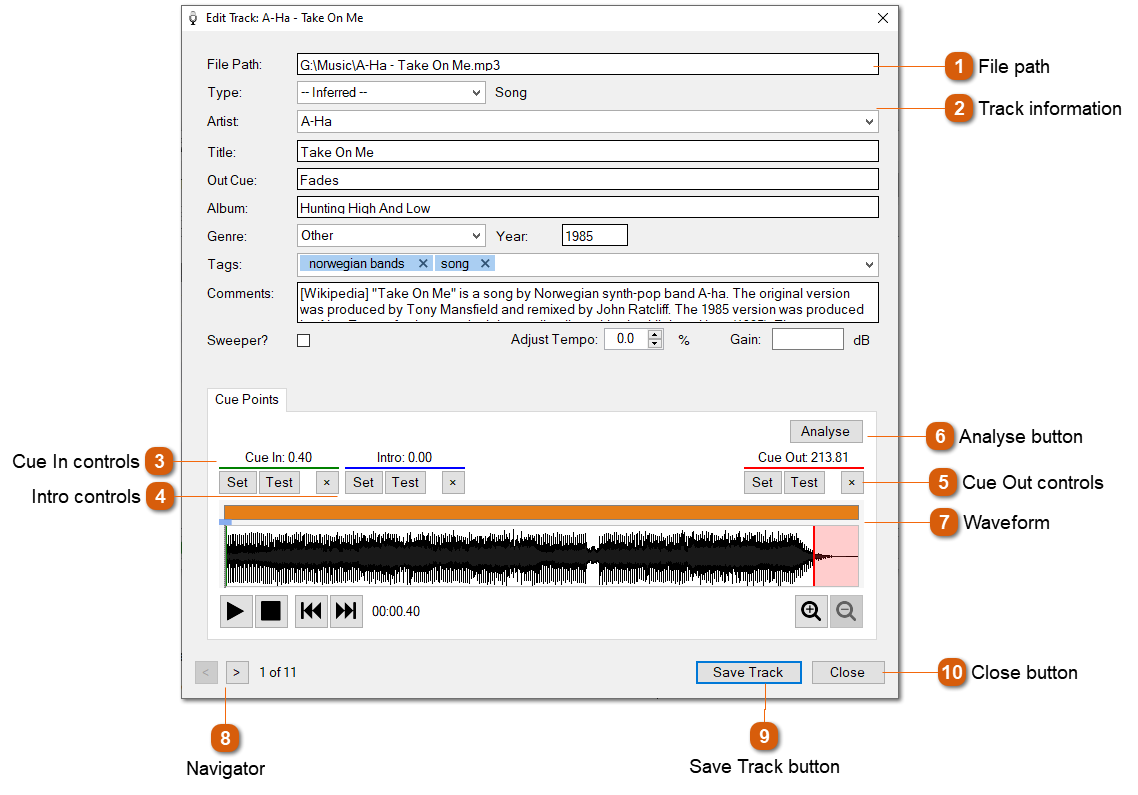
The track editor is used to change the information stored on each track imported into PlayIt VoiceTrack.
 
1

File path

1. File path
 
This displays the location of the audio file on the file system. This cannot be changed once the track has been added.
2

Track information

2. Track information
 
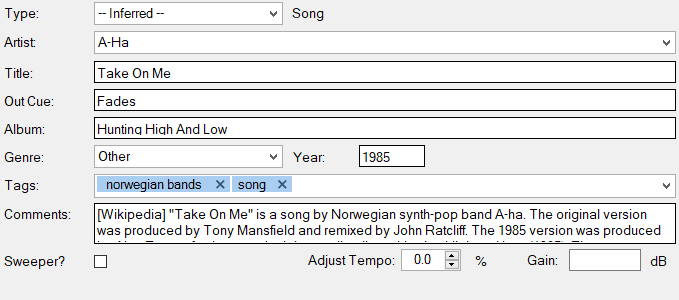
This area allows you to change the information stored on the track. Artist, Genre and Tags information will attempt to auto complete if there is similar information on other tracks in order to help keep data consistent.
3

Cue In controls

3. Cue In controls
 
The Cue In point is the position in seconds where the track should be started by a player. Use the Set button while listening to the track to set the point to the current position. Use the Test button to listen to the track from the set position.
4

Intro controls

4. Intro controls
 
The Intro point is the position in seconds where the vocals start on the track. This is counted down by the players on the main window. Use the Set button while listening to the track to set the point to the current position. Use the Test button to listen to the track from the set position.
5

Cue Out controls

5. Cue Out controls
 
The Cue Out point is the position in seconds where the track is considered to have finished. Use the Set button while listening to the track to set the point to the current position. Use the Test button to listen to the track from the set position.
6

Analyse button

6. Analyse button
 
Click the Analyse button to automatically detect the Cue In and Cue Out points based on the silence at the start and end of the track. The sensitivity of the analysis can be configured from Settings.
7

Waveform

7. Waveform
 
The waveform shows the volume of the audio track over time. Overlaid on the waveform are the Cue In (grey), Intro (blue) and Cue Out (pink) points that are set above. Double-click on the waveform to start playing at a different position in the track. Use the Play and Stop button to control playback and the Back and Forward buttons to jump to the start or end of the track. Use the Zoom buttons to zoom in and out of the waveform if you need to set a more precise cue point. You can also zoom in and out with the mouse wheel while hovering over the waveform.
8

Navigator

8. Navigator
 
Use the navigator to easily move to the previous and next track displayed in the list. Note, before moving between tracks, any changes to the current track will be saved.
9

Save Track button

9. Save Track button
 
Click the Save Track to confirm changes to the current track.
10

Close button

10. Close button
 
Click the Close button to discard changes to the current track.