
Edit QuickCart Window
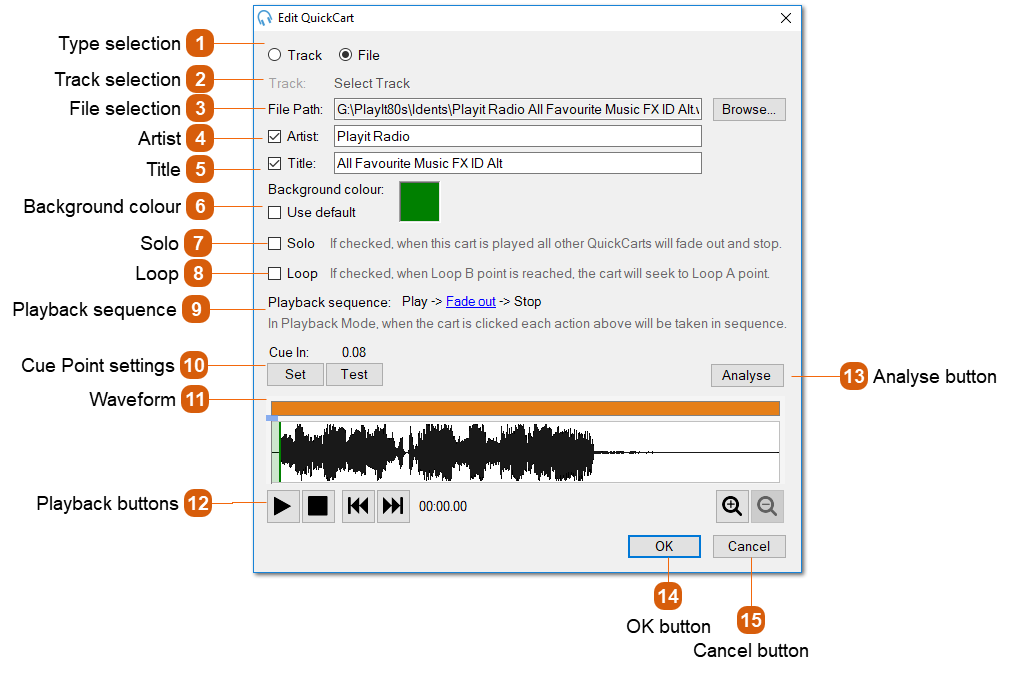


Playback buttonsUse the Play and Stop buttons to listen to the track. The audio device (sound card) used to play back the audio can be configured in Settings. Use the Back and Forward buttons to the start or end of the track. Use the Zoom buttons to zoom in and out of the waveform to set a more precise cue point. You can also use the mouse wheel to zoom in and out of the waveform.
|