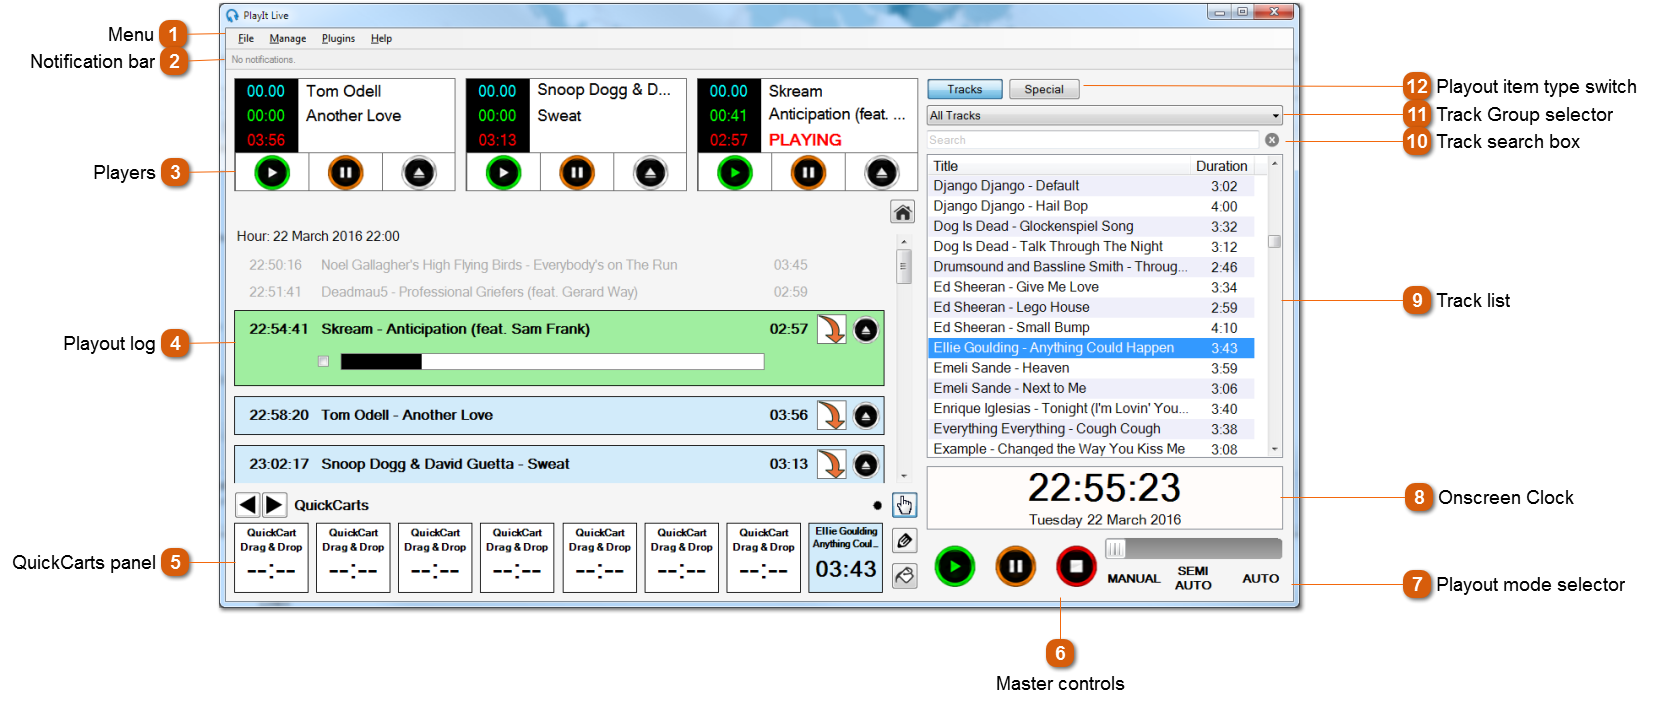
×
Menu
Index

Live-Assist Mode

 
Live-Assist Mode
1

Menu

1. Menu
The top menu bar provides options to set up PlayIt Live.
 
The File menu contains:
Connect to PlayIt Manager: Set up PlayIt Live to connect to a PlayIt Manager server. See Synchronising Data.
Settings: Configure the user interface and audio devices.
Exit: Close PlayIt Live. A confirmation box will be shown.
 
The Manage menu contains:
Tracks: Manage track audio items.
Track Groups: Manage track groups (like smart folders) containing tracks.
Logged Tracks: View recently played tracks for reporting purposes.
Playout Policies: Manage rules to create a unified sound.
Playout Pattern: Manage the pattern of track groups that will be used for playout.
Clocks: Manage hour templates used to generate the playout log.
Clock Schedule: Manage clock hourly assignments used to generate the playout log.
Playout Log: Manage the overall, day-to-day output of your station.
 
The Plugins menu contains:
Plugin Manager: View the list of currently installed plugins and create new ones.
[Number of running plugins]
 
The Help menu contains:
Online Documentation: A link to the documentation page on the PlayIt Software website.
Donate: An opportunity to give back to PlayIt Software.
About PlayIt Live: View that latest version and check for updates.
2

Notification bar

2. Notification bar
The notification bar is used to provide important information to the user without disrupting their current activity. Warnings will be displayed here if there are any set up issues or a track fails to load.
3

Players

3. Players
 
The players at the top load tracks from the playout log in the expected order. Players can be assigned to individual sound cards so they can used with different channels on a professional mixer.
 
Each player has three timers and three buttons.
 
The blue timer indicates the intro remaining of the loaded track.
The green timer indicates the elapsed time of the loaded track.
The red timer indicates the remaining time of the loaded track.
 
The green play button starts playing the track.
The orange pause button pauses the track. Pressing this button again resumes playout.
The silver eject button fades out and stops the player.
 
4

Playout log

4. Playout log
 
The playout log shows the upcoming items that are scheduled to take place. Typically these are tracks to be played, but can be break notes or fixed time markers. Each playout log item features (from left to right) the play time, title, duration, segue toggle switch and eject button.
 
To add a track to the playout log, drag and drop a track from the Track List.
 
Items in the past are shown in grey text.
 
Fixed time marker items are shown in purple.
 
Break note items are shown in yellow.
 
When an item is playing the duration will display the remaining time for that item.
 
The segue toggle switch (orange arrow) is shown for track and break note items. When this is active (orange) the next item in the log will immediately follow this item. When this is inactive (grey) the next item will not start automatically and will require the user to start it manually.
 
Click the Eject button to remove the playout item from the log.
 
The log contains headings for the hour for which the item is scheduled. Use this as a guide to schedule tracks in the future.
 
 
5

QuickCarts panel

5. QuickCarts panel
 
6

Master controls

6. Master controls
 
The master controls control the overall player status. Click the Play button to start the next item in the playout log. Click the Pause button to pause all playing players. Click the Stop button to fade out and stop all playing players. As you would expect, any playing playout items will automatically be set to not advance to the next track.
7

Playout mode selector

7. Playout mode selector
 
It is possible to select the playout mode in Live-Assist mode. There are three modes: manual, semi-auto and auto.
 
Manual:
Users must manually select tracks or items for the playout log unless they have already been scheduled via Manage > Playout Log.
 
Semi-Auto:
PlayIt Live will automatically schedule the next hour's worth of content if it has not already been scheduled.
 
Auto:
The same as Semi-Auto above, but controls are locked. This means it is not possible to modify the playout log via the main interface while in Auto mode.
8

Onscreen Clock

8. Onscreen Clock
The onscreen clock shows the current date and time.
9

Track list

9. Track list
 
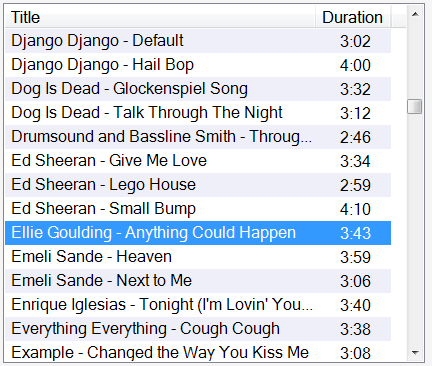
The track list shows a list of tracks added to the system. Tracks in this list can be managed from Manage > Tracks. The list shows each track in the form Artist - Title with the duration in the second column. Click either column to sort by that column, click the column again to reverse the sort order. The list can be filtered using the search box or the Track Group selector above.
10

Track search box

10. Track search box
Use the search box to filter the track list. When text is entered into the search box the track list will show only track titles (Artist - Title) that contain the entered text. To clear the search click the . It is not possible to filter by duration.
11

Track Group selector

11. Track Group selector
 
To filter the track list by track group, select the track group from the dropdown. The track list will show only tracks that exist in the selected track group. Track groups can be managed from Manage > Track Groups.
12

Playout item type switch

12. Playout item type switch
 
Tracks are a fundamental playout log item type. To select a different playout item type, select Special.