# PlayIt Recorder - User Guide
**Version 2.03**
## Contents
**Installation**
- [Installation](#installation-installation)
- [Upgrading Versions](#installation-upgrading-versions)
- [Uninstallation](#installation-uninstallation)
**Getting Started**
- [Getting Started](#getting-started-overview)
- [Logging In](#getting-started-logging-in)
- [Enter Registration Details](#getting-started-enter-registration-details)
- [Activating Offline](#getting-started-activating-offline)
- [Quick Start](#getting-started-quick-start)
**Main Window**
- [Main Window](#main-window)
**Settings**
- [Settings](#settings)
**Programmes**
- [Programmes](#programmes-overview)
- [Edit Programme](#programmes-edit-programme)
**Schedule**
- [Schedule](#schedule-overview)
- [Edit Schedule Item](#schedule-edit-schedule-item)
- [Select Programme Window](#schedule-select-programme)
**About**
- [About PlayIt Recorder](#about)
---
# Installation
To install PlayIt Recorder, download the latest version from the [PlayIt Software website](https://www.playitsoftware.com/Products/Recorder).
## Installation Steps
### Download the installer
Visit [playitsoftware.com/Products/Recorder](https://www.playitsoftware.com/Products/Recorder) and click the **Download** button to download the latest version.


### Run the installer
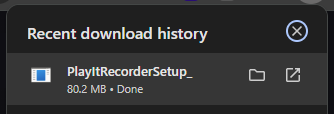
Once the download is complete, run the downloaded **.exe** file.
### Accept the licence agreement
You will first be presented with the software licence agreement. Once you have read and agree to these terms, click **I Agree**.
### Choose components
Choose the components to install. Here you can select whether to install Start Menu and Desktop shortcuts. Click **Next** to continue.
### Choose install location
Choose the location to install the software. By default, this is in **Program Files**, but can be changed to your preference. Click **Install** to begin installation.
### Launch PlayIt Recorder
Tick **Start PlayIt Recorder** and click **Finish** to launch PlayIt Recorder. By default you can access PlayIt Recorder from the Start Menu or Desktop.
## Minimum Requirements
PlayIt Recorder requires the .NET Framework 4.7.1 which is automatically downloaded and installed via the installer. To install this framework requires at least Windows 10 or Windows 11; or Windows Server 2016 or later, with all Windows updates applied.
---
# Upgrading Versions
New versions of PlayIt Recorder are regularly available from [playitsoftware.com/Products/Recorder](https://www.playitsoftware.com/Products/Recorder). It is important to back up your data before you install any new versions. Data and logs for PlayIt Recorder are stored in the Windows 'ProgramData' folder.
By default, this is located at:
> **C:\\ProgramData\\PlayIt Recorder**
To back up your data, simply copy this folder to an alternative location, such as an external hard drive.
When a new version is installed, or an old version is uninstalled, the data in the location above will not be removed.
---
# Uninstallation
When installed, PlayIt Recorder will include an **Uninstall** shortcut in the Start Menu.
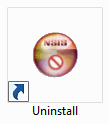
If you chose not to add Start Menu shortcuts, the uninstaller can be found at (by default):
> **C:\\Program Files (x86)\\PlayIt Recorder\\uninstall.exe** or **C:\\Program Files\\PlayIt Recorder\\uninstall.exe**
Double-click the icon to start the uninstall process. Click **Uninstall** to remove PlayIt Recorder.
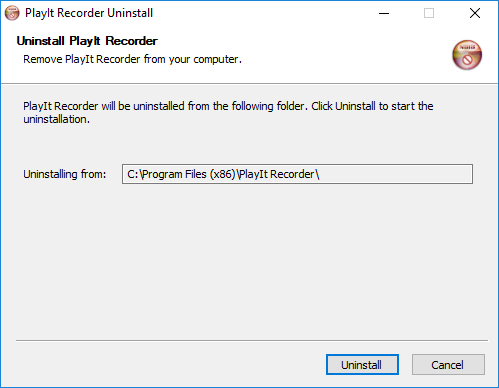
Note that you can choose whether PlayIt Recorder data is removed when you uninstall.
---
# Getting Started
Getting started with PlayIt Recorder.
In order to begin using PlayIt Recorder, you need to log into your PlayIt Software account. Click the **Log In** button to begin [logging in](/PlayItRecorder/203/getting-started/logging-in). If you do not have an account, you can create one for free by clicking **Register** or visiting [playitsoftware.com/Account/Register](https://www.playitsoftware.com/Account/Register).
If the computer you are using is not connected to the internet, you can [activate offline](/PlayItRecorder/203/getting-started/activating-offline).
---
# Logging In
To get started with PlayIt Recorder, click on the **Log In...** button in the **Get Started** window. This will take you to a web browser where you will be prompted to log in using your PlayIt Software account.
To access PlayIt Recorder, enter your account email address and password, or log in using your Facebook account.
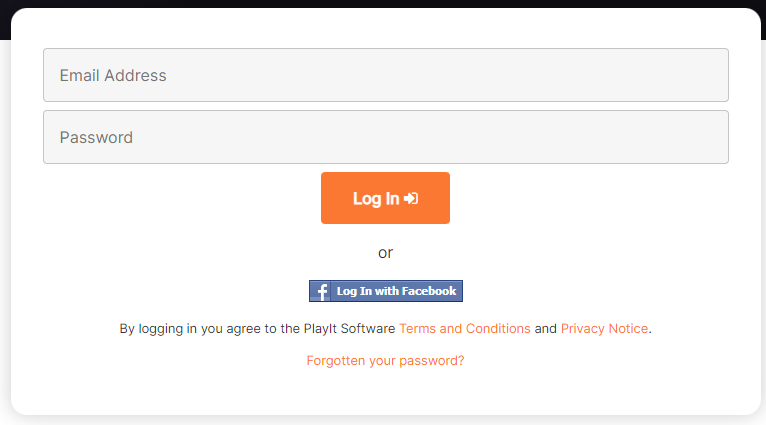
Once you are logged in, the main window will be shown.
---
# Enter Registration Details
If you do not already have an account, click on the **Register...** button in the **Get Started** window. This will take you to a web browser where you will be prompted to register for your PlayIt Software account.
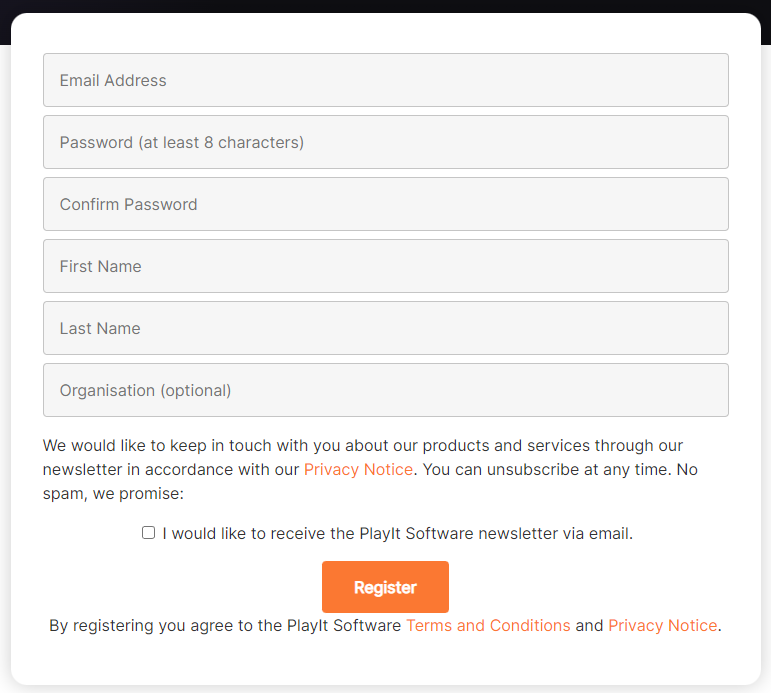
After clicking **Register**, you will be prompted to verify your email address. Please check your registered email account for an email from PlayIt Software with the subject **"PlayIt Software: Please verify your email address..."**. To ensure that you receive this email, please add **[noreply@playitsoftware.com](mailto:noreply@playitsoftware.com)** to your address book.
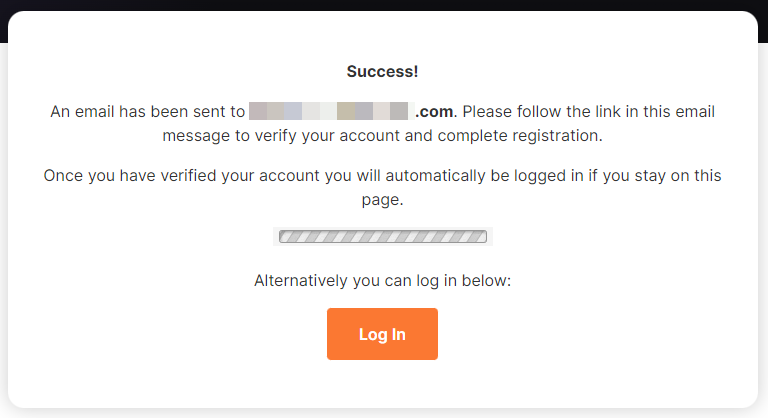
Once you have followed the verification link in the email, you will be logged in to PlayIt Recorder and the main window will be displayed.
---
# Activating Offline
If the computer on which you have installed PlayIt Recorder is not connected to the internet, it is possible to activate offline.
### Open the Activate Offline window
From the **Get Started** window, click **Activate Offline...**
Make a note of the **Computer Name** and **Machine Code** shown in the Activate Offline window. You will need to enter these on the PlayIt Software website to generate your licence key.
### Computer Name
The name of this computer. Enter this value on the website when generating your licence key.
### Machine Code
A code that uniquely identifies this installation. Enter this value on the website when generating your licence key.
### Generate a licence key
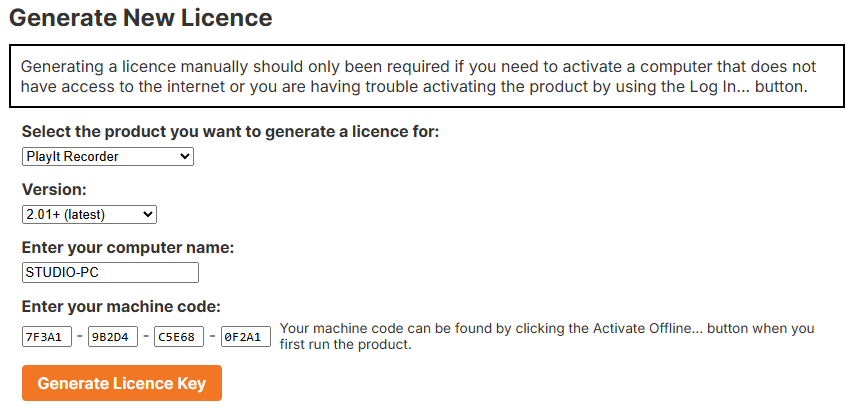
On a computer that is connected to the internet, visit the **Licences** page in the **My Account** area of the PlayIt Software website. A licence can be generated by visiting [playitsoftware.com/Account/Licences/Generate](https://www.playitsoftware.com/Account/Licences/Generate). You may be prompted to log in or create an account.
In the **Generate New Licence** section, select **PlayIt Recorder** and ensure that **v2.01+** is selected as the version. Enter the **Computer Name** and **Machine Code** you noted in the previous step and click **Generate Licence Key**.
### Enter the licence key
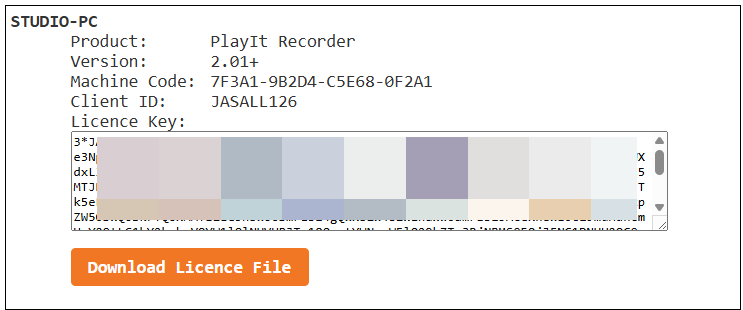
Once generated, you will be presented with a licence. Make a note of the **Licence Key** and copy it into the PlayIt Recorder window. Alternatively, download the licence file and select the file within PlayIt Recorder. Note that licence keys start with the text **3**\*.
By following these steps, you can activate PlayIt Recorder offline without an internet connection.
---
# Quick Start
PlayIt Recorder is used to create scheduled recordings of the audio from your selected sound card device.
## Initial Setup
When you first launch PlayIt Recorder, the message 'Click here to set up PlayIt Recorder...' will appear in the notification bar. Click this to open the Settings window.
After initial setup, you can open the settings window by going to **File > Settings...** from the main window.
From the Settings window, select the device you wish to record, the recording location, the format of the recording filename and the format of the recording. If you choose not to convert the recording audio it will be recorded in WAV format.
You can also choose to delete recordings after a number of days, or when the space on disk drops below a certain percentage. You can also add a chosen number of minutes to each recording to ensure there is an overlay on each recording.
Click **OK** to save your settings. For more information about each of the settings, see the [Settings](/PlayItRecorder/203/settings) section.
## Creating a Programme
Each recording must be associated with a Programme. To create a programme, from the main window go to **Programming > Programmes...**
Click the **Add New** button and enter a name for your first programme:
To confirm your changes, click the **OK** button on the **Programmes** window:
## Scheduling a Recording
Next you need to schedule a programme to record. Go to **Programming > Schedule...**
Choose the slot you want to schedule by clicking in the grid, or click the Add New Button:
Then choose the programme you want to schedule:
Review the schedule item settings.
If you want to repeat the recording you can use the **Repeat** checkbox. For example, if you simply want to record every hour of every day you can choose Repeats **Daily**, every **1** day, at **All** hours:
Click **OK** to save the schedule item.
The grid shows the new schedule item:
Click **OK** to save the schedule.
You will be prompted to start the scheduler if you have not already done so.
Go to **Recordings > Start Scheduler...** to start the scheduler.
During the scheduled item time the recorder will record the device you set in settings.
To stop the recording early press **Stop...**
## Quick Recording
If you need to record a one-off recording outside a schedule, you can use the [Quick Record](/PlayItRecorder/203/main-window) controls:
Click the record button to launch the Start Quick Recording window:
The name will be given a default, so press **Enter** to start the recording, but you can change the name to something more informative if you need to. You can also stop the recording after a period of time. Click **OK** or press **Enter** to start the recording.
---
# Main Window
The main window is the main control of PlayIt Recorder. It shows the active recordings, completed recordings and allows the ability to start Quick Recordings.
The main PlayIt Recorder window.
### Menu
The menu bar provides access to all PlayIt Recorder functions.
- **File:**
- **Settings...**: Configure PlayIt Recorder.
- **Exit...**: Exit PlayIt Recorder. Any scheduled recordings will stop and future recordings will not start.
- **Recordings:**
- **Start Scheduler...**: Starts up the scheduler and any scheduled recordings will start.
- **Stop Scheduler...**: Stops the scheduler and any scheduled recordings will stop.
- **Explore Recordings...**: Explore to the recordings folder to access any completed recordings.
- **Programming:**
- **Programmes...**: Manage programmes. Programmes indicate the name of the recording.
- **Schedule...**: Manage the schedule, this defines when programmes will be recorded.
- **Help:**
- **Online Documentation...**: Open the PlayIt Recorder documentation in your web browser.
- **About PlayIt Recorder...**: Show version information and check for updates.
### Notification Bar
Displays important notices, for example if a recording failed to start.
### Recording Device
The currently selected recording device. Click the link to open [Settings](/PlayItRecorder/203/settings) to change the device.
### Programme Information
Displays information about the currently selected active recording, with the name as a heading and the elapsed and remaining time below.
### Stop Button
Stops the currently selected active recording early.
### Active Recording Selector
Use the arrows to select between currently active recordings. If there are multiple programmes scheduled at the same time, or you have entered the bleed time setting then multiple active recordings can occur.
### Completed Recordings
Displays all completed recordings. Use the delete button to remove a recording. This will also delete the underlying recording file.
### Disk Space Status
Displays the remaining disk space percentage and amount for the drive of the recording folder location.
### Quick Record
Click the **record** button to start a quick recording. This will show the Start Quick Recording window allowing you to enter a name for the recording. A default name will be shown so you can just press Enter or click OK to start the recording. You can enter a different name if you need to. You can also select the **Stop the recording after** check box to select a time after which the recording will stop.
When the recording is active, the controls will change:
Press the **pause** button to temporarily halt the recording. Press the **stop** button to end the recording.
### Recording Levels
The recording levels show the volume of the recording. This is used to monitor the recording to ensure the audio is not too loud or quiet. Recordings should aim for the green area.
---
# Settings
The Settings window allows you to configure all aspects of PlayIt Recorder. Open it from the **File** menu by clicking **Settings...**.
The Settings window with all configuration options.
### Language
Select the display language for PlayIt Recorder. Changes take effect after restarting the application.
### Recording Device
Select the audio device you wish to record from.
### Recording Location
Enter the folder where recorded audio files will be saved. Use the **Browse...** button to find the folder. You should ensure that the currently logged in user has access to write to this location.
### Filename Format
Enter the format for the filename. This is the template that will be used to generate the filename for the recording. Use the **Edit...** button to show a helper window to help you build the filename format.
Hover over each of the dynamic value buttons, e.g. `{year}`, to find out what will be displayed. An example is displayed below the text box to show what will be generated.
It is possible to add a backslash `\` to put recordings in folders. For example, `{year}{month}{day}\{hour}{min}{sec}_{name}` would place recordings in a new folder for each day.
### Audio Conversion
By default audio will be recorded in WAV format.
Recording audio can be converted to another format. In its simplest configuration, you can configure MP3 in various qualities. Higher qualities sound better but take up more disk space. Click the **Advanced >** button if you wish to use your own encoder and parameters.
**Advanced:** For full control over the encoding process, click **Advanced >** to switch to advanced mode.
Specify a custom encoder executable and parameters. Enter the path to the encoder in **Encoder location** or use **Browse...** to find it. Enter the command-line parameters in **Encoder parameters**, using `{filepath}` as a placeholder for the output file path. Set the **File extension** to match the encoder's output format. Click **< Simple** to return to simple mode.
### Delete Recordings
You can configure recordings to be deleted after a set number of days, or when the disk space drops below a given percentage.
### Bleed Time
You can add a specified number of minutes to the start and end of scheduled recordings to ensure there is no break between old recordings stopping and new recordings starting.
### Startup
Tick this box to automatically start PlayIt Recorder when you log into the computer.
### OK / Cancel
Click **OK** to save your settings. Click **Cancel** to discard your changes.
---
# Programmes
Programmes indicate the name and description of a recording. The name can be used to [generate the filename](/PlayItRecorder/203/settings#filename-format) of the recording.
The Programmes window.
### Programme List
The list of all programmes added to PlayIt Recorder.
### Add New Button
Click the **Add New** button to add a new programme. This will display the [Edit Programme](/PlayItRecorder/203/programmes/edit-programme) window.
### Edit Button
Click the **Edit** button to edit the selected programme.
### OK Button
Click **OK** to save all changes made to the programmes list.
### Cancel Button
Click **Cancel** to discard all changes made to the programmes list.
### Apply Button
Click **Apply** to save all changes made to the programmes list but keep the window open.
---
The Edit Programme window is used to create and edit programmes. The programme name can be used to [generate the filename](/PlayItRecorder/203/settings#filename-format) for the recording.
The Edit Programme window.
### Programme Name
The name of the programme. This can be used to [generate the filename](/PlayItRecorder/203/settings#filename-format) for the recording.
### Description
A description of the programme. This is solely used for your own records.
### OK / Cancel
Click **OK** to save changes to the programme. Click **Cancel** to discard changes.
---
The schedule window allows you to set up when programmes will be recorded.
To add a recording, click an empty slot in the grid (or use the **Add New** button), then choose the programme to record. To change an existing recording, double-click it to open the [Edit Schedule Item](/PlayItRecorder/203/schedule/edit-schedule-item) window. Use the week buttons to move between weeks, and click **OK** to save your changes.
The Schedule window.
### Move Weeks Buttons
Use these buttons to move between weeks in the past and future.
### Day Heading
Shows each day of the week. The current day is indicated in red.
### Hour Heading
Shows each hour of the day. The current hour is indicated in red.
### Scheduled Programme
Indicates a scheduled programme in the schedule. Double-click the scheduled programme box to edit it. The [Edit Schedule Item](/PlayItRecorder/203/schedule/edit-schedule-item) window will be shown. To delete a schedule item, right-click and select **Delete**.
For recurring schedule items the Edit Recurring Item window will be shown, allowing you to select whether to edit only this occurrence, this and future occurrences, or all occurrences.
### Empty Slot
This shows an empty hour slot in the schedule. Click the slot to add a schedule item. You can drag to create a schedule item longer than one hour. The [Select Programme](/PlayItRecorder/203/schedule/select-programme) window will be shown, followed by the [Edit Schedule Item](/PlayItRecorder/203/schedule/edit-schedule-item) window. It is possible to schedule recordings of any duration via the Edit Schedule Item window, they are not restricted to hours.
Click an empty slot to add a schedule item.
### Scroll Bar
Use the scroll bar to move up and down to hours throughout the day.
### Add New Button
Click the Add New button to create a new hour-long schedule item at the current time. The [Select Programme](/PlayItRecorder/203/schedule/select-programme) window will be shown, followed by the [Edit Schedule Item](/PlayItRecorder/203/schedule/edit-schedule-item) window.
### OK Button
Click the OK button to save any changes made to the schedule.
### Cancel Button
Click the Cancel button to discard any changes made to the schedule.
---
The Edit Schedule Item window is shown when editing a schedule item via the schedule grid, or adding a new schedule item via the Add New button from the [Schedule window](/PlayItRecorder/203/schedule/overview).
The Edit Schedule Item window.
### Scheduled Item
The scheduled programme to be recorded. Click the link to select a different programme. The [Select Programme](/PlayItRecorder/203/schedule/select-programme) window will be shown.
### Start Time
The start time of the recording schedule item.
### Finish Time
The finish time of the recording schedule item.
### Repeat Checkbox
Whether this schedule item should be repeated.
### Repeat Period
How regularly this schedule item should repeat. You can select between Daily, Weekly, Monthly or Yearly.
### Repeat Every
How frequently this schedule item should repeat. You can select between every 1 to 14 days, weeks, months or years depending on the repeat period selected.
### Repeat On
If the Weekly repeat period is selected, you can choose which days and hours the schedule item should also repeat on. For example, you may have a drive time show which repeats weekly Monday to Friday between 4pm and 7pm.
### Repeat At
If the Daily repeat period is selected, you can choose which hours the schedule item should also repeat at. For example, if you want to split recordings into hour-long blocks every hour, you can select the Daily "All" hours option.
### Repeat Until
Repeat the schedule until a particular date and time. The selected time is inclusive, so if a future recording schedule item starts at this time it will be included.
### OK Button
Click the OK button to save changes to the schedule item.
### Cancel Button
Click the Cancel button to discard changes to the schedule item.
---
The Select Programme window is shown when changing the scheduled programme for a schedule item or when adding a new schedule item from the [Schedule window](/PlayItRecorder/203/schedule/overview).
The Select Programme window.
### Programme List
Select the programme recording to schedule. Double-click to quickly select and close the window.
### Add New Button
Click the Add New button to add a new programme to PlayIt Recorder 'on-the-fly' for quick creating and scheduling.
### OK Button
Click the OK button to use the selected programme.
### Cancel Button
Click the Cancel button to close the window without selecting a programme.
---
# About PlayIt Recorder
The About window displays the current version of PlayIt Recorder and checks for updates.
The About window when the software is up to date.
### Current Version
Displays the currently installed version of PlayIt Recorder.
### New Version Check
Indicates that this version is up to date.
### Up Time
Shows how long PlayIt Recorder has been running since it was last started.
### OK Button
Click the **OK** button to close the window.
## When an Update is Available
When a newer version of PlayIt Recorder is available, you will be notified with a link to download it.
The About window when a newer version is available.
### Download Link
Click the link to download and install the latest version of PlayIt Recorder.