
Audio Storage Settings
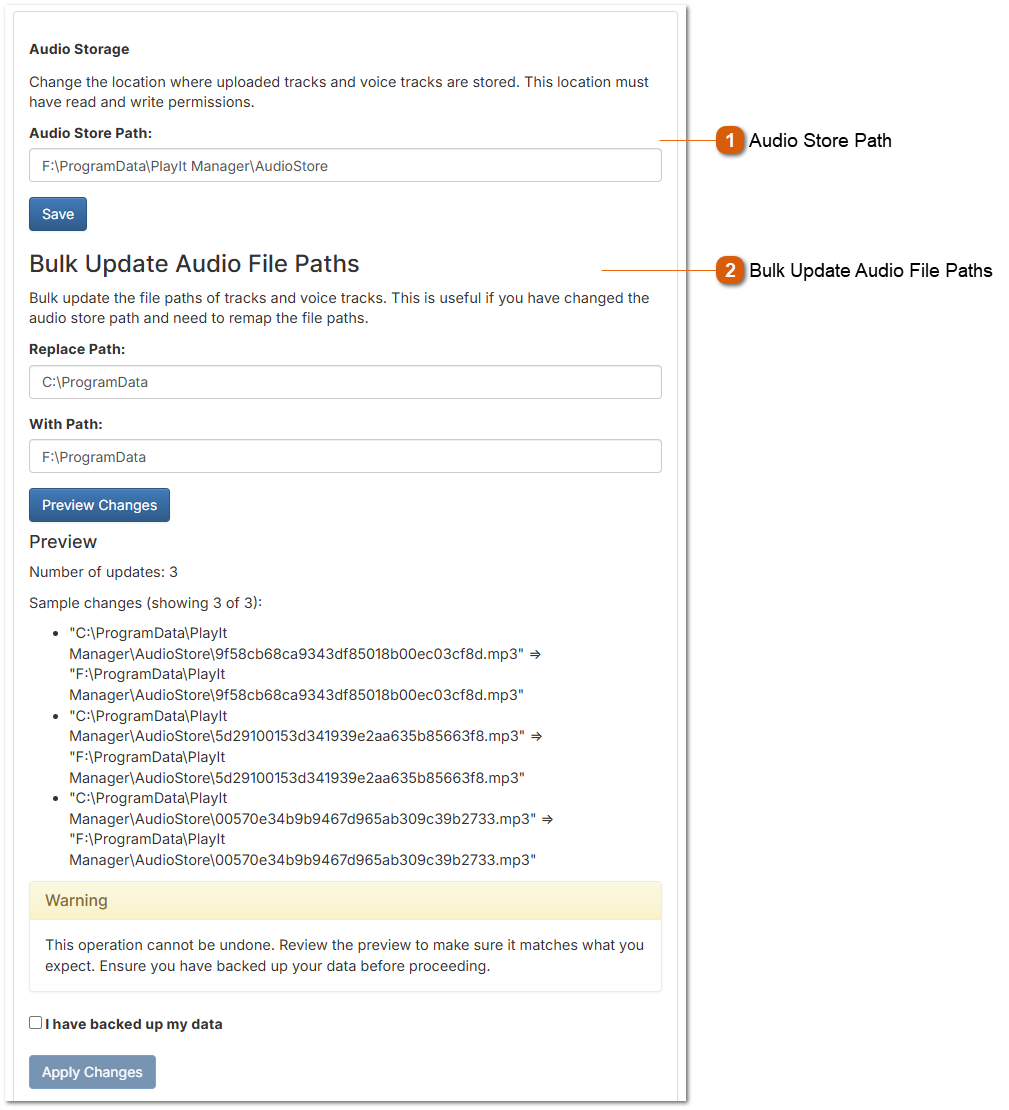

Bulk Update Audio File Paths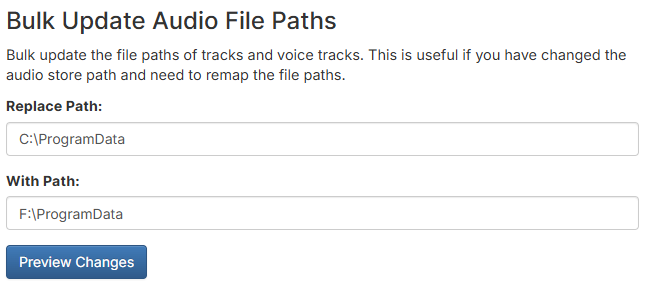 Use this feature to bulk update the file paths of tracks and voice tracks in your database. This is essential when you have changed the audio store path and need to remap the file paths so that PlayIt Manager can locate the audio files in their new location.
How to Use Bulk Update
Replace Path - Enter the old path prefix that you want to replace (e.g., C:\ProgramData)
With Path - Enter the new path prefix that will replace the old one (e.g., F:\ProgramData)
Preview Changes - Click the Preview Changes button to see a sample of files that will be affected
Preview
After clicking Preview Changes, you will see:
Number of updates - The total count of tracks that will be modified
Sample changes - A list showing examples of the path transformations (displaying up to 3 samples)
Each sample shows the old path with an arrow pointing to the new path
Warning
This operation cannot be undone. Before proceeding:
Applying Changes
Once applied, all affected tracks and voice tracks will have their file paths updated in the database to reflect the new location.
|