# PlayIt Live - User Guide
**Version 2.18**
## Contents
**Introduction**
- [What is PlayIt Live?](#introduction-what-is-playit-live)
- [Concepts](#introduction-concepts)
- [Glossary](#introduction-glossary)
**Installation**
- [Installation](#installation-installation)
- [Upgrading Versions](#installation-upgrading-versions)
- [Uninstallation](#installation-uninstallation)
**Getting Started**
- [Getting Started](#getting-started-activation)
- [Logging In](#getting-started-logging-in)
- [Enter Registration Details](#getting-started-enter-registration-details)
- [Activating Offline](#getting-started-activating-offline)
**The Main Window**
- [The Main Window](#main-window-overview)
- [Live-Assist Mode](#main-window-live-assist-mode)
- [Segue Editor](#main-window-segue-editor)
- [Voice Tracking](#main-window-voice-tracking)
- [Remote Voice Tracking Setup](#main-window-remote-voice-tracking-setup)
- [Remote Voice Tracking Usage](#main-window-remote-voice-tracking-usage)
- [Priority Streams](#main-window-priority-streams)
- [Decks Mode](#main-window-decks-mode)
- [Decks Mode Player](#main-window-decks-mode-player)
- [QuickCarts](#main-window-quickcarts)
- [QuickCart Pages](#main-window-quickcarts-pages)
- [Edit QuickCart](#main-window-edit-quickcart)
- [Pre-Fade Listen](#main-window-pre-fade-listen)
- [Track Play History](#main-window-track-play-history)
- [User Login Window](#main-window-log-in)
**Settings**
- [Settings](#settings-overview)
- [General](#settings-general)
- [Live-Assist Mode](#settings-live-assist-mode)
- [Voice Tracking](#settings-voice-tracking)
- [Advanced Scheduling](#settings-advanced-scheduling)
- [Decks Mode](#settings-decks-mode)
- [QuickCarts](#settings-quickcarts)
- [Keyboard](#settings-keyboard)
- [Web Links](#settings-web-links)
- [Advanced](#settings-advanced)
**Tracks**
- [Tracks](#tracks-overview)
- [Manage Tracks Window](#tracks-manage-tracks)
- [Edit Track Window](#tracks-edit-track)
- [Bulk Editing Tracks](#tracks-bulk-editing)
- [Add New Tracks Wizard](#tracks-add-new-tracks-wizard)
- [CSV Track Import](#tracks-csv-track-import)
- [Add New Tracks Additional Options](#tracks-add-new-tracks-additional-options)
- [Add New Tracks Progress](#tracks-add-new-tracks-progress)
- [Add New Tracks Review](#tracks-add-new-tracks-review)
- [Add New Tracks Group](#tracks-add-new-tracks-group)
**Track Groups**
- [Track Groups](#track-groups-overview)
- [Manage Track Groups Window](#track-groups-manage-track-groups)
- [Choose Track Group Type Window](#track-groups-choose-type)
- [Edit Listed Track Group Window](#track-groups-edit-listed)
- [Edit Filtered Track Group Window](#track-groups-edit-filtered)
- [Edit Grouped Track Group Window](#track-groups-edit-grouped)
- [Move Tracks Window](#track-groups-move-tracks)
**Multiple Artist Splits**
- [Multiple Artist Splits](#artist-splits-overview)
- [Edit Multiple Artist Split Window](#artist-splits-edit)
**Related Artists**
- [Related Artists](#related-artists-overview)
- [Edit Related Artist Window](#related-artists-edit)
**Monitored Folders**
- [Monitored Folders](#monitored-folders-overview)
- [Manage Monitored Folders Window](#monitored-folders-manage)
- [Edit Monitored Folder Window](#monitored-folders-edit)
- [Monitored Folders Status](#monitored-folders-status)
**Logged Tracks**
- [Logged Tracks](#logged-tracks-overview)
**Playout Policies**
- [Playout Policies](#playout-policies-overview)
- [Manage Playout Policies Window](#playout-policies-manage)
- [Choose Playout Policy Type Window](#playout-policies-choose-type)
- [Edit Track / Artist / Title Separation Playout Policy Window](#playout-policies-edit-track-artist-separation)
- [Edit Daypart Separation Playout Policy Window](#playout-policies-edit-daypart-separation)
- [Manage Dayparts Window](#playout-policies-manage-dayparts)
- [Edit Daypart Window](#playout-policies-edit-daypart)
- [Edit Track Set Separation Playout Policy Window](#playout-policies-edit-track-set-separation)
**Playout Pattern**
- [Playout Pattern](#playout-pattern-overview)
- [Manage Playout Pattern Window](#playout-pattern-manage)
**Scheduling**
- [Scheduling](#scheduling-overview)
- [Clocks](#scheduling-clocks)
- [Manage Clocks Window](#scheduling-manage-clocks)
- [Edit Clock Window](#scheduling-edit-clock)
- [Select Track](#scheduling-edit-track-settings)
- [Edit Track Group Settings Window](#scheduling-edit-track-group-settings)
- [Edit Break Note Settings Window](#scheduling-edit-break-note-settings)
- [Edit Fixed Time Marker Settings Window](#scheduling-edit-fixed-time-marker)
- [Edit Voice Track Settings Window](#scheduling-edit-voice-track-settings)
- [Edit Remote URL Settings Window](#scheduling-edit-remote-url-settings)
- [Edit Aux Input Settings Window](#scheduling-edit-aux-input-settings)
- [Edit Advert Block Settings Window](#scheduling-edit-advert-block-settings)
- [Edit Hook Sequence Settings Window](#scheduling-edit-hook-sequence-settings)
- [Edit Merge Start Settings Window](#scheduling-edit-merge-start-settings)
- [Edit Partial Clock Settings Window](#scheduling-edit-partial-clock-settings)
- [Clock Schedule](#scheduling-clock-schedule)
- [Clock Grids](#scheduling-clock-grids)
- [Schedule View](#scheduling-schedule-view)
- [Legacy Clock Schedule](#scheduling-legacy-calendar)
- [Playout Log](#scheduling-playout-log)
- [Edit Playout Log](#scheduling-edit-playout-log)
- [Edit Playout Log (Scheduled)](#scheduling-edit-playout-log-scheduled)
- [Import Playout Log](#scheduling-import-playout-log)
- [PlayIt Playout Log Format](#scheduling-playit-playout-log-format)
- [M3U Playlist Format](#scheduling-m3u-playlist-format)
- [Export Playout Log](#scheduling-export-playout-log)
**Advert Scheduling**
- [Advert Scheduling](#adverts-overview)
- [Advert Campaigns](#adverts-campaigns)
- [Edit Advert Campaign](#adverts-edit-campaign)
- [Edit Advert](#adverts-edit-advert)
- [Advert Log](#adverts-log)
- [Advert Play Report](#adverts-play-report)
**Scheduled Events**
- [Scheduled Events](#scheduled-events-overview)
- [Insert Track Action](#scheduled-events-insert-track)
- [Insert Special Item Action](#scheduled-events-insert-special)
- [Insert/Import External Log/Playlist Action](#scheduled-events-insert-external-log)
- [Merge External Log File Action](#scheduled-events-merge-external-log)
- [Run Utility Command Action](#scheduled-events-run-utility-command)
**Priority Streams**
- [Priority Streams](#priority-streams-overview)
- [Manage Priority Streams Window](#priority-streams-manage)
- [Edit Priority Stream Window](#priority-streams-edit)
**Users**
- [Users](#users-overview)
- [Manage Users Window](#users-manage)
- [Edit User](#users-edit)
**Tools**
- [Tools](#tools-overview)
- [Missing Track File Analysis](#tools-missing-track-file-analysis)
- [Duplicate Track File Analysis](#tools-duplicate-track-file-analysis)
- [Track Play Count Analysis](#tools-track-play-count-analysis)
- [Database Clean-up](#tools-database-cleanup)
- [Loudness Analysis](#tools-loudness-analysis)
- [Backup and Restore](#tools-backup-and-restore)
- [Auto Adjust](#tools-auto-adjust)
- [Mixdown Playout Log](#tools-mixdown-playout-log)
- [Internet Broadcast](#tools-internet-broadcast)
- [Edit Internet Broadcast Stream](#tools-edit-internet-broadcast-stream)
- [Now Playing](#tools-now-playing)
- [Edit Now Playing Target](#tools-edit-now-playing-target)
- [Edit Now Playing Filter](#tools-edit-now-playing-filter)
- [Now Playing Placeholders](#tools-now-playing-placeholders)
- [External Devices](#tools-external-devices)
- [Hardware](#tools-external-devices-hardware)
- [Named Outputs](#tools-external-devices-named-outputs)
- [Named Inputs](#tools-external-devices-named-inputs)
- [Input Triggers](#tools-external-devices-input-triggers)
- [Practical Examples](#tools-external-devices-examples)
**Remote Access**
- [Built-in Remote Access Server](#remote-access-overview)
- [Advanced Settings](#remote-access-advanced-settings)
- [Setting Up External Access](#remote-access-setting-up-external-access)
- [Remote Management](#remote-access-remote-management)
- [Remote Studio](#remote-access-remote-studio)
- [Remote Voice Tracking](#remote-access-remote-voice-tracking)
- [Remote Access Status](#remote-access-connected-users)
- [PlayIt Live Control API](#remote-access-control-api)
**Synchronising Data**
- [Synchronising Data](#synchronising-data-overview)
- [Connect to Remote Management Server Window](#synchronising-data-connect-to-server)
**Reference**
- [Spec Check Window](#reference-spec-check)
- [About PlayIt Live](#reference-about)
---
# What is PlayIt Live?
PlayIt Live is radio broadcast automation and playout software for Windows. It schedules and plays out your station's audio (music, jingles, adverts, and presenter links) either fully automated, fully live, or anywhere in between. It is used by community, internet, hospital, school, and commercial radio stations around the world.
The PlayIt Live main window in Live-Assist mode.
PlayIt Live is free to download and use, with optional premium features for professional broadcasters.
## What you can do with PlayIt Live
- **Play out audio** - Run your station from a single playout log, with multiple players that load and play tracks in sequence. Choose between [Live-Assist Mode](/PlayItLive/218/main-window/live-assist-mode) for hands-on presenting and [Decks Mode](/PlayItLive/218/main-window/decks-mode) for a classic radio deck layout.
- **Manage a music library** - Import and organise your audio as [Tracks](/PlayItLive/218/tracks/overview), each with the artist, title, intro, segue, and cue points needed for smooth playback. Organise your library with [Track Groups](/PlayItLive/218/track-groups/overview).
- **Automate your output** - Build a [Playout Pattern](/PlayItLive/218/playout-pattern/overview) or hour-long [Clocks](/PlayItLive/218/scheduling/clocks) and let PlayIt Live generate a [Playout Log](/PlayItLive/218/scheduling/playout-log) automatically, applying [Playout Policies](/PlayItLive/218/playout-policies/overview) to keep a consistent sound.
- **Schedule adverts and events** - Run commercial breaks with [Advert Scheduling](/PlayItLive/218/adverts/overview), and trigger actions at set times with [Scheduled Events](/PlayItLive/218/scheduled-events/overview).
- **Voice track shows in advance** - Record presenter links between tracks with [Voice Tracking](/PlayItLive/218/main-window/voice-tracking), so a show can sound live even when it is pre-produced.
- **Broadcast to the internet** - Stream your output to an Icecast or Shoutcast server and publish now-playing information from the [Tools](/PlayItLive/218/tools/overview) menu.
- **Work remotely** - Manage your station, present, or voice track from anywhere using the [Built-in Remote Access Server](/PlayItLive/218/remote-access/overview).
## Player modes
PlayIt Live has two player modes, which you can switch between from **File > Settings > Player Mode**:
- **[Live-Assist Mode](/PlayItLive/218/main-window/live-assist-mode)** is the primary mode. It combines a playout log of upcoming items with players at the top, letting you run a fully automated station, present live, or assist a live show.
- **[Decks Mode](/PlayItLive/218/main-window/decks-mode)** presents a classic radio deck interface, with separate decks that you load and play manually.
## Extending PlayIt Live
PlayIt Live can be integrated with other systems and automated through the [Control API](/PlayItLive/218/remote-access/control-api), a premium feature that lets you control PlayIt Live programmatically from external hardware and software.
## Where to go next
- [Installation](/PlayItLive/218/installation/installation) - Download and install PlayIt Live.
- [Getting Started](/PlayItLive/218/getting-started/activation) - Activate PlayIt Live and log in.
- [Concepts](/PlayItLive/218/introduction/concepts) - Understand the building blocks of PlayIt Live and how they fit together.
- [The Main Window](/PlayItLive/218/main-window/overview) - Find your way around the interface.
- [Glossary](/PlayItLive/218/introduction/glossary) - Definitions of common PlayIt Live terms.
---
# Concepts
This page introduces the main building blocks of PlayIt Live and explains how they fit together. Each concept links to a more detailed section. If you are new to PlayIt Live, reading this page first will help the rest of the documentation make sense. For short definitions of individual terms, see the [Glossary](/PlayItLive/218/introduction/glossary).
## The playout log
The **playout log** is the heart of PlayIt Live. It is the running order of everything your station will play, shown as a list of items in the order they will go to air. Most items are tracks, but the log can also contain voice tracks, break notes, fixed time markers, and other special items.
You can build the log by hand by dragging tracks into it, let PlayIt Live fill it automatically from your schedule, or use a mixture of both. See [The Playout Log](/PlayItLive/218/scheduling/playout-log).
## Tracks and track groups
A **[track](/PlayItLive/218/tracks/overview)** represents an audio file, together with the information PlayIt Live needs to play it well: artist, title, duration, and cue points such as the intro and cue out position. Tracks are imported into your library and can be browsed and searched from the track list.
**[Track groups](/PlayItLive/218/track-groups/overview)** organise your tracks. A group can be a **Listed** group (a hand-picked list of tracks), a **Filtered** group (tracks selected dynamically by their properties, for example "all songs from the 1980s"), or a **Grouped** group (a combination of other track groups). Track groups are used throughout PlayIt Live: to filter the track list, to build a playout pattern, and within clocks and playout policies.
## Players, segues, and player modes
The **players** load tracks from the playout log and play them in sequence. In [Live Assist Mode](/PlayItLive/218/main-window/live-assist-mode), several players sit at the top of the main window, each showing intro, elapsed, and remaining timers.
A **segue** is the transition from one item into the next, where one track ends and the following one begins. PlayIt Live works out segues automatically from each track's cue points, and you can fine-tune them in the [Segue Editor](/PlayItLive/218/main-window/segue-editor).
PlayIt Live offers two player modes: [Live Assist Mode](/PlayItLive/218/main-window/live-assist-mode), built around the playout log, and [Decks Mode](/PlayItLive/218/main-window/decks-mode), a classic deck-based layout.
## Automation
PlayIt Live can run your station on its own. Two switches in Live Assist Mode control this:
- The **Log Scheduler** automatically fills the playout log ahead of time so there is always something queued to play.
- **Automation** plays items automatically and locks the log to prevent accidental changes. Turning Automation on also turns on the Log Scheduler.
With both switches off you are in full manual control; with both on, the station runs unattended.
## Scheduling
Scheduling is how PlayIt Live decides what to play and when. There are a few related concepts:
- A **[Playout Pattern](/PlayItLive/218/playout-pattern/overview)** is a repeating sequence of track groups (for example *song, song, jingle*) that the scheduler cycles through to fill each hour. This is the simplest way to automate your output.
- **[Clocks](/PlayItLive/218/scheduling/clocks)** are hour-long templates that lay out exactly what should play in an hour and in what order, mixing track groups, specific tracks, adverts, voice tracks, and markers.
- The **[Clock Schedule](/PlayItLive/218/scheduling/clock-schedule)** assigns clocks to the hours of the week, so different hours and days can sound different.
- **[Playout Policies](/PlayItLive/218/playout-policies/overview)** are rules that keep your output sounding consistent, for example preventing the same artist or track from repeating too soon.
Together these feed the scheduling engine, which generates the [playout log](/PlayItLive/218/scheduling/playout-log).
## Adverts and scheduled events
**[Advert Scheduling](/PlayItLive/218/adverts/overview)** manages commercial spots: you create campaigns of adverts, PlayIt Live places them into advert blocks across the log, and it produces a play report for billing.
**[Scheduled Events](/PlayItLive/218/scheduled-events/overview)** trigger actions at specific times or when PlayIt Live starts, for example merging an external log or switching Automation on.
## Voice tracking
**[Voice tracking](/PlayItLive/218/main-window/voice-tracking)** lets a presenter record links between tracks ahead of time. The recorded link is stored in the log and played at the right moment, so a pre-produced show can sound live. Voice tracks can be recorded in the studio or remotely with [Remote Voice Tracking](/PlayItLive/218/remote-access/remote-voice-tracking).
## QuickCarts
**[QuickCarts](/PlayItLive/218/main-window/quickcarts)** are instant-playback buttons for jingles, sound effects, beds, and other audio you want to fire on demand while presenting. They are arranged on pages of buttons alongside the playout log.
## Priority streams
**[Priority Streams](/PlayItLive/218/priority-streams/overview)** allow a remote presenter or external source to take over from automated playout. When a priority stream is live it overrides normal Live-Assist output, then hands back automatically when it ends.
## Bringing audio in and out
- **[Monitored Folders](/PlayItLive/218/monitored-folders/overview)** watch folders on disk and import audio automatically as files are added, keeping your library up to date without manual importing.
- **[Internet Broadcast](/PlayItLive/218/tools/internet-broadcast)** streams your audio output to an Icecast or Shoutcast provider, and **[Now Playing](/PlayItLive/218/tools/now-playing)** sends details of the current track to a file or online service. Both are set up from the [Tools](/PlayItLive/218/tools/overview) menu.
- **[Logged Tracks](/PlayItLive/218/logged-tracks/overview)** records what was actually played and when, for reporting and royalty purposes.
## Working remotely and across studios
The **[Built-in Remote Access Server](/PlayItLive/218/remote-access/overview)** lets you reach PlayIt Live from a web browser to:
- present and edit the log in real time with **[Remote Studio](/PlayItLive/218/remote-access/remote-studio)**,
- manage your library and schedule with **[Remote Management](/PlayItLive/218/remote-access/remote-management)**,
- record links with **[Remote Voice Tracking](/PlayItLive/218/remote-access/remote-voice-tracking)**, and
- automate the software through the **[Control API](/PlayItLive/218/remote-access/control-api)**.
To share a single set of data across several computers, PlayIt Live can connect to **[PlayIt Manager](/PlayItLive/218/synchronising-data/overview)** (or to the built-in server of another PlayIt Live), keeping tracks, schedules, and the playout log in sync.
## Plugins
PlayIt Live can be extended through **plugins**, installed and configured from the **Plugins** menu in the main window. Available plugins include Microphone Mix, Audio Processing, and Remote Start (MIDI).
---
# Glossary
Common terms used throughout PlayIt Live and this documentation. For a fuller explanation of how these pieces fit together, see [Concepts](/PlayItLive/218/introduction/concepts).
- **Automation** - A mode in [Live-Assist Mode](/PlayItLive/218/main-window/live-assist-mode) that plays items automatically and locks the playout log to prevent accidental changes. Turning Automation on also turns on the Log Scheduler.
- **Break Note** - A non-audio marker placed in the playout log to remind the presenter of something, such as a station ident or a live read. A break note can have a duration, during which silence is played.
- **Clock** - An hour-long template that defines which track groups play in an hour and in what order. See [Clocks](/PlayItLive/218/scheduling/clocks).
- **Clock Schedule** - The assignment of clocks to the hours of the week, used to generate the playout log. See [Clock Schedule](/PlayItLive/218/scheduling/clock-schedule).
- **Cue In** - The point in a track where playback should start, typically just after any silence at the beginning. See [Tracks](/PlayItLive/218/tracks/overview).
- **Cue Out** - The point in a track where it is considered finished and should segue into the next item. The track typically fades out at this point, unless **No Fade** is selected. See [Tracks](/PlayItLive/218/tracks/overview).
- **Dayparting** - Restricting a track to specific days and hours so it is only scheduled at appropriate times. See [Tracks](/PlayItLive/218/tracks/overview).
- **Decks Mode** - A classic radio player layout with separate decks that you load and play manually. See [Decks Mode](/PlayItLive/218/main-window/decks-mode).
- **Fixed Time Marker** - A playout log item that forces the items after it to start at a set time, dropping earlier items as needed.
- **Hook** - A short, recognisable section of a track (such as the chorus), used in hook sequences within clocks. See [Tracks](/PlayItLive/218/tracks/overview).
- **Intro** - The opening section of a track before the vocals start, used so a presenter can talk over it or a sweeper can play across it. See [Tracks](/PlayItLive/218/tracks/overview).
- **Live-Assist Mode** - The primary player mode, built around a playout log with players at the top. Suits fully automated, fully live, or assisted presenting. See [Live-Assist Mode](/PlayItLive/218/main-window/live-assist-mode).
- **Log Scheduler** - The switch that automatically fills the playout log ahead of time so there is always something queued to play.
- **Monitored Folder** - A folder on disk that PlayIt Live watches and imports audio from automatically. See [Monitored Folders](/PlayItLive/218/monitored-folders/overview).
- **Now Playing** - A feature that sends details of the currently playing track to a file or online service. See [Tools](/PlayItLive/218/tools/overview).
- **Out Cue** - The way a track ends, for example fade out or sustain. See [Tracks](/PlayItLive/218/tracks/overview).
- **PlayIt Manager** - A separate server application that stores a single source of station data, which multiple PlayIt Live instances can connect to and synchronise with. You do not need PlayIt Manager to synchronise: one PlayIt Live instance can also sync with another that already has its built-in remote access server set up. See [Synchronising Data](/PlayItLive/218/synchronising-data/overview).
- **Playout Log** - The running order of everything the station will play, shown in the order it will go to air, as well as a historical record of what has already played. See [The Playout Log](/PlayItLive/218/scheduling/playout-log).
- **Playout Pattern** - A repeating sequence of track groups that the scheduler cycles through to fill each hour. See [Playout Pattern](/PlayItLive/218/playout-pattern/overview).
- **Playout Policy** - A rule that keeps output sounding consistent, such as preventing the same artist or track from repeating too soon. See [Playout Policies](/PlayItLive/218/playout-policies/overview).
- **Pre-Fade Listen (PFL)** - Previewing a track through headphones before it goes to air. See [Pre-Fade Listen](/PlayItLive/218/main-window/pre-fade-listen).
- **Priority Stream** - A remote or external source that can override automated playout, used to bring in a live presenter. See [Priority Streams](/PlayItLive/218/priority-streams/overview).
- **QuickCart** - An instant-playback button for jingles, sound effects, and other audio fired on demand. See [QuickCarts](/PlayItLive/218/main-window/quickcarts).
- **Remote Management** - Managing your track library and schedule from a web browser via the built-in remote access server. See [Remote Management](/PlayItLive/218/remote-access/remote-management).
- **Remote Studio** - Presenting and editing the playout log in real time from a web browser, with the ability to monitor the station audio and add your microphone live. See [Remote Studio](/PlayItLive/218/remote-access/remote-studio).
- **Remote Voice Tracking** - Recording voice tracks remotely from a web browser or PlayIt VoiceTrack. See [Remote Voice Tracking](/PlayItLive/218/remote-access/remote-voice-tracking).
- **Segue** - The transition from one item into the next, where one track ends and the following one begins. See [Segue Editor](/PlayItLive/218/main-window/segue-editor).
- **Segue Editor** - The window for fine-tuning the segue between tracks and for recording voice tracks. See [Segue Editor](/PlayItLive/218/main-window/segue-editor).
- **Station ID** - A short jingle that identifies the station. Also a track type in PlayIt Live. See [Tracks](/PlayItLive/218/tracks/overview).
- **Sweeper** - A track, usually with no background music, designed to be played over the intro of a song without clashing. See [Tracks](/PlayItLive/218/tracks/overview).
- **Track** - An audio file in your library together with the information PlayIt Live uses to play it, such as artist, title, and cue points. See [Tracks](/PlayItLive/218/tracks/overview).
- **Track Group** - A collection of tracks defined by a list, a filter, or a combination of other groups. See [Track Groups](/PlayItLive/218/track-groups/overview).
- **Voice Track** - A presenter link recorded ahead of time and stored in the playout log so a pre-produced show can sound live. See [Voice Tracking](/PlayItLive/218/main-window/voice-tracking).
---
# Installation
To install PlayIt Live, download the latest version from the [PlayIt Software website](https://www.playitsoftware.com/Products/Live).
## Installation Steps
### Download the installer
Visit [playitsoftware.com/Products/Live](https://www.playitsoftware.com/Products/Live) and click the **Download for Free** button to download the latest version.

### Run the installer
Once the download is complete, run the downloaded **.exe** file.

### Accept the licence agreement
You will first be presented with the software licence agreement. Once you have read and agree to these terms, click **I Agree**.
### Choose components
Choose the components to install. Here you can select whether to install Start Menu shortcuts. No shortcuts will be created on the desktop. Click **Next** to continue.
### Choose install location
Choose the location to install the software. By default, this is in **Program Files**, but can be changed to your preference. Click **Install** to begin installation.
### Launch PlayIt Live
Tick **Start PlayIt Live** and click **Finish** to launch PlayIt Live. If PlayIt Live does not start, go to the Start Menu and type PlayIt Live.
## Microsoft Edge WebView2 Runtime Requirement
As part of the installation, PlayIt Live will install the Microsoft Edge WebView2 runtime. This is required for embedded web browser features such as tutorial videos and the Plugin Gallery. The runtime is already installed as part of Windows 11, but will need to be downloaded and installed for Windows 10. Please note that embedded web browser features are not supported in Windows 7.
If you need to install the WebView2 runtime manually, you can do so via the [Microsoft Edge WebView2 page](https://developer.microsoft.com/en-gb/microsoft-edge/webview2).
---
# Upgrading Versions
New versions of PlayIt Live are regularly available from [playitsoftware.com/Products/Live](https://www.playitsoftware.com/Products/Live). It is important to back up your data before you install any new versions. Data and logs for PlayIt Live are stored in the Windows 'ProgramData' folder.
By default, this is located at:
> **C:\\ProgramData\\PlayIt Live**
To back up your data, simply copy this folder to an alternative location, such as an external hard drive.
When a new version is installed, the data in the location above will not be removed.
---
# Uninstallation
When installed, PlayIt Live will include an **Uninstall** shortcut in the Start Menu.
If you chose not to add Start Menu shortcuts, the uninstaller can be found at (by default):
> **C:\\Program Files (x86)\\PlayIt Live\\uninstall.exe** or **C:\\Program Files\\PlayIt Live\\uninstall.exe**
Double-click the icon to start the uninstall process.
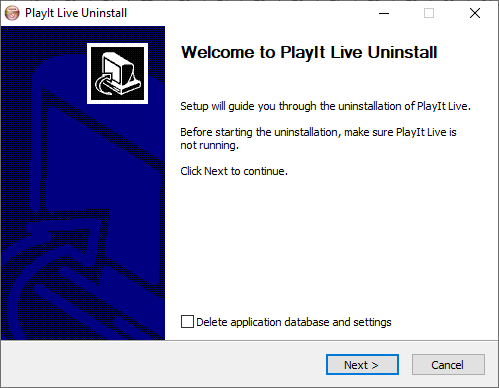
By default your database and settings will be retained when you uninstall. You can choose whether PlayIt Live data is removed by ticking the **Delete application database and settings** checkbox.
Click **Next**.
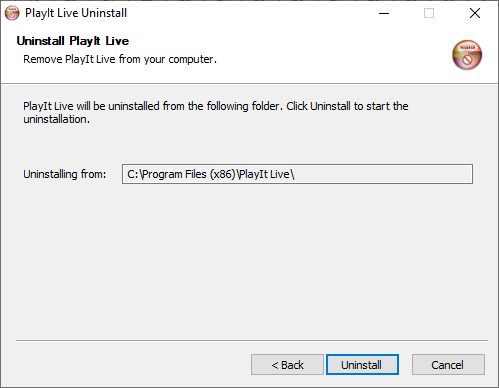
Click **Uninstall** to remove PlayIt Live.
---
# Getting Started
In order to begin using PlayIt Live, you need to log into your PlayIt Software account. Click the **Log In...** button to begin [logging in](/PlayItLive/218/getting-started/logging-in). If you do not have an account, you can create one for free by clicking **Register...** or visiting [playitsoftware.com/Account/Register](https://www.playitsoftware.com/Account/Register).
If the computer you are using is not connected to the internet, you can [activate offline](/PlayItLive/218/getting-started/activating-offline).
---
# Logging In
To get started with PlayIt Live, click on the **Log In...** button in the **Get Started** window. This will take you to a web browser where you will be prompted to log in using your PlayIt Software account.
Enter your account email address and password, or log in using your Facebook account.
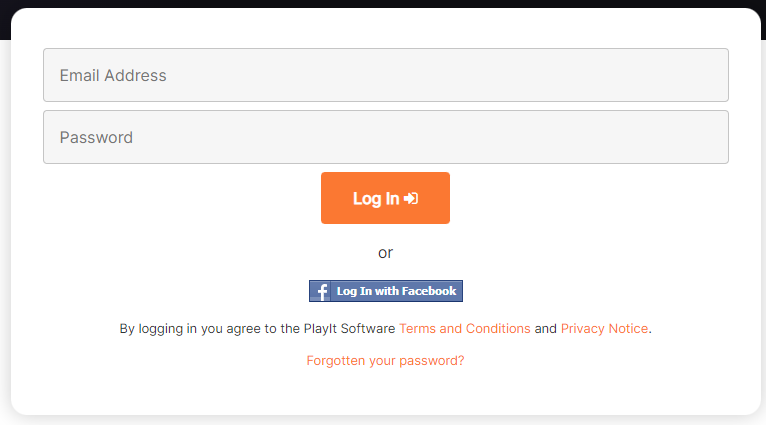
Once you are logged in, the [main window](/PlayItLive/218/main-window/overview) will appear, allowing you to begin using the software.
---
# Enter Registration Details
If you do not already have an account, click on the **Register...** button in the **Get Started** window. This will take you to a web browser where you will be prompted to register for your PlayIt Software account.
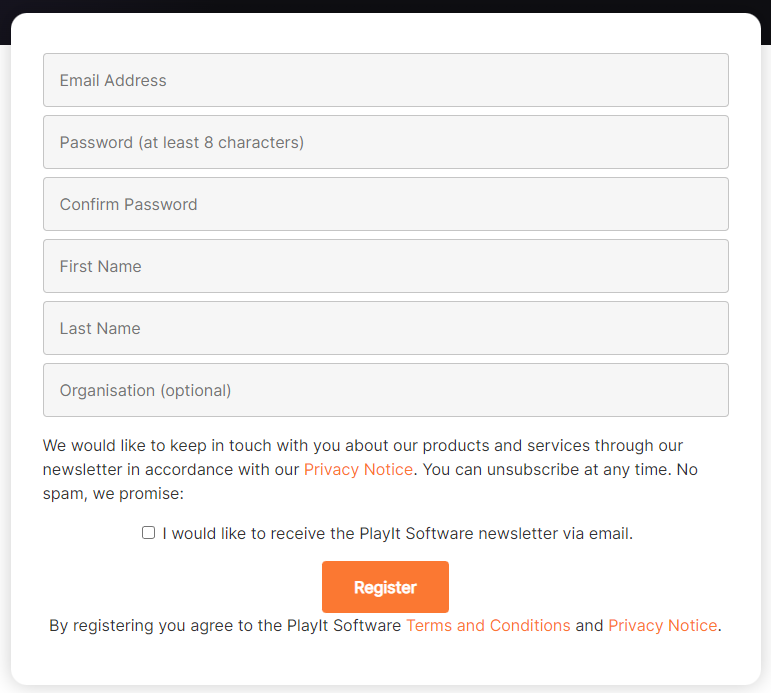
After clicking **Register**, you will be prompted to verify your email address. Check your registered email account for an email from PlayIt Software with the subject **"PlayIt Software: Please verify your email address..."**. To ensure that you receive this email, add **[noreply@playitsoftware.com](mailto:noreply@playitsoftware.com)** to your address book.
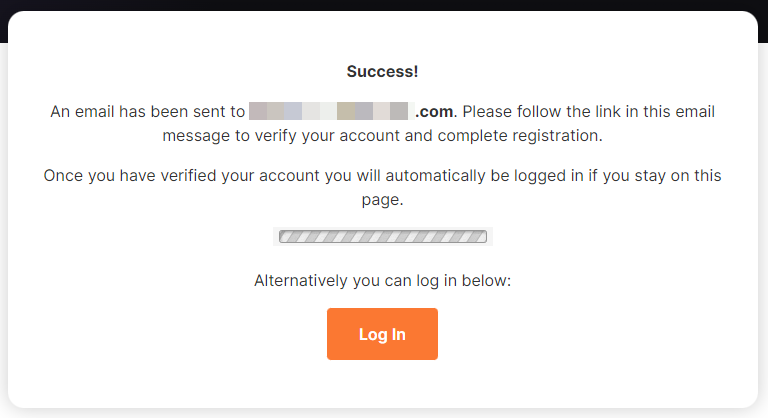
Once you have followed the verification link in the email, you will be logged in to PlayIt Live and the [main window](/PlayItLive/218/main-window/overview) will be displayed.
---
# Activating Offline
If the computer on which you have installed PlayIt Live is not connected to the internet, it is possible to activate offline.
### Open Activate Offline
From the **Get Started** window, click **Activate Offline...**
### Generate a licence key
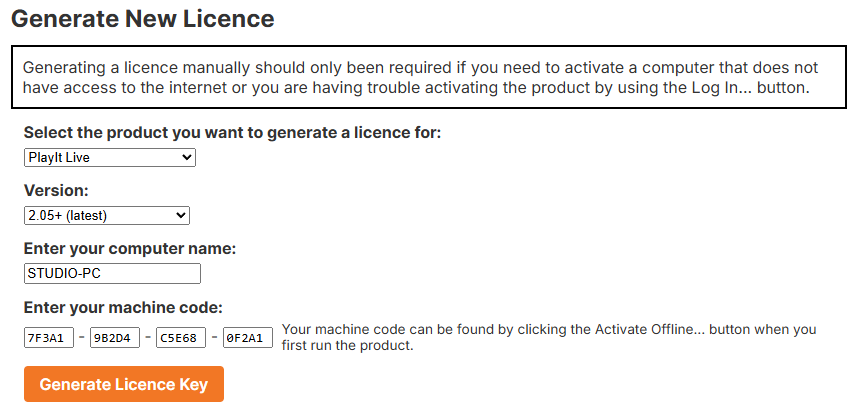
In the **Activate Offline** window, you will need to enter your Licence Key. To generate a new licence, visit [playitsoftware.com/Account/Licences/Generate](https://www.playitsoftware.com/Account/Licences/Generate). If you have not already, you may be prompted to log in or create an account.
In the **Generate New Licence** section, select **PlayIt Live** and ensure that version **2.05+ (latest)** is selected. Enter the **Computer Name** and **Machine Code** that you see in PlayIt Live and click **Generate Licence Key**.
### Enter the licence key
Once the licence key is generated, make a note of it or download the licence file and select it within PlayIt Live. Licence keys start with the text "3\*".
By following these steps, you can activate PlayIt Live offline without an internet connection.
---
# The Main Window
When PlayIt Live first starts it will be presented in [Live-Assist Mode](/PlayItLive/218/main-window/live-assist-mode). The player mode can be changed from **File > Settings... > Player Mode**.
The main window provides access to all PlayIt Live features:
- [Live-Assist Mode](/PlayItLive/218/main-window/live-assist-mode) - The primary player mode with a playout log and multiple players
- [Decks Mode (Classic)](/PlayItLive/218/main-window/decks-mode) - A classic radio deck interface
- [QuickCarts](/PlayItLive/218/main-window/quickcarts) - Instant playback cart buttons
- [Pre-Fade Listen Window](/PlayItLive/218/main-window/pre-fade-listen) - Preview tracks before they play
- [Track Play History Window](/PlayItLive/218/main-window/track-play-history) - Review recently played tracks
- [Log in to PlayIt Live](/PlayItLive/218/main-window/log-in) - Sign in to your PlayIt Live account
---
# Live-Assist Mode
Live-Assist Mode is the primary operating mode in PlayIt Live. It provides a comprehensive interface for managing live broadcast playout, with players at the top, a playout log showing upcoming and past items, a track list for browsing and adding tracks, and controls for automation and scheduling.
### Menu
The top menu bar provides options to set up PlayIt Live.
The **File** menu contains:
- **[Enable remote connections](/PlayItLive/218/remote-access/overview)**: Set up PlayIt Live to enable the built-in remote management server and allow remote connections for managing data and remote voice tracking.
- **[Sync with a remote server](/PlayItLive/218/synchronising-data/overview)**: Set up PlayIt Live to connect to a remote management server such as PlayIt Manager or the built-in server in another PlayIt Live.
- **[Settings](/PlayItLive/218/settings/overview)**: Configure the user interface and audio devices.
- **Exit**: Close PlayIt Live. A confirmation box will be shown.
The **Manage** menu contains:
- **[Tracks](/PlayItLive/218/tracks/overview)**: Manage track audio items.
- **[Track Groups](/PlayItLive/218/track-groups/overview)**: Manage track groups (like smart folders) containing tracks.
- **[Logged Tracks](/PlayItLive/218/logged-tracks/overview)**: View recently played tracks for reporting purposes.
- **[Playout Policies](/PlayItLive/218/playout-policies/overview)**: Manage rules to create a unified sound.
- **[Playout Pattern](/PlayItLive/218/playout-pattern/overview)**: Manage the pattern of track groups that will be used for playout.
- **[Clocks](/PlayItLive/218/scheduling/clocks)**: Manage clocks used to generate the playout log.
- **[Clock Schedule](/PlayItLive/218/scheduling/clock-schedule)**: Manage clock hourly assignments used to generate the playout log.
- **[Playout Log](/PlayItLive/218/scheduling/playout-log)**: Manage the overall, day-to-day output of your station.
- **[Advert Campaigns](/PlayItLive/218/adverts/campaigns)**: Manage advert campaigns for playing adverts (commercial spots).
- **[Advert Log](/PlayItLive/218/adverts/log)**: Manage the advert log, the log of adverts and when they will play.
- **[Advert Play Report](/PlayItLive/218/adverts/play-report)**: Export a report of when adverts were played for affidavits.
- **[Scheduled Events](/PlayItLive/218/scheduled-events/overview)**: Manage events that can be triggered to happen at a specific time or when PlayIt Live starts.
- **[Priority Streams](/PlayItLive/218/priority-streams/overview)**: Manage priority streams which can be used to override normal live-assist automation and bring in a live presenter/DJ via a remote stream.
- **[Users](/PlayItLive/218/users/overview)**: Manage users who can log in to use the software.
The **Tools** menu contains:
- **[Missing Track File Analysis](/PlayItLive/218/tools/missing-track-file-analysis)**: Find and resolve tracks that reference files that have been moved or deleted.
- **[Duplicate Track File Analysis](/PlayItLive/218/tools/duplicate-track-file-analysis)**: Find and delete track files that have been added to PlayIt Live multiple times.
- **[Track Play Count Analysis](/PlayItLive/218/tools/track-play-count-analysis)**: Determine the number of plays tracks have had during a date/time range.
- **[Database Clean-up](/PlayItLive/218/tools/database-cleanup)**: Clean up the database, deleting old playout log items and voice tracks.
- **[Mixdown Playout Log](/PlayItLive/218/tools/mixdown-playout-log)**: Mixdown a portion of the playout log to MP3 or WAV for later broadcast or review.
- **[Monitored Folder Status](/PlayItLive/218/monitored-folders/status)**: View the status of your monitored folders and force a re-scan if necessary.
- **[Loudness Analysis](/PlayItLive/218/tools/loudness-analysis)**: Analyse the tracks in the database so each track has the same loudness.
- **[Backup and Restore](/PlayItLive/218/tools/backup-and-restore)**: Manually or automatically back up the database periodically. You can also restore the database to a previous backup.
- **[Auto Adjust](/PlayItLive/218/tools/auto-adjust)**: Automatically adjust segues and tempos of tracks in Live-Assist Mode.
- **[Internet Broadcast](/PlayItLive/218/tools/internet-broadcast)**: Set up internet broadcast streams to stream your audio output to an internet streaming provider.
- **[Now Playing](/PlayItLive/218/tools/now-playing)**: Set up now playing metadata targets to send your current playing track information to a file or remote service.
The **Plugins** menu contains:
- **Plugin Manager**: View the list of currently installed plugins and create new ones.
- **\[Number of running plugins\]**: Shows the number of plugins that are currently running.
The **Help** menu contains:
- **Online Documentation**: A link to the documentation page on the PlayIt Software website.
- **New to PlayIt Live? video**: A video showing how to use the basic features of PlayIt Live.
- **Open Application Data Folder**: Opens the PlayIt Live application data folder. Only perform this step if requested by PlayIt Software Support.
- **Open Sound Control Panel**: Opens the Windows Sound Control Panel. Allows you to see and configure any attached audio devices.
- **Licence Information**: View your currently applied licence information and allow you to update your licence.
- **[Spec Check](/PlayItLive/218/reference/spec-check)**: Verify if your computer meets the minimum or recommended specifications to run PlayIt Live.
- **[About PlayIt Live](/PlayItLive/218/reference/about)**: View the latest version and check for updates.
### Notification bar
The notification bar is used to provide important information to the user without disrupting their current activity. Warnings will be displayed here if there are any setup issues or a track fails to load.
### Players
The players at the top load tracks from the playout log in the expected order. Players can be assigned to individual sound cards so they can be used with different channels on a professional mixer.
Each player has three timers and three buttons.
The **blue** timer indicates the intro remaining of the loaded track. The **green** timer indicates the elapsed time of the loaded track. The **red** timer indicates the remaining time of the loaded track.
The **green** play button starts playing the track. The **orange** pause button pauses the track. The **silver** eject button fades out and stops the player.
### Playout log
The playout log shows the upcoming items that are scheduled to take place. Typically these are tracks to be played, but can be break notes, fixed time markers, or other special items. Each playout log item features (from left to right) the play time , icon, title, tempo (if adjusted), duration (or remaining time) , segue toggle switch, edit and eject/delete button. These are the default columns; you can change which columns are shown by right-clicking the column headings and selecting **Select Columns** (see [Displaying more information about a track](#displaying-more-information-about-a-track) below). A three-dots ellipsis icon is used to show additional menu options.
#### Icons
The icon on the log item displays the type of the item. Icons and colours can also be customised based on the track group a track belongs in. It is possible to colour the entire row by changing [this setting](/PlayItLive/218/settings/live-assist-mode).
-  - Track
-  - Voice Track
-  - Break Note
-  - Fixed Time Marker
-  - Currently playing item
-  - Past item that was played
-  - Past item that was not played
-  - Future item that will not be played due to a fixed time marker
#### Current Item
The current item is indicated by a right arrow in a circle icon:
- 
The current item is the currently playing or the next item to be played when playout resumes.
#### Adding tracks
To add a track to the playout log, drag and drop a track from the Track List to a position between existing tracks or between an empty "drag tracks here" marker. If you dragged a track into a position soon to be played it will be loaded into one of the players in sequence. You can also drag and drop audio files directly from Windows File Explorer into the playout log.
#### Playing tracks
To play the track, click the **Play** button in the player at the top. When an item is playing it will be shown in green and the duration column will display the remaining time for that item.
While a track is playing, the progress bar will be displayed showing the current position in the track. To change the position, click the **Seek** checkbox to the left of the progress bar and then click the position in the progress bar. The Seek checkbox is there to prevent the position of the track from being accidentally changed whilst on air.
The triangles on the progress bar indicate the track's trigger points: the grey down-pointing triangle marks the fade point (Cue Out), and the red triangle marks the point at which the track is ejected and finishes.
#### Navigating the playout log
It is possible to scroll up to past items to see what was played, or scroll down to see what is going to be played in the future. You can do this by scrolling with the mouse wheel or using the **up** and **down** arrows to the right of the playout log. You can also navigate using the keyboard arrow keys or the **Page Up** and **Page Down** keys.
You can click the **Home** button to return to the current item. Pressing the **Home** key on your keyboard does the same. The Home button has two states, underlined and not-underlined. When the Home button is underlined the playout log will automatically scroll with the current item. If you manually scroll away, the Home button will no longer be underlined. After 5 minutes of inactivity the playout log will return home.
The **Go to time** button can be used to navigate to a specific date and time in the log. This is useful if you wish to edit the log or record voice tracks for a future programme.
#### Toggling segues
A segue is the transitioning of one item into another item. The segue toggle switch changes between a green arrow and a red stop sign . A green arrow indicates that the succeeding track will automatically play after this track. A red stop sign indicates that playout will stop after this track has finished.
#### Fine tuning segues
The **Edit** button allows you to fine tune the segue between the current, preceding and succeeding tracks. This will launch the [Segue Editor](/PlayItLive/218/main-window/segue-editor).
#### Recording voice tracks
For voice track items the edit button will be replaced by the **Record** button . This will launch the [Segue Editor](/PlayItLive/218/main-window/segue-editor) allowing you to record your voice track. Until a voice track is recorded, a voice track item will display a placeholder entry. This will not be loaded into a player and will be skipped if a voice track has not been recorded. You can change the length of the placeholder duration by clicking on the duration. By default this looks like **\[00:30\]**.
#### Deleting, restoring and ejecting items
- Click the **Bin/Trash** button to soft delete a playout item from the log.
- Hold the **CTRL** key to display the **Delete** button to hard delete the item.
- Click the **Restore** button to restore a previously soft deleted item.
- If the item is currently playing, the **Eject** button is shown instead. Clicking it fades out the item, and the next item plays if the segue option is set to continue.
#### Protected items
If the item is marked as Protected, the **Shield** icon is shown. This prevents the item from being accidentally deleted. Protected items will not be dropped by Fixed Time Markers or soft deleted by the Auto Adjust feature.
#### Playout log item menu
Click the **Ellipsis** button to expand the context menu for the playout log item. Here it is possible to perform additional actions such as Edit Segue, Edit Track, Delete, [Track Play History](/PlayItLive/218/main-window/track-play-history), or visit Web Links. Right-clicking a playout log item will also bring up the same menu.
#### Hour headings
The log contains headings for the hour for which the item is scheduled. Each hour shows how much the hour is currently over or under running. Each hour also features an Ellipsis button with additional options. This can be used to schedule the hour now, import an hour from a playout log format, export an hour to PlayIt Playout Log format or a plain text format, or clear the hour completely. The import/export features are useful if you want to save a playlist and import this into another hour. You can also select to **Mixdown** this hour to an MP3 or WAV file for later broadcast or review.
#### Scheduling an hour now
Click the hour heading's **Ellipsis** button and select **Schedule Hour Now** to immediately populate that hour of the playout log from its scheduled clock, without waiting for the log scheduler to reach it. In the menu, **Schedule Hour Now** appears at the top, above the existing **Import**, **Export**, **Clear** and **Mixdown** options.
**Schedule Hour Now** generates the playout log items for that hour from the clock assigned to it in your [clock schedule](/PlayItLive/218/scheduling/clock-schedule), exactly as the log scheduler would when it reaches that hour. If you have [advanced scheduling](/PlayItLive/218/settings/advanced-scheduling), any adverts due in that hour are scheduled at the same time.
This is useful when an upcoming hour has not been automatically populated yet. For example, the log scheduler only looks a short way ahead, so a future hour you have scrolled to may still be empty. Rather than switching the [Log Scheduler](#scheduler-switch) on (which would schedule from the current point forward), you can schedule just that one hour on demand so you can review, edit, or voice track it ahead of time.
#### Displaying more information about a track
You can display more information about a playout log item by right-clicking the column headings and selecting more columns. You can resize the columns by clicking and dragging between the columns. You can reorder the columns by going to **Select Columns** and using the **Up** and **Down** buttons.
You can also display more information about a particular track by clicking and expanding the log item. The Out Cue, Intro, Album, Genre and Year are displayed on the left with the Comment field displayed on the right. If the track was recently played, the Last Played time is also displayed.
#### Frequency spectrum
The playing items on the playout log can display a frequency spectrum visualising how the audio changes dynamically. The bars indicate the distribution of audio frequencies, from low on the left (bass) to high on the right (treble). This can be disabled under [Settings](/PlayItLive/218/settings/live-assist-mode).
#### Navigating with the keyboard
- **Up**: Move the selection one item up.
- **Down**: Move the selection one item down.
- **Page Up**: Move the selection one page up.
- **Page Down**: Move the selection one page down.
- **Home**: Move the selection to the current item.
### QuickCarts panel
The QuickCarts panel provides instant playback buttons for jingles, sound effects, and other audio items. See [QuickCarts](/PlayItLive/218/main-window/quickcarts).
### Internet broadcast indicator
The status of your internet broadcast. To enable internet broadcasting, set up a stream from **Tools > Internet Broadcast** (see [Internet Broadcast](/PlayItLive/218/tools/internet-broadcast)).
### Currently logged in user
This shows the user who is currently logged in. To log out, click the button and then click **Log out**. This is only shown when **Require users to log in to use PlayIt Live** is ticked on [Manage > Users](/PlayItLive/218/users/manage).
### Track Group selector
To filter the track list by track group, select the track group from the dropdown. The track list will show only tracks that exist in the selected track group. Track groups can be managed from **Manage** > **Track Groups**.
### Track search box
Use the search box to filter the track list. When text is entered, the track list shows only tracks whose displayed column values contain that text (by default this is the Artist - Title). Click the clear button to remove the filter.
The search box also supports advanced expressions that filter on a specific field. For example, enter `ActiveDuration < 180` to show only tracks shorter than 3 minutes (180 seconds).
Searching only filters within the track group currently selected in the Track Group selector.
### Track list
The track list shows a list of tracks added to the system. By default, the list shows each track in the form Artist - Title with the duration in the second column. Click either column to sort by that column, click the column again to reverse the sort order. The list can be filtered using the search box or the Track Group selector above.
It is possible to select the columns in this list by right-clicking a column and selecting **Select Columns**. On the track list, it is also possible to right-click a track item to view additional options such as [Edit Track](/PlayItLive/218/tracks/edit-track), [Pre-Fade Listen](/PlayItLive/218/main-window/pre-fade-listen), [Track Play History](/PlayItLive/218/main-window/track-play-history), and Web Links.
The track list can be resized by dragging the space to the left of the track list.
### Special items
While **Tracks** are a fundamental playout log item type, you can also insert special items into the log. Simply drag and drop the box for the item type you want to insert into the playout log. You can click the down arrow icon to collapse this section to save space.
### Onscreen Clock
The onscreen clock shows the current date and time. The onscreen clock can also be configured to include two additional clocks, for example, countdown clocks. Right-click the clock and select **Configure**.
Clock types that can be selected are:
- **Current Time**: Shows the current clock time.
- **Until End of Hour**: Shows a countdown until the end of the current hour.
- **Until Time in Hour**: Shows a countdown to a specific time within an hour. This can be useful if your show ends a few minutes before the top of the hour to account for commercials/advertisements.
- **Until Next Fixed Time Marker**: Shows a countdown to the start of the next fixed time marker. This can be useful to count down to the next break.
- **Until Next Stop**: Shows a countdown to the next time audio will stop playing. Note that the playout engine only looks forward up to 5 hours, so it will display --:-- if audio will stop in the long-term future.
### Log Scheduler Switch
Switch the log scheduler **ON** to automatically schedule the playout log so that there are always items scheduled to play out.
### Automation Switch
Switch automation **ON** to automatically schedule the playout log and lock it so it cannot be changed to prevent accidental changes. Switching Automation ON will also switch on the Log Scheduler.
When Automation is switched on, a message will be shown at the top of the playout log indicating that the log is locked.
### Master controls
The master controls control the overall player status. Click the **Play** button to start the next item in the playout log. When the audio is playing the **Play** button will become a **Play Next** button which, when clicked, will advance to the next track. Click the **Pause** button to pause all playing players. Click the **Stop** button to fade out and stop all playing players.
## Priority Streams
When one or more priority streams are open, priority stream players are displayed below the main live-assist players. These will indicate which priority streams are connected and playing.
When priority streams have overridden main live-assist playout, a message will be shown to indicate this.
For more information see the [Priority Streams](/PlayItLive/218/main-window/priority-streams) section.
## Related pages
- [Segue Editor](/PlayItLive/218/main-window/segue-editor)
- [Voice Tracking](/PlayItLive/218/main-window/voice-tracking)
- [Priority Streams](/PlayItLive/218/main-window/priority-streams)
---
# Segue Editor
The Segue Editor is used to give you greater control over how tracks are sequenced. Tracks can be moved closer or further away from the preceding or succeeding track. If you are familiar with PlayIt VoiceTrack, the Segue Editor operates in the same way. It is possible to move tracks, trim the start and end, and fade tracks in and out or adjust the volume.
### Waveform
The waveform represents the audio signal. It shows the changes in amplitude over the duration of the track.
Click anywhere in the waveform view to set the current position marker.
### Fade envelope
Changing the fade envelope allows you to adjust the volume of the track. Click the orange line on the waveform to edit the fade envelope. Clicking on the line will create an envelope point. Adding multiple envelope points will allow you to create a shape to adjust the fade volume. To remove a point, drag the point outside the waveform box. The light-grey envelope shown is the effective envelope when a track playing at the same time has **Duck other tracks** enabled.
### Waveform top bar
Drag and drop the top bar of the track to align it with the previous or next track. Dragging from the far left of the bar adjusts the track's position relative to the previous track; dragging from the far right adjusts it relative to the next track.
### Cue point marker
A thick vertical line shown on the track represents a cue point marker. The Cue In point is shown in green, the Cue Out point is shown in pink and the Intro point is shown in cyan. Cue Points can be changed via [Manage > Tracks](/PlayItLive/218/tracks/manage-tracks) and editing a track.
### Recording and playback controls
-  - **Record button:** Start recording from your microphone. Please see the [Voice Tracking](/PlayItLive/218/main-window/voice-tracking) section for more details. This button is disabled if you are not editing the segue for a voice track.
-  - **Delete recording button:** Deletes the recording so it can be discarded. This button is disabled if you are not editing the segue for a voice track.
-  - **Play button:** Start playback from the current playback position. **Tip:** You can use the **space bar** to perform this action.
-  - **Pause button:** Pause playback at the current playback position.
-  - **Stop button:** Stop playback and reset to the previously selected position marker. **Tip:** You can use the **space bar** to perform this action if audio is playing.
-  - **Jump to start:** Move the position marker to the start of the view. **Tip:** You can use the **Home** key to perform this action.
-  - **Move to previous track:** Move the position marker to the previous track from the current position. **Tip:** You can use the **Page Down** key to perform this action.
-  - **Move to next track:** Move the position marker to the next track from the current position. **Tip:** You can use the **Page Up** key to perform this action.
-  - **Jump to end:** Move the position marker to the end of the view. **Tip:** You can use the **End** key to perform this action.
**Current playback position** : Indicates how long has elapsed in the project.
### Zoom controls
As an alternative to using the mouse wheel to zoom the multi-track view, you can use the zoom buttons to zoom in and out.
### Prev Segue / Next Segue
Quickly move to the previous or next tracks in the playout log. These can be used to iterate through the tracks in the playout log efficiently.
### Prev Voice / Next Voice
As above, but you will advance to only voice track segues. These can be used to iterate through voice tracks and quickly record voice tracks. These buttons are disabled if there are no voice tracks nearby in the log.
### Segue Information
The Segue Information shows how the selected track will sequence from the previous track into the next track. To see the segue information for the track, click on the waveform.
The **segue style** defines specific ways that the track will sequence:
- **Cue Out/In** (default): The cue in of the track will line up with the cue out of the previous track.
- **Sweep Start**: The sweeping track will start at the same time as the next track, provided it is short enough to play before the intro point of the next track. If the sweeping track is longer than the intro of the next track, the sweeping track will start before the next track and play up to the end of the intro. This option will make use of the Early Out cue point on the previous track if this is available.
- **Sweep Intro**: The sweeping track will finish playing immediately before the end of the intro point of the next track. This option will make use of the Early Out cue point on the previous track if this is available.
- **Custom**: You can manually set up how the tracks sequence with each other.
When you move a track by dragging the waveform, the segue style will automatically change to Custom.
Note that **Sweep Start** and **Sweep Intro** require Intro or Early Out points to be set on the preceding or succeeding tracks, otherwise **Cue Out/In** will be used.
The **Duck other tracks** checkbox can be used to reduce the volume of the previous and next track when this track is played. You can configure the ducking (volume and speed) via the Settings button. When ducking is active you can see the effective track envelope changing to show the volume change.
### Audio Settings
If the volume of a track or recorded voice track is too quiet, use the **Gain** setting to increase the volume. The default gain for voice tracks can be set via **Settings...**.
It is also possible to adjust the tempo of the track. Typically this is used automatically by the [Auto Adjust](/PlayItLive/218/tools/auto-adjust) feature to fit items to a Fixed Time Marker or the end of the hour.
### Settings button
The Settings button allows quick access to voice tracking [settings](/PlayItLive/218/settings/live-assist-mode) from the Segue Editor. Here you can edit the audition time or the audio devices for playback or recording.
### Save button
Save your segue changes and close the Segue Editor window.
### Cancel button
Discard your segue changes and close the Segue Editor window.
---
# Voice Tracking
Premium Feature · Voice Tracking
VT [Purchase →](https://www.playitsoftware.com/Account/Subscription/VoiceTracking)
Purchasing the **Voice Tracking** module unlocks full voice tracking functionality. Until activated, voice tracks are preceded by an audio overlay.
Voice tracking is an industry-standard technique to create the illusion that there is a live announcer sitting behind the desk in a radio studio, when in fact all the audio has been prerecorded and played out automatically. Voice tracking can allow you to record a three-hour show in less than half an hour.
PlayIt Live enables you to do this by inserting Voice Track items into the playout log and recording the audio with your microphone. The recorded audio can then be sequenced with other tracks in the log and tweaked using the [Segue Editor](/PlayItLive/218/main-window/segue-editor). It is also possible to record voice tracks remotely, on another computer, and send these voice tracks to PlayIt Live. For more information on this, see [Remote Voice Tracking (Setup)](/PlayItLive/218/main-window/remote-voice-tracking-setup).
## Inserting voice tracks
Start by dragging tracks into the log for the hour you wish to voice track. Then drag a **Voice Track** item from the Special Items panel into the log for every voice link you would like to record between tracks.
The Special Items panel contains the Voice Track item (highlighted). Drag and drop a Voice Track item into the playout log to insert a voice track placeholder.
A placeholder will be shown in the playout log for each voice track item you need to record.
## Recording a voice track
Click the red circle record icon on the voice track you wish to record. The [Segue Editor](/PlayItLive/218/main-window/segue-editor) will be shown allowing you to record your voice.
If you are using voice tracking for the first time, go to **Settings...** and ensure that your microphone device and audition time settings are set up correctly. The audition time is the number of seconds of the end of the previous track you will hear when you start recording your voice track. Remember to click **OK** to save your settings.
To start recording your voice track, click the **Record** button, or press the **R** key.
A pop-up box will be shown if you have not purchased a Voice Tracking module licence.
Your recording will start and you will hear the end of the previous track. Start speaking to record your voice. The **Record** button will change to the **Play Next** button. Click the **Play Next** button to play the next track after the voice track, or press the **R** key again. The button will change to the **Stop** button. Click the **Stop** button to finish recording, or press the **R** key one more time.
## Editing a voice track
Your Segue Editor view should now look something like this, with the recorded voice track shown in the middle:
You can trim the audio of the recording by clicking the edges of the waveform to remove any unwanted silence at the start or end of the recording. You can also move the audio around by clicking and dragging the top bar of the waveform and edit the volume by clicking and dragging on the orange fade envelope. If the audio you have recorded is too quiet, use **Gain** to increase the volume.
You have now recorded your first voice track. Click **Next Voice** to save and record the next voice track, or click **Save** to save and return to the playout log.
## Voice tracks in the playout log
The voice track will now be shown loaded into the players if playing next, and shown in the log with the other tracks.
Voice tracks can be recorded as far in advance as you need. Just scroll down the playout log to the required time.
## Recording beds and imaging
When recording a voice track item, a **Carts** section is shown to the right hand side under the Audio Settings section. This can be used to record other audio alongside your voice track, for example, a bed (background music) or imaging such as station idents.
Simply drag and drop an audio file into the cart, or you can use the menu icon to load an existing track, file, or eject the cart. You must ensure carts are loaded before starting to record your voice track. Use the volume slider to adjust the volume of the audio if you want to talk over it.
## Related pages
- [Segue Editor](/PlayItLive/218/main-window/segue-editor)
- [Remote Voice Tracking (Setup)](/PlayItLive/218/main-window/remote-voice-tracking-setup)
- [Remote Voice Tracking (Usage)](/PlayItLive/218/main-window/remote-voice-tracking-usage)
---
# Remote Voice Tracking Setup
Premium Feature · Voice Tracking
VT [Purchase →](https://www.playitsoftware.com/Account/Subscription/VoiceTracking)
Purchasing the **Voice Tracking** module unlocks full remote voice tracking functionality. Until activated, voice tracks are preceded by an audio overlay. Remote voice trackers can send voice tracks to PlayIt Live without needing the module themselves. The number of users who can connect concurrently is determined by the number of users selected when purchasing. With the [Premium Module Bundle](https://www.playitsoftware.com/Account/Subscription/Bundle), an unlimited number of remote voice tracking users can connect at the same time.
PlayIt Live can be configured to allow users to connect from another computer at home or another studio and record voice tracks in your playout log. They can also edit the segues and add additional tracks from your library.
You will need to do the following to allow remote users to connect:
1. Enable remote connections by starting the built-in remote server.
2. Set up users, including username, password, and the hours they are allowed to edit in the playout log.
3. Add voice track placeholders to the playout log where users can record voice tracks.
4. Give the remote URL from step 1 and a username and password from step 2 to the user.
## 1\. Enable remote connections
From the main interface, go to **File > Enable remote connections...**
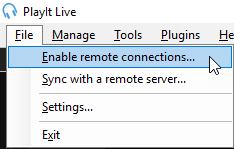
The File menu with the 'Enable remote connections...' option highlighted.
Expand the Advanced section, ensure that **Use HTTPS** is checked. The default server port of 25433 should be fine. Click **Start Server**.
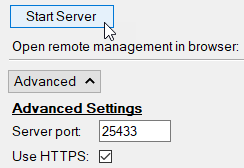
The Advanced Settings section showing the Start Server button, the Server port field set to 25433, and the Use HTTPS checkbox ticked.
This will enable remote connections to PlayIt Live. Depending on your configuration, you may be required to configure your Windows Firewall and network port forwarding to allow connections from outside your network. You can use the **Help me set up external access** button to assist you with this.

The 'Help me set up external access' button.
Under external access is a **remote URL** that will be used by the remote user to connect. Take note of this.

A green tick confirms that PlayIt Live is set up for external access. The remote URL is displayed below.
## 2\. Set up users
From the main interface, go to **Manage > Users...**
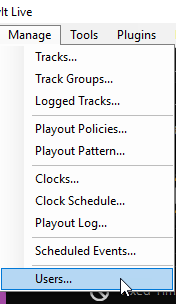
The Manage menu with the 'Users...' option highlighted at the bottom.
On the Manage Users window, click **Add New**. Enter a display name, username and password for the user. Use the **Remote Voice Tracking** grid to select the hours the user is allowed to remote voice track into.
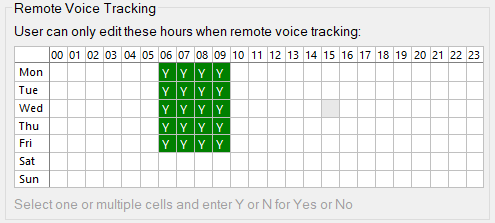
The Remote Voice Tracking permissions grid. Days of the week are listed on the left and hours 00-23 across the top. Green 'Y' cells mark the hours the user is allowed to voice track.
Add more users as necessary.
Click **OK** on the Manage Users window to apply the changes.
## 3\. Add voice track placeholders
Voice track placeholders are gaps in the playout log where users can record their voice tracks. You can add voice track placeholders to the playout log by dragging the **Voice Track** button from the Special Items panel onto the playout log.
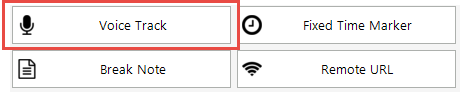
The Special Items panel showing the Voice Track button highlighted with a red border, alongside Fixed Time Marker, Break Note, and Remote URL buttons.
You can use the Go To Time button  to go straight to an hour to drop voice tracks for a future hour.
Alternatively you can add voice track placeholders directly via **Manage > Playout Log** or via a clock via **Manage > Clocks**. If a user starts a remote voice tracking session for an hour which has not yet been scheduled in the playout log, PlayIt Live will automatically schedule this hour.
## 4\. Connect a user
Once you have set up the above, contact your remote voice trackers sending them the remote URL and their username and password. Remote voice trackers can remote voice track in two ways:
1. **Recommended:** Voice tracking via a web browser (any operating system). Please refer to [Remote Voice Tracking (Usage)](/PlayItLive/218/main-window/remote-voice-tracking-usage).
2. Via PlayIt VoiceTrack (Windows only). Please refer to the PlayIt VoiceTrack documentation.
## Related pages
- [Voice Tracking](/PlayItLive/218/main-window/voice-tracking)
- [Remote Voice Tracking (Usage)](/PlayItLive/218/main-window/remote-voice-tracking-usage)
---
# Remote Voice Tracking Usage
Premium Feature · Voice Tracking
VT [Purchase →](https://www.playitsoftware.com/Account/Subscription/VoiceTracking)
Purchasing the **Voice Tracking** module unlocks full remote voice tracking functionality. Until activated, voice tracks are preceded by an audio overlay. Remote voice trackers can send voice tracks to PlayIt Live without needing the module themselves. The number of users who can connect concurrently is determined by the number of users selected when purchasing. With the [Premium Module Bundle](https://www.playitsoftware.com/Account/Subscription/Bundle), an unlimited number of remote voice tracking users can connect at the same time.
This page explains how to perform remote voice tracking into PlayIt Live via a web browser. You will need:
1. The remote access URL of your station. This usually ends with `.playitradio.com` and must start with `https://`.
2. Username
3. Password
4. A Chrome-based web browser such as Google Chrome, Microsoft Edge, or Vivaldi. These are available on any operating system.
## Connecting to PlayIt Live
Visit the remote access URL in a web browser. Select **Remote Voice Tracking**.
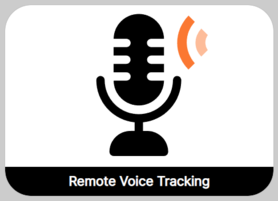
The Remote Voice Tracking option on the PlayIt Live remote access landing page, shown as a large button with a microphone icon.
Enter your **Username** and **Password** and click **Log In**.
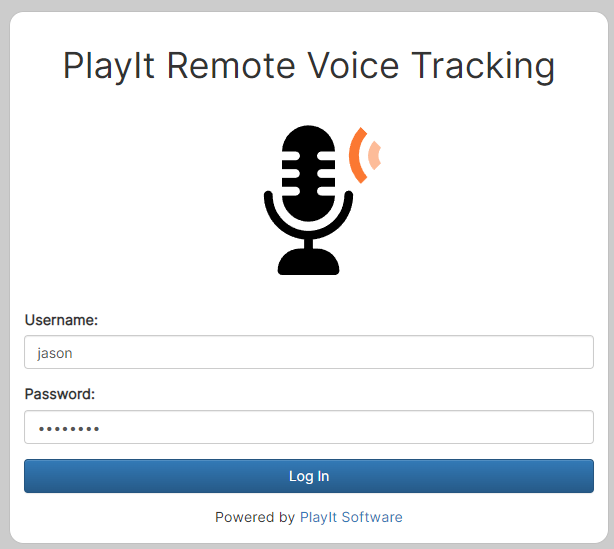
The PlayIt Remote Voice Tracking login page with Username and Password fields and a Log In button.
## Selecting a voice tracking slot
Select the voice tracking slot you wish to voice track into.
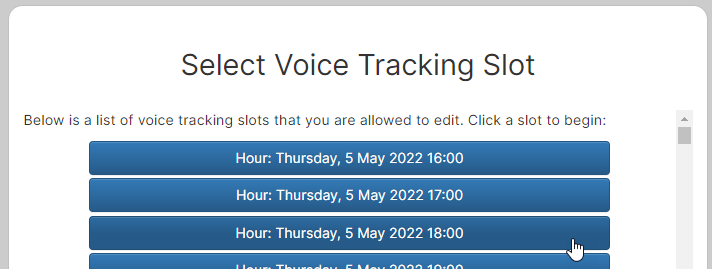
The Select Voice Tracking Slot page showing a list of available hour slots as blue buttons, each labelled with the date and time.
If there are no voice tracking slots available you will see the following message. Your station programmer must ensure there are voice tracking placeholder items in the hours you need to voice track.

A message stating 'No slots available' with instructions to contact your administrator and ensure voice track placeholders exist in the playout log.
## The remote voice tracking interface
After selecting a slot, the playout log items in the hour will be downloaded and the browser will begin to download the start and end of the audio for each of the tracks in the hour. Once the download has finished, the **Downloading** indicator will disappear.
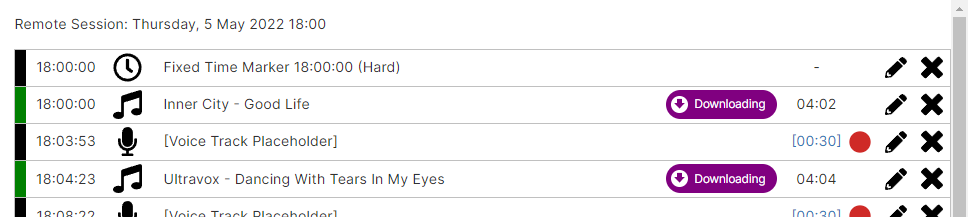
The remote voice tracking playout log showing tracks with their scheduled times, a purple 'Downloading' indicator next to tracks still being downloaded, and voice track placeholders with red record buttons.
On the right hand side, you will see the **Session Controls** section. Here you can switch to a different hour slot or end the remote session. It is important to end the remote session after you have finished so that other voice trackers can connect. The number of people who can connect at the same time depends on the Voice Tracking licence of the station you are connecting to, so if you are unable to connect you may need to wait for another voice tracker to finish, or contact your station administrator. The **Update queue** shows the commands that are being sent to the server. If these are showing as "Processed" you know these are being accepted successfully by the remote voice tracking server.
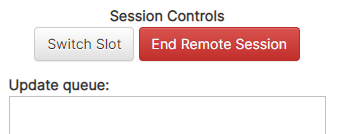
The Session Controls panel showing a 'Switch Slot' button, an 'End Remote Session' button, and the Update queue area.
## Recording a voice track
Click the red circle **Record** icon next to a Voice Track Placeholder item to launch the segue editor.

A voice track placeholder row in the playout log with a red arrow pointing to the record button on the right side.
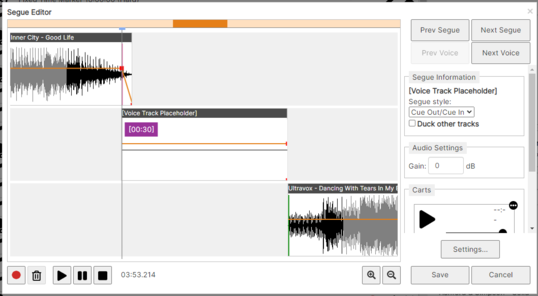
The web-based Segue Editor showing three audio waveforms stacked vertically (previous track, voice track placeholder, and next track), with playback controls at the bottom and segue settings on the right.
If this is the first time you have used voice tracking you will be prompted to allow the browser to access your microphone. You must click **Allow**.
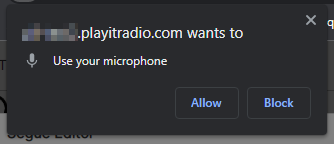
A browser permission dialog asking to use your microphone, with Allow and Block buttons.
Select the **Playback device** that will be used to play the audio and the **Microphone device** used to record. You should choose a microphone device that does not record the playback and you should wear headphones so the audio from the computer is not picked up by the microphone. Click **Save Changes**.
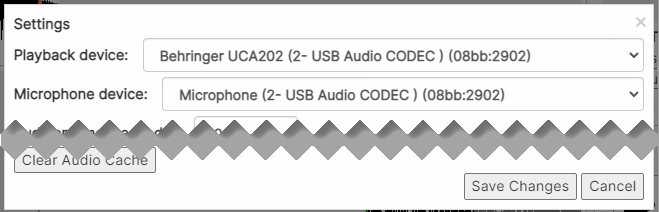
The Settings dialog showing dropdown menus for Playback device and Microphone device selection, with a Clear Audio Cache button and Save Changes/Cancel buttons.
To start recording your voice track, click the **Record** button, or press the **R** key.
The end of the previous track will start playing and your microphone will be recorded. Speak as the track is finishing. When you are ready to play the next track, click the **Play Next** button , or press the **R** key again. Finish recording your voice track, then click the **Stop** button , or press the **R** key one more time.
Depending on the performance of your computer, the browser may need to finish encoding your recorded audio. Once encoding has finished, the interface will be ready to use again.
## Editing a recorded voice track
After recording, the voice track waveform will appear in the segue editor between the previous and next tracks.
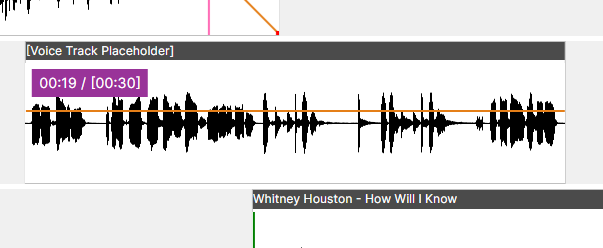
The Segue Editor showing a recorded voice track waveform between the previous and next tracks, with a purple duration label showing the recording length.
Click anywhere in the timeline to place the playback marker and click the **Play** button (or **spacebar**) to start playing the audio to review your recording. If you wish, you can use the **Duck other tracks** checkbox on the Segue Information section to bring down the audio of the previous and next track. The attenuation settings used here are the ones configured within PlayIt Live.
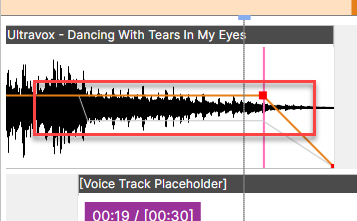
The Segue Editor showing the end of a track waveform with a volume fade-down envelope (orange line) and red square control points where the track overlaps with the voice track below.
You can also manually adjust the volume envelope by clicking on the orange line to create a point and then clicking again on that point to move it. Each point will be shown with a red square. To remove a point, drag the point up or down outside the waveform box.
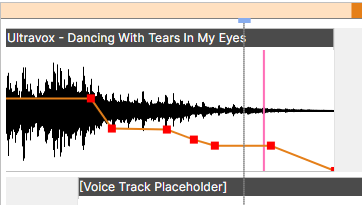
The volume envelope on a track waveform with multiple red square control points on the orange line, creating a custom fade shape.
You can change the overall volume of the track by editing the **Gain** section under **Audio Settings**. This is useful if your microphone is particularly quiet. In this case you would increase the gain value.
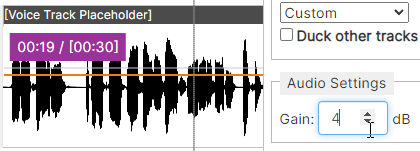
The Audio Settings section showing a Gain field set to 4 dB, next to a voice track waveform.
You can move your voice track recording relative to the previous or next item. To do so, click the title bar (where it says \[Voice Track Placeholder\]) and drag it to the desired location. If you move it from the left-hand side of the track, it will move relative to the previous track. If you move it from the right-hand side of the track, it will move relative to the next track. Moving a track is useful if you missed the point where you wanted to finish speaking and wanted to correct it without re-recording.
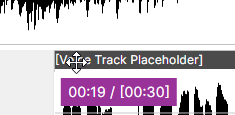
The title bar of a voice track being dragged, shown by the cursor grabbing the '\[Voice Track Placeholder\]' label.
## Saving and finishing
Once you have finished recording and tweaking your voice track segue, click **Next Voice** to advance to the next voice track item to record. Once you do this, the voice track you just recorded along with the segue information will be sent to the voice tracking server ready to broadcast.
Once you have finished with the segue editor, click **Save Changes** at the bottom.
You will notice in the main interface that the Update queue is populated with processed commands.
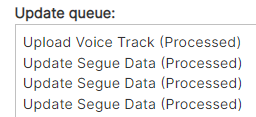
The Update queue section showing a list of processed commands including 'Upload Voice Track (Processed)' and several 'Update Segue Data (Processed)' entries.
It is worth regularly checking this to ensure the queue is being processed as expected.
## Adding more voice tracks
To add more voice tracks to the hour, drag and drop the **Add Voice Track** button to where you want to add the voice track. If you click the button, the voice track will be added to the end of the hour.

The 'Add Voice Track' button with a microphone icon, being dragged into position in the playout log.
## Track list
You can see a list of the tracks available on the remote voice tracking system that you can drag and drop into the hour. You can also filter by track group or use the search box.
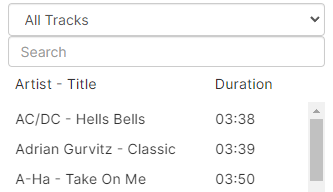
The Track List panel showing a dropdown filter set to 'All Tracks', a search box, and a list of available tracks with Artist, Title, and Duration columns.
## Re-ordering the hour
Click and drag any item row to move it within the hour.
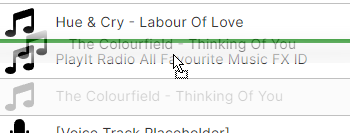
Items in the playout log being reordered by dragging. A track is shown being moved to a new position between other tracks.
## Segue editor carts
In the segue editor, the **Carts** feature allows you to record audio from your computer straight into your voice track. This is useful if you want to include a bed (background music) or a station ID (jingle). Carts are located on the right-hand side of the segue editor.
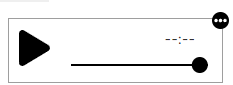
An empty cart slot with a play button and a volume slider.
To load a track, you can either drag and drop a track from your file system into the player, or you can click the menu icon (three dots) and select **Load File...**
Click the **Play** button to play the cart while recording a voice track and the cart will be included directly in the recording. Drag the slider on the cart to adjust the volume of the cart if it is too loud to talk over.
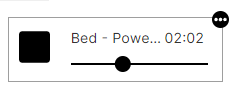
A cart slot loaded with a bed track, showing the track name, duration (02:02), and a volume slider.
## Audition time
The audition time is the amount of time the segue editor will play of the end of the previous track before you need to speak. This can be changed under the **Settings** button on the Segue Editor. If you increase the Audition Time, you will need to click **Clear Audio Cache** and refresh the browser to download more audio, otherwise you will hear silence if not enough audio has been downloaded.
## Finishing up
Remember to end your remote session by clicking the **End Remote Session** button so others can connect, if necessary. If there are any pending items in the update queue, it will wait for these to finish before logging you out. Do not close your browser until these have finished, otherwise your hour may be incomplete.
## Troubleshooting
If you are having trouble connecting to your station's remote access URL, try visiting [https://playitradio.com](https://playitradio.com) and pasting the address into the box and clicking **Connect**.
If you see the following error message, please contact your station administrator. The server has not been correctly configured for browser-based remote voice tracking.

An error message on a pink background stating 'A secure (HTTPS) connection is required to use Remote Voice Tracking in the browser. Please contact your administrator to select Use HTTPS under Advanced options when starting the server.'
## Related pages
- [Voice Tracking](/PlayItLive/218/main-window/voice-tracking)
- [Remote Voice Tracking (Setup)](/PlayItLive/218/main-window/remote-voice-tracking-setup)
---
# Priority Streams
Priority Streams is a feature allowing you to bring in an external stream such as a remote presenter/DJ or outside broadcast. When a priority stream is **live**, normal live-assist playout will stop and the priority stream will take over. If a priority stream is not connected or if it is too quiet or silent, it will not **go live** and not take over normal live-assist playout. The highest priority, **open**, **active** priority stream will take priority over normal live-assist playout.
Premium Feature · Advanced Scheduling
AS [Purchase →](https://www.playitsoftware.com/Account/Subscription/AdvancedScheduling)
Purchasing the **Advanced Scheduling** module unlocks Priority Streams. Start a free two-week trial from within PlayIt Live via **Help > Licensing Information**.
## How it works
When a priority stream is **open**, PlayIt Live will continuously try to connect to a live URL (for Live URL streams) or check for connections on the [direct stream connections port](/PlayItLive/218/settings/live-assist-mode) (for Direct Connection streams). If a connection is made and the volume level of the audio is sufficient (see [silence threshold](/PlayItLive/218/settings/live-assist-mode)) then the priority stream is considered **active**. Normal live-assist playout will fade and stop, or wait until the currently playing track finishes (depending on [settings](/PlayItLive/218/settings/live-assist-mode)) and then the priority stream will **go live**. If there are multiple **active** priority streams, the one with the highest priority will **go live**. If the priority is the same, the one that was **active** first will **go live**.
When the priority stream is no longer **active**, live-assist playout will resume its previous state (playing or stopped) or switch Automation ON, depending on [settings](/PlayItLive/218/settings/live-assist-mode).
To control the open state of a priority stream automatically you can use a **Change Priority Stream Open State** action under **Manage > Scheduled Events**, or add a **Scheduled Event Action** item in the playout log.
## Main interface
When one or more priority streams are open, priority stream players are displayed below the main live-assist players. These will indicate which priority streams are connected and playing.
### Priority stream panel
When one or more priority streams are open, priority stream players are displayed below the main live-assist players. Each priority stream shows its name, connection type, connection status and audio levels.
### Priority stream override message
When priority streams have overridden main live-assist playout, this message will be shown to indicate that normal playout has been paused and the priority stream is live.
## Scenarios
### Allowing a stream to take over live-assist automation at any time
1. Simply create an **open** priority stream.
2. Then stream audio to the live URL or to the direct stream connections port.
### Allow a stream to take over live-assist automation after the news
1. Create a **closed** priority stream 'Example'.
2. Add to the playout log the following items:
- Fixed Time Marker 00:00 (Hard)
- Scheduled Event Action: Change Priority Stream Open State: Close \[All Priority Streams\]
- Track: News
- Track: News Out Jingle
- Scheduled Event Action: Change Priority Stream Open State: Open 'Example'
- Then add additional items after that match the format of the streaming show. These will act as a backup if the priority stream is disconnected or does not turn up.
3. Then stream audio to the live URL or to the direct stream connections port. When the priority stream is **open** it will **go live**.
### Pre-buffer a stream to take over live-assist automation after the news
1. Create a **closed** priority stream 'Example'.
2. Add to the playout log the following items:
- Fixed Time Marker 00:00 (Hard)
- Scheduled Event Action: Change Priority Stream Open State: Close \[All Priority Streams\]
- Track: News
- **Scheduled Event Action: Change Priority Stream Open State: Pre-Open 'Example'**
- Track: News Out Jingle
- Scheduled Event Action: Change Priority Stream Open State: Open 'Example'
- Then add additional items after that match the format of the streaming show. These will act as a backup if the priority stream is disconnected or does not turn up.
3. Then stream audio to the live URL or to the direct stream connections port. When the priority stream is **open** it will **go live**.
Scheduled Event Actions can be added to clocks to template the automatic control of priority stream open states.
When creating clocks that contain Scheduled Event Actions to bring in priority streams, you should add track or track group items that match the format of the show that is being streamed. If the priority stream disconnects, PlayIt Live automation will be able to take over with relevant songs.
## Terminology
**Active:** An active priority stream is one that is **open**, is connected and has a volume level higher than the [silence threshold](/PlayItLive/218/settings/live-assist-mode). If a stream is disconnected or falls below the silence threshold for a period of time it will be considered inactive.
**Go Live:** The priority stream with the highest priority which is **active** will be faded up. Depending on the settings selected, the normal live-assist playout will fade and stop, or the current track will finish before the priority stream is faded up.
**Open:** PlayIt Live will try to connect to the live URL or check for audio for the user on the direct stream connection port. Open streams can **go live**.
**Pre-Open:** As Open, but the stream will not **go live**. This can be used to pre-buffer a stream before **opening** and **going live**.
**Closed:** PlayIt Live will not check or stop checking for connections for the priority stream and will stop **going live**.
## Related pages
- [Live-Assist Mode](/PlayItLive/218/main-window/live-assist-mode)
- [Priority Streams Overview](/PlayItLive/218/priority-streams/overview)
- [Manage Priority Streams](/PlayItLive/218/priority-streams/manage)
- [Edit Priority Stream](/PlayItLive/218/priority-streams/edit)
- [Live-Assist Mode Settings](/PlayItLive/218/settings/live-assist-mode)
---
# Decks Mode
Decks Mode emulates a cart machine where a disc jockey physically presses a button to control the cart. Tracks are loaded into individual decks by dragging and dropping from the track list or from a file on your file system.
To enable Decks Mode, go to [Settings > General](/PlayItLive/218/settings/general) and select the **Decks Mode (Classic)** option under player mode. You can configure the number of decks and audio device assignments in the [Settings > Decks Mode](/PlayItLive/218/settings/decks-mode) tab.
### Players
The deck players at the top allow you to load and play tracks. Each deck operates independently with its own playback controls. See [Decks Mode Player](/PlayItLive/218/main-window/decks-mode-player) for details on the individual deck controls.
### Segue button
The segue button between each pair of decks controls whether the next deck will automatically start playing when the current deck finishes. A green arrow indicates that automatic playback is enabled. Click the button to toggle this behaviour.
### QuickCarts panel
The QuickCarts panel provides instant playback buttons for jingles, sound effects, and other audio items. See [QuickCarts](/PlayItLive/218/main-window/quickcarts).
### Onscreen clock
The onscreen clock shows the current date and time. See [Onscreen Clock](/PlayItLive/218/main-window/live-assist-mode#onscreen-clock) for configuration options.
### Track list
The track list shows a list of tracks added to the system. Drag and drop a track from this list onto a deck to load it. See [Track list](/PlayItLive/218/main-window/live-assist-mode#track-list).
### Track search box
Use the search box to filter the track list. See [Track search box](/PlayItLive/218/main-window/live-assist-mode#track-search).
### Track Group selector
Filter the track list by track group using the dropdown. See [Track Group selector](/PlayItLive/218/main-window/live-assist-mode#track-group-selector).
---
# Decks Mode Player
A Decks Mode player is loaded with a track by dragging and dropping a track from the track list or from a file on your file system. When a track is loaded, it is automatically cued to the Cue In point if this is set on the track.
### Intro
The blue timer indicates the intro time remaining on the playing track.
### Elapsed
The green timer indicates the elapsed time on the playing track.
### Remaining
The red timer indicates the remaining time on the playing track.
### Track title
The track title is shown in the form Artist - Title.
### Out cue
The **Out** text is displayed when the **Out Cue** information is entered on the track.
### Progress bar
The progress bar indicates the duration that has elapsed for the track in the player. Click the seek checkbox to the left of the progress bar to enable seeking. When seeking is enabled, the elapsed portion of the progress bar will change to blue. Click on the progress bar to seek to that position in the track.
The progress bar features a number of highlightings:
- **Grey**: Cue in point
- **Silver**: Intro point
- **Pink**: Cue out point
### Play
The **Play** button starts playing the track.
### Pause
The **Pause** button temporarily suspends playback of the track. Click this again to resume playback.
### Stop
The **Stop** button fades out and stops the track. The stop button is replaced with the **Eject** button when the track is not playing or no track is loaded into the player.
The **Eject** button unloads the track from the deck. The eject button is shown when the track is not playing. When a track is playing, it is replaced with the **Stop** button.
### Deck number
The deck number identifies the deck player.
### Segue button
The segue button controls whether the next deck will automatically start playing when the current deck finishes. A green arrow indicates that the next deck will automatically play. Click the button to toggle this behaviour.
---
# QuickCarts
QuickCarts are single-click one-shot players. They are typically used to play jingles, promos, or beds. Simply drag and drop a track from the track list or an audio file from Windows Explorer onto a QuickCart to load it.
QuickCarts can be configured as a panel of rows at the bottom of the main window, or as a separate window (like a cartwall) which can be placed on a separate monitor. Multiple pages can also be configured.
### Paging controls
Use the left and right arrows to navigate between pages. Click the page name to open the [QuickCarts Pages](/PlayItLive/218/main-window/quickcarts-pages) window where you can add, rename, and reorder pages.
### Row of QuickCarts
QuickCarts are displayed in one or more rows. Drag and drop a track or audio file onto a QuickCart to load it. When loaded, the cart displays the artist and title of the track with the remaining time below.
In Playback mode, click a cart to start playing. Click again to fade out and stop. Click once more to force stop immediately.
When playing, the cart shows a progress bar as the background and a status of **PLAYING**. A looping cart shows **LOOPING** and a cart that is finishing its loop shows **FINISHING**. While a cart is fading out, the cart turns a dark shade of grey and the status **FADING** is shown.
By default the playback sequence is Play → Fade → Stop. This can be changed per cart from the [Edit QuickCart](/PlayItLive/218/main-window/edit-quickcart) window, for example to immediately stop without fading (Play → Stop), or to cease looping first (Play → Cease loop → Fade → Stop).
If a cart is configured as **Solo**, playing it will fade out and stop all other playing carts. It will also stop if any other cart starts playing.
**Segue arrows** allow you to create automatic transitions between QuickCarts. In Edit mode, click the space between two adjacent carts to set a green arrow indicating the segue direction. When the first cart reaches the cue out point it will automatically trigger the next cart in the direction of the arrow. Click the arrow to reverse direction, or click once more to remove the segue.
When a QuickCart plays, other players can be ducked. See [Settings](/PlayItLive/218/settings/quickcarts) to configure this.
### Page indicator
The dots indicate the current page position relative to the other pages. Click a dot to navigate directly to that page.
### Playback mode
Click the hand button to enter Playback mode. In this mode, clicking a cart plays, fades, or stops it.
### Edit mode
Click the pencil button to enter Edit mode. In this mode, clicking a cart opens the [Edit QuickCart](/PlayItLive/218/main-window/edit-quickcart) window where you can select a track or file and override the artist and title. Right-click to eject a cart. While in Edit mode, hold **Ctrl** to temporarily switch to Playback mode.
### Paint mode
Click the paint bucket button to enter Paint mode. In this mode, clicking a cart changes its background colour. Double-click the paint button to select a new colour. While in Paint mode, hold **Ctrl** to temporarily switch to Playback mode.
## Gain slider
The gain slider appears on each loaded cart and allows you to adjust its playback volume independently. This is useful for balancing levels across carts recorded at different volumes without modifying the original audio files.
The gain slider visibility is configured under **File > Settings > QuickCarts**:
- **When loaded**: The gain slider is always visible on loaded carts.
- **When editing**: The gain slider is only shown in Edit mode.
- **Never**: The gain slider is not displayed. Previously set gains still apply.
## Related pages
- [QuickCarts Pages](/PlayItLive/218/main-window/quickcarts-pages)
- [Edit QuickCart](/PlayItLive/218/main-window/edit-quickcart)
- [Settings: QuickCarts](/PlayItLive/218/settings/quickcarts)
---
# QuickCart Pages
The QuickCart Pages window is used to manage the pages in the QuickCarts panel or window. All changes are applied immediately.
### Page list
The page list shows all pages in order. Select a page to rename it, delete it, or change its position. Double-click a page to make it the current page and navigate to it in the main window.
### Add Page
Click **Add Page** to add a new page to the bottom of the list.
### Rename Page
Click **Rename Page** to rename the selected page.
### Delete Page
Click **Delete Page** to delete the selected page. A confirmation will appear before the page is deleted. It is not possible to delete the last remaining page.
### Move Up
Click **Move Up** to move the selected page one position up in the list.
### Move Down
Click **Move Down** to move the selected page one position down in the list.
### Close
Click **Close** to close the window.
---
# Edit QuickCart
The Edit QuickCart window is opened by clicking a cart in Edit mode. It lets you configure the audio source, display name, background colour, and playback behaviour for an individual QuickCart.
### Type
Choose the audio source type:
- **Track**: Select a track that has been added to PlayIt Live.
- **File**: Select a file directly from the file system, without adding it to PlayIt Live.
### Track selection
Click the track link to select a different track. This section is only available when the **Track** type is selected.
### File selection
Shows the file path of the selected audio file. When the **File** type is selected, click **Browse...** to select a different audio file.
### Artist
Check the **Artist** checkbox and type in the box to override the artist name displayed on the QuickCart.
### Title
Check the **Title** checkbox and type in the box to override the title displayed on the QuickCart.
### Background colour
Click the colour box to select a custom background colour for the QuickCart. Click **Use default** to revert to the default colour (blue).
### Solo
When **Solo** is checked, playing this cart will fade out and stop all other playing carts. This cart will also stop if any other cart starts playing. Solo is designed to ensure only one cart plays at a time.
### Loop
When **Loop** is checked, the cart will loop between the Loop A and Loop B cue points. If Loop B is not set, the cart loops from the end. If Loop A is not set, the cart returns to the Cue In point when the loop restarts.
### Playback sequence
The playback sequence determines how the cart behaves when clicked in the main window. By default, the sequence is **Play > Fade out > Stop**, meaning each click advances the cart through these states. Click any step to change it.
For looping carts, additional options are available: **Cease loop** (stop the cart from looping, allowing it to play to the end) and **Go to Loop B** (jump to the end of the loop, useful for beds with a specific ending).
### Cue points
Set the **Cue In** point where playback begins, and the **Cue Out** point where a segued cart will start. Use the **Set** button while listening to mark the current position. Use the **Test** button to preview from the set point.
For looping carts, **Loop A** and **Loop B** cue points also appear here.
### Waveform
The waveform shows the audio volume over time. Cue points are overlaid as coloured markers. Double-click on the waveform to start playing from that position. Use the mouse wheel to zoom in and out.
### Playback buttons
Use **Play** and **Stop** to preview the cart. The audio device used to play back the audio can be configured in [Settings](/PlayItLive/218/settings/quickcarts). Use **Back** and **Forward** to jump to the start or end of the track. Use the **Zoom** buttons or the mouse wheel to adjust the waveform zoom level.
### Analyse
Click **Analyse** to automatically detect the Cue In point based on the silence at the start of the track.
### OK
Click **OK** to save changes and close the window.
### Cancel
Click **Cancel** to close the window without saving changes.
---
# Pre-Fade Listen
The Pre-Fade Listen window allows you to listen to a track before it airs.
Click the **Play** and **Stop** buttons to control playback. You can double-click on a part of the waveform to advance to a position in the track. Use the mouse wheel to zoom in and out of the waveform for a more precise position selection. Audio will play back on the audio device you have selected under [Settings > Track Editor Audio Device](/PlayItLive/218/settings/general#track-editor-audio-device).
---
# Track Play History
Premium Feature · Advanced Scheduling
AS [Purchase →](https://www.playitsoftware.com/Account/Subscription/AdvancedScheduling)
Purchasing the **Advanced Scheduling** module unlocks the full play history across days and hours. Without the module, only the most recent play is shown.
The Track Play History window provides a visual representation of when and how often a track and its artist are played over a selected time period. This supports in-depth analysis and informed decisions in music scheduling.
## Accessing Track Play History
To view the Track Play History for a specific track:
- From the main window, on a playout log item, select the three dots (or right-click) and select **Track Play History...**
- From the main window, on the track list, right-click a track and select **Track Play History...**
## Reading the Grid
The window displays a grid where:
- Rows represent days.
- Columns represent hours of the day, from 00 to 23.
- A green music note icon indicates the track was played during the corresponding hour and day.
- A blue person icon indicates the artist of that track was played during the corresponding hour and day.
For times in the future, the icons indicate the track or artist is scheduled for that hour.
## Practical Uses
**Track Play Frequency:** Instantly see how often a track is played, helping to avoid overplay or underplay of particular songs or artists.
**Play Pattern Analysis:** Identify patterns in track plays to optimise music rotation and scheduling.
**Artist Exposure:** Monitor how frequently songs from a particular artist are played, helping to maintain a diverse playlist.
---
# User Login Window
The Log In window appears when PlayIt Live is configured to require users to log in before use. Enter your username and password and click **Log In**.
If you have just installed PlayIt Live you will not see this window. To require users to log in, go to **Manage > Users** and click **Require users to log in to use PlayIt Live**.
## Changing Your Password
If your administrator has set up your account and requires you to change your password on first login, you will be prompted to enter and confirm a new password. Click **Change Password** to continue.
## Forgotten Admin Password
If you are an administrator and have forgotten your password, you can reset it by logging into your PlayIt Software account on the PlayIt Software website with the same account as that who has licenced the software:
1. Visit [https://www.playitsoftware.com/Account/Dashboard/ResetAdminPassword](https://www.playitsoftware.com/Account/Dashboard/ResetAdminPassword) and verify that the Client ID matches. You must be signed in to the PlayIt Software account that licenced the software; attempting to reset the admin password from any other account will not work.
2. Enter **Reset Code Part 1** into the website, which will generate **Reset Code Part 2**.
3. Enter Part 2 into the box in PlayIt Live and click **Reset**.
4. You will be prompted to change your password.
---
# Settings
The Settings window allows you to configure all aspects of PlayIt Live. Open it from the **File** menu by clicking **Settings...**.
It is organised into the following sections:
- [**General**](/PlayItLive/218/settings/general) - Theme, font size, time/date display, fade time, player mode selection, track editing/monitoring, and user login.
- [**Live-Assist Mode**](/PlayItLive/218/settings/live-assist-mode) - Number of players, audio device assignments, segue settings, scheduling settings, and user interface options for Live-Assist mode.
- [**Voice Tracking**](/PlayItLive/218/settings/voice-tracking) - Microphone recording device, audition time, recordings folder and format, ducking, cue points, and playout log editing mode.
- [**Advanced Scheduling**](/PlayItLive/218/settings/advanced-scheduling) - Priority streams, fitting to time, and other advanced scheduling options.
- [**Decks Mode**](/PlayItLive/218/settings/decks-mode) - Number of decks, audio device assignments, and Remote Studio mic device for Decks mode.
- [**QuickCarts**](/PlayItLive/218/settings/quickcarts) - QuickCart layout, audio devices, ducking, and gain slider options.
- [**Keyboard**](/PlayItLive/218/settings/keyboard) - Keyboard shortcut bindings and global trigger settings.
- [**Web Links**](/PlayItLive/218/settings/web-links) - Custom web links displayed in the main window.
- [**Advanced**](/PlayItLive/218/settings/advanced) - Playback buffer length, clock offset, ASIO devices, and additional advanced settings.
---
# General
The General tab contains settings for the overall appearance and behaviour of PlayIt Live.
The General tab of the Settings window.
### Section Tabs
The tab strip at the top of the Settings window allows you to switch between the different settings sections.
### Language
Select the language used throughout the PlayIt Live user interface. A change of language only takes effect after you restart PlayIt Live. If you switch to a language by accident and can no longer read the menus, see [Changing the language back](#changing-the-language-back) at the bottom of this page.
### Theme
Select the visual theme for PlayIt Live. You can choose between **Dark** and **Light**, which change the colour scheme of the application.
### Track List Font Size
Set the font size used in track lists throughout the application.
### Track List Double-Click Behaviour
Choose what happens when you double-click a track in a track list. Options include playing the track, editing its properties, or adding it to the playout log.
### Time and Date Display
Configure the time and date format used throughout the application. You can choose between 12-hour and 24-hour time, and between day-first and month-first date formats. You can also enable or disable the on-screen clock.
### Fade Time
Set the default fade time in seconds. This is the duration used when fading between tracks. This also applies when tracks are segued in Live-Assist Mode.
### Flash Players
When enabled, players will flash when the remaining time drops below the specified number of seconds. This provides a visual warning that a track is about to end.
### Track Editor Audio Device
Select the audio device used for previewing and editing tracks. This is the device used when you audition a track from the track editor or track list. The track editor audio device is also used for the player in the Pre-Fade Listen window and the segue editor.
### Silence Analysis
Configure the cue-in and cue-out thresholds for silence analysis. These values determine at what volume level (in dB) a track is considered to have started or ended. By default, the Cue In threshold is -62 dB and the Cue Out threshold is -14 dB. Silence analysis is used to automatically set cue points on imported tracks. These settings are also applied when a file is dragged and dropped from the file system onto a player, helping to achieve the best sounding gapless playback.
### Live-Assist Mode
Select Live-Assist Mode as the player mode. In Live-Assist mode, tracks are queued in a playout log and played sequentially through a set of players.
### Decks Mode
Select Decks Mode as the player mode. In Decks Mode, each deck operates independently, similar to traditional broadcast mixing desks.
### User Login
When enabled, users must log in before using PlayIt Live on this computer. This is primarily used to restrict user permissions, and applies to logging in locally on the same computer as PlayIt Live. This is the same checkbox available under [Manage > Users](/PlayItLive/218/users/manage).
### OK
Click **OK** to save your settings and close the Settings window. If there are any errors that need correcting a popup box will be displayed.
### Cancel
Click **Cancel** to discard your changes and close the Settings window.
## Changing the language back
If you switch to a language by accident and can no longer read the menus, you can still find your way back to this setting. Open the menu at the top left (the **File** menu), choose the **Settings...** item, then use the **Language** setting at the top of the **General** tab. The table below gives those two menu labels in each language:
Language
File menu
Settings item
Deutsch (Deutschland)
Datei
Einstellungen...
English (United Kingdom)
File
Settings...
English (United States)
File
Settings...
Español (España)
Archivo
Configuración...
Español (Latinoamérica)
Archivo
Configuración...
Français (France)
Fichier
Paramètres...
Italiano (Italia)
File
Impostazioni...
Nederlands (Nederland)
Bestand
Instellingen...
Português (Brasil)
Arquivo
Configurações...
---
# Live-Assist Mode
The Live-Assist Mode tab contains settings for the number of players, audio device assignments, segue behaviour, scheduling, and user interface options when using Live-Assist mode.
The Live-Assist Mode tab of the Settings window.
### Number of Players
Select the number of players to display in Live-Assist mode. You can choose between two, three, or four players. More players allow you to have more tracks loaded and ready to play simultaneously.
### Player Audio Device Assignments
Assign an audio output device to each player. By default, all players use the same device, but you can assign different devices to different players for multi-output setups.
### Remote Studio Mic Device
Select the audio device used for Remote Studio microphone playback in Live-Assist mode.
### Default Segue
Choose the default segue behaviour when one track finishes:
- **Next** - Automatically start the next track in the playout log.
- **Stop** - Stop playback and wait for the presenter to start the next track.
### Sweeper Segue and Duck Settings
Configure the default sweeper segue style and ducking behaviour. Sweepers can overlap with the previous track, and ducking reduces the volume of the playing track while the sweeper plays.
### Scheduling Settings
Configure the built-in log scheduler and schedule-ahead settings. When the built-in log scheduler is enabled, PlayIt Live will automatically schedule tracks ahead by the specified number of hours and minutes.
#### Schedule ahead
By default, PlayIt Live will schedule at least 15 minutes ahead when the Log Scheduler is ON. Use this setting to increase the amount that is scheduled ahead, up to 24 hours. PlayIt Live schedules in full hours, so scheduling ahead by at least 15 minutes will trigger the next hour to schedule at xx:45 past the hour (15 minutes before the end of the hour).
#### Default Track Scheduling Strategy
PlayIt Live uses a scheduling strategy when deciding what tracks to select for Track Group clock items or track groups in the Playout Pattern. The options are:
- **Smart Selection** - Selects a track using a weighted random algorithm. A track played longer ago is given a larger weight, increasing its chance of being selected.
- **Random** - Selects a track entirely at random from the track group.
- **Most Rested** - Selects the track from the track group that was played longest ago.
#### Clock scheduling mode
Choose how PlayIt Live decides which clock applies to each hour:
- **Clock Grids** - Use the [Clock Grids](/PlayItLive/218/scheduling/clock-grids) window, where you build reusable weekly templates with layers, recurrence, and date ranges. This is the preferred mode for new schedules.
- **Legacy (Calendar)** - Use the older calendar-based clock schedule.
Only one mode drives clock selection at a time. Switching modes does not delete anything: the data for the mode you switch away from becomes inactive but remains stored, so you can switch back at any time.
### Item Colouring
Choose how track group colours are displayed in the playout log:
- **Edge only** - Show a coloured strip on the left edge of each item.
- **Entire row** - Colour the entire row background.
### Show Frequency Spectrum
When enabled, a real-time frequency spectrum analyser is displayed alongside the players.
### Playout Log Font Size
Set the font size used for the live playout log on the main interface. A larger font makes the upcoming items easier to read at a glance, which is useful for presenters reading the running order from across the studio or on a larger studio monitor. A smaller font fits more items on screen at once.
You can choose from the sizes **8**, **10**, **12**, **14** and **16**. The default is **10**. The playout log headings, warnings, and other text scale in proportion to the size you choose, so the whole log stays balanced.
To change the size, select a different value from the dropdown and click **OK**. The change is applied to the live playout log immediately, with no need to restart PlayIt Live.
---
# Voice Tracking
The Voice Tracking tab contains settings for recording and managing voice tracks. Voice Tracking allows presenters to pre-record links between tracks.
Premium Feature · Voice Tracking
VT [Purchase →](https://www.playitsoftware.com/Account/Subscription/VoiceTracking)
Voice Tracking requires the **Voice Tracking** module. Until you purchase it, recorded voice tracks are preceded by an audio overlay.
The Voice Tracking tab of the Settings window.
### Licence Status
Shows the current licence status for the Voice Tracking premium module. If Voice Tracking is not included in your licence, this will display a message explaining how to activate it. Without a valid Voice Tracking module, all voice tracks will be preceded by an audio notice requesting that you purchase the module.
### Microphone Recording Device
Select the audio input device used for recording voice tracks. This should be set to the microphone or audio interface you use for recording. The device chosen here should not record audio that is played back, to avoid music from being recorded into the voice track recording.
### Audition Time
Set the number of seconds from the end of the previous track that are played when you start recording a voice track. This determines how much context the presenter hears while recording a voice track.
### Recordings Folder
Enter the folder where voice track recordings will be saved. Use the **Browse...** button to select a folder. Ensure the currently logged-in user has write access to this location, and that there is sufficient disk space to store recordings at this location.
### Recordings Format
Select the audio format for voice track recordings. You can choose from different formats and quality levels. Higher quality recordings sound better but take up more disk space.
### Duck Other Players
When enabled, the volume of other players is reduced while a voice track is playing. You can set how much the volume is reduced (the duck amount, as a percentage) and how quickly the change is applied (the duck speed).
### Cue Point Analysis
When enabled, PlayIt Live automatically detects cue points for voice track recordings. Set the cue-in and cue-out thresholds (in dB) to control the volume levels at which the voice track is considered to start and end.
### Default Gain
Set the default gain (in dB) applied to newly recorded voice tracks. This can be used to boost or reduce the volume of voice tracks relative to music tracks.
### Default Playout Log Editing Mode
Choose the default editing mode when opening the playout log for voice tracking:
- **Only voice tracks** - Only voice track slots are editable.
- **Full playout log editing** - All items in the playout log can be edited, including adding, removing, and reordering tracks.
This setting can be overridden on a per-user basis.
---
# Advanced Scheduling
The Advanced Scheduling tab contains settings for priority streams, fitting to time, and other advanced scheduling features.
Premium Feature · Advanced Scheduling
AS [Purchase →](https://www.playitsoftware.com/Account/Subscription/AdvancedScheduling)
Advanced Scheduling requires the **Advanced Scheduling** module. Start a free two-week trial from within PlayIt Live via **Help > Licensing Information**.
The Advanced Scheduling tab of the Settings window.
### Licence Status
Shows the current licence status for the Advanced Scheduling premium module. If Advanced Scheduling is not included in your licence, this will display a message explaining how to activate it.
### Fitting To Time
Configure how PlayIt Live fits scheduled content to time markers. Adjust the target threshold (how close to the target time the scheduler should aim), the number of attempts, and the time allowed per fit calculation. These settings control the precision and performance of the fitting algorithm.
By default, **Target threshold** is set to 30 seconds, **Number of attempts** to 25 and **Seconds per fit** to 2 seconds. This means that PlayIt Live will generate up to 25 combinations of playout log items and pick the first (or best) one that fits within the target threshold.
Decreasing **Target threshold** or increasing **Number of attempts** or **Seconds per fit** will **increase** the time it takes to schedule playout log items.
### Priority stream audio device
Select the audio device used for monitoring priority streams. Priority streams allow external audio sources to take priority over scheduled playout.
### When a priority stream becomes active
Choose what happens to the currently playing track when a priority stream becomes active:
- **Fade the currently playing track immediately** - The current track fades out smoothly.
- **Wait for the currently playing track to finish** - The priority stream waits until the current track finishes.
### When no more priority streams are active
Choose what happens when there are no more active priority streams:
- **Return to the previous playing state** - PlayIt Live returns to whatever it was doing before the priority stream started.
- **Turn automation ON and start playing** - Automation is enabled and playout continues from the schedule.
### Silence Detection
Configure when a priority stream is considered inactive based on silence. Set the volume threshold (in dB) and the duration (in seconds) that the stream must be below this level before it is considered inactive.
### Direct Stream Connections
When enabled, PlayIt Live listens for direct stream connections on the specified port. This allows external applications to send audio directly to PlayIt Live as a priority stream.
Remote users can connect using any Icecast-compatible encoder such as the Internet Broadcast plugin, BUTT, or Rocket Broadcaster. To set up a user to connect, create a user under Manage > Users. The following details can be used by the remote user to connect:
Setting
Value
Server Type
Icecast
Server Address
Your external IP address
Server Port
The port specified here in settings (remember to tick the checkbox to allow connections)
Username
PlayIt Live user specified under Manage Users
Password
PlayIt Live user password specified under Manage Users
Mount
/
Other Advanced Scheduling features include Auto Adjust, Advert Scheduling, Track Dayparting, Daypart Separation and Hook Sequences.
---
# Decks Mode
The Decks Mode tab contains settings for the number of decks, audio device assignments, and Remote Studio Microphone Playback Device when using Decks mode.
The Decks Mode tab of the Settings window.
### Number of full row decks:
Set the number of full-row decks displayed in Decks mode. Each deck operates independently and can be loaded with a different track. There is no fixed upper limit on the number of decks you can select, but the maximum is constrained by your screen resolution.
### Deck Audio Device Assignments
Assign an audio output device to each deck. By default, all decks use the same device, but you can assign different devices for multi-output setups.
### Remote Studio Microphone Playback Device:
Select the audio device used for Remote Studio microphone playback in Decks mode.
---
# QuickCarts
The QuickCarts tab contains settings for configuring QuickCart panels. QuickCarts provide instant playback of jingles, sound effects, and other short audio clips.
The QuickCarts tab of the Settings window.
### Docked to Bottom
Enable or disable the QuickCarts panel docked to the bottom of the main window. When enabled, you can configure the number of rows, carts per row, and audio device for this panel.
### Number of QuickCart Rows
Set the number of rows of QuickCart buttons in the docked panel.
### Number of QuickCarts Per Row
Set the number of QuickCart buttons displayed in each row. As more QuickCarts are displayed per row they will be resized to fit the available space on the screen.
### QuickCart Audio Device
Select the audio output device used for playing QuickCarts in the docked panel.
### Separate Window (Cartwall)
Enable or disable the separate Cartwall window. This provides an additional set of QuickCarts in its own floating window with independent layout and audio device settings.
### Enable right-click eject in Playback mode
When enabled, right-clicking a QuickCart in Playback or Edit mode will eject the currently loaded cart. When the setting is off, eject only works in Edit mode.
### Duck Other Players
When enabled, the volume of other players is reduced while a QuickCart is playing. You can set how much the volume is reduced (the duck amount, as a percentage) and how quickly the change is applied (the duck speed).
### Show Gain Slider
Choose whether to display a gain slider on each QuickCart button, allowing presenters to adjust individual QuickCart volumes.
---
# Keyboard
The Keyboard tab allows you to configure keyboard shortcuts for common actions in PlayIt Live.
The Keyboard tab of the Settings window.
### Command/Shortcut List
The list shows all available commands and their current keyboard shortcuts. Select a command from the list to view or change its shortcut in the editing panel below.
### Edit Keyboard Binding
Use the modifier checkboxes (CTRL, ALT, SHIFT) and click the key box to define the shortcut for the selected command. Click **Clear** to remove an existing shortcut.
For example, to bind **CTRL+Right** to move to the next QuickCart page, select the CTRL checkbox and click the '' text box. When prompted to press a key, press the Right arrow on your keyboard. The keyboard shortcut is now configured.
### Global Trigger
Enable this checkbox to make the shortcut work even when PlayIt Live is not the active window. This is useful for controlling playback from other applications.
Please think carefully when choosing keyboard shortcuts. For example, it is not recommended to configure the Space Bar as a keyboard shortcut. This could interfere when you are typing into the search box and inadvertently trigger an action.
---
# Web Links
The Web Links tab allows you to configure custom web links that are displayed in the main window. These links can be used to quickly look up the current track or access websites relevant to your broadcast, such as a search engine, music databases, station websites, or social media.
Web Links can be used to quickly search the web for an artist or track by right-clicking a track on the main interface (or expanding the track's context menu). Each configured link appears as an entry on that right-click menu, and selecting an entry opens the link in your default browser with the current track's details substituted in.
The Web Links tab of the Settings window.
### Web Links List
The list shows all configured web links with their display text and URL. Select a link to edit or reorder it.
- **Display Text** - The text displayed on the right-click context menu, e.g. `Wikipedia: {artist}` would display `Wikipedia: ABBA`. The `{artist}` placeholder can be used here so the menu entry reflects the current track.
- **URL** - The URL (web address) opened in the browser. Placeholders for `{artist}`, `{title}` and `{album}` can be used and are automatically replaced with the currently playing track's artist, title and album.
- **Order** - The order in which the links appear on the context menu. This can be changed using the Up/Down buttons.
### Actions
Use the buttons to manage your web links:
- **Add...** - Add a new web link.
- **Edit...** - Edit the selected web link.
- **Up** / **Down** - Reorder the selected link.
- **Reset to defaults...** - Restore the default set of web links.
## Examples
Display Text
URL
Comments
Wikipedia: {artist}
`https://www.duckduckgo.com/?q=\{artist} band site:wikipedia.org`
Uses DuckDuckGo to find the first result matching the search. The backslash `\` denotes this.
Wikipedia: {artist} - {title}
`https://www.duckduckgo.com/?q=\{artist} - {title} song site:wikipedia.org`
Uses DuckDuckGo to find the first result matching the search. The backslash `\` denotes this.
Google: {artist} - {title}
`https://www.google.com/search?q={artist} - {title}`
Wikipedia: {artist}
`https://en.wikipedia.org/w/index.php?search={artist}`
Directly search Wikipedia.
Wikipedia: {artist} - {title}
`https://en.wikipedia.org/w/index.php?search={artist} - {title}`
Directly search Wikipedia.
All Music: {artist}
`https://www.allmusic.com/search/all/{artist}`
Discogs: {artist}
`https://www.discogs.com/search/?q={artist}&btn=&type=artist`
Discogs: {artist} - {title}
`https://www.discogs.com/search/?q={artist} - {title}&type=release`
MusicBrainz: {artist}
`https://musicbrainz.org/search?type=artist&query={artist}`
MusicBrainz: {artist}
`https://www.duckduckgo.com/?q=!mbartist {artist}`
Using DuckDuckGo Bangs (DuckDuckGo has a feature called Bangs which makes it easy to query other services: see [https://duckduckgo.com/bang](https://duckduckgo.com/bang)).
---
# Advanced
The Advanced tab contains low-level audio and system settings. These settings should only be changed if you are experiencing specific issues or have been advised to change them.
The Advanced tab of the Settings window.
### Playback Buffer Length
Set the playback buffer length in milliseconds. A longer buffer provides more stable playback but introduces more latency. The default value works well for most systems. Only increase this if you experience audio glitches or dropouts. A restart of PlayIt Live is required to apply the change.
### Clock Offset
Adjust the clock to account for a broadcast delay. Positive values move the clock forward, negative values move it back. A restart of PlayIt Live is required to apply the change.
### ASIO Devices
Select which ASIO audio devices are available for use in PlayIt Live. ASIO provides low-latency audio output and is recommended for professional broadcast setups. Only devices that are checked in this list will appear in the audio device dropdowns throughout the application. ASIO devices must be explicitly initialised to avoid potential conflicts with the equivalent standard driver loaded by PlayIt Live.
### Additional Advanced Settings
A text field for entering additional advanced settings as key-value pairs. These settings are used for specialised configurations and troubleshooting. Only modify these if directed by PlayIt Software support. You may need to restart PlayIt Live for changes to take effect.
---
# Tracks
Tracks represent audio files that can be imported into PlayIt Live. With each track, additional information is stored to assist playback and announcing on air. This information includes:
- **Type** - The type of the track, which can be used for track group filtering, e.g. Song or Station ID. By default this is set to Inferred, which means the type is determined automatically from the tags, artist, title, and duration. See [Inferred Type rules](#inferred-type-rules) below.
- **Artist** - The performer of the track, typically read from the file tags when the track is imported.
- **Title** - The title of the track, typically read from the file tags when the track is imported.
- **Duration** - The total length of the audio file.
- **Cue In** - The position in the track where a player should start playing. This is typically where the silence ends at the start of the track and the audible audio begins.
- **Intro** - The intro point of the track. This can be used by the segue editor to overlap the intro with the previous track.
- **Cue Out** - The position in the track where it is considered to be finished. If a track is fading out, this should be shortly before the end of the fade. When the cue out point is reached in Live-Assist mode, this will cause the track to segue into the next.
- **Out Cue** - The style at which the track ends (e.g. fade out, sustain).
- **Genre** - The genre of the track.
- **Year** - The year the track was released.
- **Album** - The album the track belongs to.
- **Tags** - Semicolon-separated tags for categorising the track.
- **Comments** - Free-text notes about the track. This is displayed on the playout log when clicking an item.
- **ISRC** - The International Standard Recording Code for the track.
- **Record Label** - The record label of the track.
- **Track ID** - A unique identifier for the track, which can be used for external system integration.
## Track types
The following track types are available:
- **Song** - A music track.
- **Station ID** - A short station identification jingle.
- **Promo** - A promotional item.
- **Commercial** - A commercial or advertisement.
- **News** - A news bulletin or item.
- **Bed** - A music bed, typically used as background audio.
- **Station ID + Bed** - A combined station identification and music bed.
The track type can be set manually on the [Edit Track](/PlayItLive/218/tracks/edit-track) window, or left as Inferred to be determined automatically.
## Inferred Type rules
When a track's type is set to Inferred, PlayIt Live determines the type automatically using the following rules, in order:
1. If any of the track's tags match a track type name, that type is used.
2. Otherwise, if the artist or title field matches a track type name, that type is used.
3. If the track's duration is less than 30 seconds, the type is set to Station ID.
4. Otherwise, the type defaults to Song.
All comparisons are case-insensitive.
## Additional properties
Tracks also have the following properties that affect playback:
- **Sweeper** - Indicates whether the track is a sweeper. A sweeper is a track that can be played over the intro of the next song (before the Intro point); or over the end of the previous song (after the Early Out point). It is typically dry (no background music) so it does not clash with the track it is playing over.
- **No Fade** - Prevents the track from being faded out when the Cue Out point is reached. This is typically used for tracks that have a natural ending, such as a song with a long fade out.
- **Disabled** - Prevents the track from being scheduled.
- **Valid From / Expires** - Date range during which the track is available for scheduling. Valid From and Expires are measured from midnight at the start of the specified date, so a range from 1st June 2026 to 2nd June 2026 would make the track available for scheduling from 1st June 2026 00:00 until 2nd June 2026 00:00 (i.e. for the whole day of 1st June).
- **Hook Start / Hook End** - Defines the hook section of the track, used for hook sequences in clocks. A hook is a short, distinctive section of a track that can be used for quick identification, such as the chorus of a song.
- **Dayparting** - Restricts the track to specific days and hours for scheduling. This is typically used for tracks that are only suitable for certain times of day, such as a breakfast show jingle that should only be played in the morning.
- **Gain** - Adjusts the playback volume of the track.
- **Tempo Adjust** - Adjusts the playback speed of the track. Tempo can be adjusted from -10% to +10%, without changing the pitch.
## Managing tracks
- [Manage Tracks](/PlayItLive/218/tracks/manage-tracks) - Browse, search, and manage your track library.
- [Edit Track](/PlayItLive/218/tracks/edit-track) - View and edit the properties of a track.
- [Bulk Editing](/PlayItLive/218/tracks/bulk-editing) - Edit properties across multiple tracks at once.
- [Add New Tracks Wizard](/PlayItLive/218/tracks/add-new-tracks-wizard) - Import new tracks into PlayIt Live.
---
# Manage Tracks Window
The Manage Tracks window allows you to browse, search, and manage all the tracks in your PlayIt Live library. Open it from the **Tracks** menu by clicking **Manage Tracks...**.
The Manage Tracks window showing the track library.
### Track Group Selector
Use the Track Group dropdown to filter the track list by a specific track group. Select **All Tracks** to show every track in your library, or choose a specific group to see only the tracks it contains. Track groups can be managed from [Manage > Track Groups](/PlayItLive/218/track-groups/manage-track-groups).
### Export to CSV
Click this button to export the current track list to a CSV file. This is useful for creating reports or sharing track information with external systems.
### Search Box
Type in the search box to filter tracks by artist, title, or other properties. The track list updates as you type.
### Track List
The main track list displays all tracks matching the current filter and search criteria. By default, the columns shown are Artist, Title, Intro, Duration, and Path. Right-click a column header to choose which columns are visible, or to access the column selector.
Double-click a track to open the [Edit Track](/PlayItLive/218/tracks/edit-track) window for that track.
To delete a track, select it and press the **Delete** key, or click the delete icon on the row. You can select all tracks with **Ctrl+A** to delete in bulk. A confirmation prompt will appear before deletion. Changes are not saved until you click **Apply** or **OK**. Deleting a track will remove it from your entire PlayIt Live library, even if a track group filter is applied. To remove a track from a specific track group without deleting it, edit the track and remove it from that group; or edit the track group and remove the track from there.
### Add New
Click **Add New** to open the [Add New Tracks Wizard](/PlayItLive/218/tracks/add-new-tracks-wizard), which guides you through importing new tracks into your library from files or folders.
### Edit
Click **Edit** to open the [Edit Track](/PlayItLive/218/tracks/edit-track) window for the selected track. You can select multiple tracks using Ctrl or Shift and click **Edit** to [bulk edit](/PlayItLive/218/tracks/bulk-editing) their properties.
### OK
Click **OK** to save any pending changes and close the Manage Tracks window.
### Cancel
Click **Cancel** to discard any pending changes and close the Manage Tracks window.
### Apply
Click **Apply** to save any pending changes without closing the window.
---
# Edit Track Window
The Edit Track window allows you to view and edit the properties of a track in your library. Open it by selecting a track in the [Manage Tracks](/PlayItLive/218/tracks/manage-tracks) window and clicking **Edit**, or by double-clicking a track.
The Edit Track window showing track properties and cue points.
### File Path
The full file path of the track's audio file on disk. This field is read-only.
### Type
The track type, which can be Song, Station ID, Promo, Commercial, News, Bed, or Station ID + Bed. When set to **Inferred**, the type is determined automatically from the track's tags, artist, title, and duration. See [Inferred Type rules](/PlayItLive/218/tracks/overview#inferred-type-rules) for details.
### Artist
The performer of the track. This is typically read from the file's metadata tags when the track is first imported. You can type a new value or select from previously used artists. The Artist field is used by [Artist Separation playout policies](/PlayItLive/218/playout-policies/edit-track-artist-separation) to ensure that tracks by the same artist are not played too close together.
### Title
The title of the track, typically read from the file's metadata tags when imported. The Title field is used by [Title Separation playout policies](/PlayItLive/218/playout-policies/edit-track-artist-separation) to ensure that tracks with the same title are not played too close together.
### Out Cue
The Out Cue can be the style of the track's ending, such as "Fade Out" or "Sustain"; or the last spoken words in the track, so the presenters know when to talk over the end of the track. This is displayed on the playout log when clicking an item.
### Album
The album the track belongs to. This is typically read from the file's metadata tags when imported.
### Genre
The genre of the track. Select from the dropdown or type a custom value. This is typically read from the file's metadata tags when imported.
### Year
The release year of the track as a four-digit year. This is typically read from the file's metadata tags when imported.
### Tags
Semicolon-separated tags for categorising the track. Tags can be used for filtering and for [Inferred Type rules](/PlayItLive/218/tracks/overview#inferred-type-rules). Select from existing tags or type new ones.
### Comments
Free-text notes about the track, such as usage instructions or background information.
### Sweeper
When enabled, this allows the playout system to play this track over the intro of the next song (before the Intro point); or over the end of the previous song (after the Early Out point). It is typically used for sweepers, which are short clips that identify the station or show, and are usually dry (no background music) so they do not clash with the track they are playing over.
### No Fade
Prevents the track from being faded out when the next track begins. Use this for tracks that have a natural ending that should not be cut short.
### Adjust Tempo
Adjusts the playback speed of the track. Tempo can be adjusted from -10% to +10%, without changing the pitch.
### Gain
Adjusts the playback volume of the track in decibels. Use positive values to boost quieter tracks or negative values to reduce louder ones.
### Track ID
A unique identifier for the track, used for integration with external systems such as music scheduling software or playout logging.
### Tabs
The tab bar provides access to additional track settings. See the [Tabs](#tabs) section below for details on each tab.
### Track Navigation
Use the **<** and **\>** buttons to navigate between tracks without closing the window. The current position and total track count are shown alongside.
### Save Track
Click **Save Track** to save your changes and close the window. If you are navigating between tracks using the navigation buttons, changes are saved automatically when you move to another track.
### Close
Click **Close** to close the window without saving any unsaved changes.
## Tabs
### Cue Points
The Cue Points tab is the default view and contains the waveform visualisation along with controls for setting Cue In, Intro, Hook, Early Out, and Cue Out points for the track. Cue points are used to control how tracks are played and how they transition to the next track in Live Assist mode. You can use the playback controls to preview the track and fine-tune the cue points.
The Cue Points tab with waveform, cue point controls, and analyse button.
### Cue Point Controls
The cue point controls let you set the following points for the track:
- **Cue In**: The position in seconds where the track should be started by a player.
- **Intro**: The position in seconds where the vocals start on the track.
- **Hook Start**: The position where a hook in a hook sequence will start. Click the **Hooks** section to expand this cue point.
- **Hook End**: The position where a hook in a hook sequence will end, if the full hook is used. Click the **Hooks** section to expand this cue point.
- **Early Out**: The position where the track is considered to be almost finished. Click the **E. Out** section to expand this cue point. Early Out can be used in two scenarios:
- For songs, the point indicates to PlayIt Live that it can place a sweeper after this point as the track is finishing, providing a smoother transition.
- For tracks marked as **Sweeper**, the point indicates that PlayIt Live can start the next track after this point, allowing the end of the sweeper to play over the intro of the next song.
- **Cue Out**: The position in seconds where the track is considered to have finished. When this point is reached in Live Assist mode, the players will begin fading out this track and start playing the next track. The players count down the remaining time to this point.
Each cue point has its own **Set**, **Test**, and **×** buttons:
- **Set**: While listening to the track, click **Set** to capture the current playback position as the cue point value.
- **Test**: Click **Test** to play the track from the cue point position.
- **×**: Click to reset the cue point to its default position.
Cue points can also be adjusted using the keyboard or mouse. Click on the cue point value of interest, then use the following:
Action
Result
**Left Arrow** / **Right Arrow**
Adjust the cue point by 0.01 seconds.
**Shift+Left Arrow** / **Shift+Right Arrow**
Adjust the cue point by 0.1 seconds.
Click and drag over the cue point value
Adjust the cue point with the mouse.
**Enter** or double-click the cue point value
Test playback from the cue point.
**Spacebar**
Stop playback.
### Analyse Button
Click **Analyse** to automatically detect the **Cue In** and **Cue Out** points based on the silence at the start and end of the track. The sensitivity of the analysis can be configured from [Silence Analysis](/PlayItLive/218/settings/general#silence-analysis) in Settings. The system will not automatically set the Intro, Hook, or Early Out points.
### Waveform
The waveform shows the volume of the audio track over time. Cue point markers are overlaid as coloured lines using the following colour coding:
Cue point
Colour
Cue In
Green
Intro
Blue
Hook
Hot pink
Early Out
Orange
Cue Out
Red
Double-click on the waveform to start playing at a different position in the track. Use the **Play** and **Stop** buttons to control playback, and the **Go to start** and **Go to end** buttons to jump to the start or end of the track. Use the **Zoom** buttons to zoom in and out of the waveform if you need to set a more precise cue point. You can also zoom with the mouse wheel while hovering over the waveform.
### Scheduling
The Scheduling tab contains options for controlling when the track is available for scheduling.
The Scheduling tab with disable, valid from, expires, and ignore year on dates options.
### Disabled
Tick this checkbox to prevent the track from being considered when scheduling. Disabled tracks remain in your library but will not be scheduled automatically.
### Valid From
Tick the checkbox and select a date to make the track available for scheduling only from that date onwards. Before midnight (00:00) on the selected date, the track will not be scheduled.
### Expires
Tick the checkbox and select a date after which the track should no longer be scheduled. After midnight (00:00) on the selected date, the track will not be scheduled automatically.
### Ignore year on dates
Tick this checkbox to ignore the year part of the Valid From and Expires dates so the track recurs every year between the same day and month. For example, a Christmas track set to be valid from 1 December and to expire on 1 January returns to the schedule each year automatically, without you having to update the dates. This option is only available while both Valid From and Expires are ticked, and is cleared automatically if you untick either of them.
### Dayparting
Premium Feature · Advanced Scheduling
AS [Purchase →](https://www.playitsoftware.com/Account/Subscription/AdvancedScheduling)
Dayparting requires the Advanced Scheduling premium module.
The Dayparting tab allows you to restrict the track to specific days and hours. This feature requires the Advanced Scheduling premium module. A green indicator next to the tab shows that the module is licensed. If the indicator is red, click it to purchase or start a trial of the module.
The Dayparting tab with the hour and day selector grid.
### Dayparting Enabled
Tick this checkbox to enable dayparting for the track. When enabled, the track will only be scheduled during the time slots selected in the grid below.
### Dayparting Grid
The grid shows days of the week as rows and hours of the day as columns. Select cells and press **Y** to allow scheduling during those time slots, or **N** to block them. Green cells indicate allowed time slots.
### Reporting
The Reporting tab contains fields used for music reporting and royalty tracking. These values can be exported via **Manage > Logged Tracks** to report to licensing and royalty collection agencies.
The Reporting tab with ISRC and Record Label fields.
### ISRC
The International Standard Recording Code for the track. This is a 12-character code used to identify individual recordings for royalty tracking and music reporting.
### Record Label
The record label that released the track. This information is included in music reports.
### Track Groups
The Track Groups tab shows which track groups the track belongs to. Track groups are used to organise your library and control scheduling rotation. Alongside the Listed Track Groups that you can add and remove, the tab also displays any Filtered or Grouped Track Groups that dynamically include this track. These dynamic memberships are read-only and shown for reference.
The Track Groups tab showing group memberships.
### Track Group List
The list of Listed Track Groups that the track currently belongs to. You can select a group and press **Delete** to remove the track from it. Filtered and Grouped Track Groups that dynamically include this track are shown alongside for reference and cannot be edited from this tab.
### Add Track Group
Click **Add Track Group** to add the track to an additional Listed Track Group. A dialog will appear allowing you to select from available track groups.
---
# Bulk Editing Tracks
You can edit multiple tracks at once using the bulk edit feature. This is useful when you need to change a shared property across several tracks, such as correcting an artist name or setting a genre.
## Selecting Multiple Tracks
Open the [Manage Tracks](/PlayItLive/218/tracks/manage-tracks) window, then hold **Ctrl** or **Shift** to select multiple tracks in the list. To select all tracks in the list, click any track and press **Ctrl+A**. Click **Edit** to open the bulk edit dialog.
Select multiple tracks using Ctrl or Shift, then click Edit.
## Editing Shared Properties
The bulk edit dialog shows the properties of all selected tracks. Fields where all selected tracks share the same value display that value. Fields where the values differ are left blank.
Each field has a checkbox next to it. Tick the checkbox for any field you want to change, then enter the new value. Only fields with a ticked checkbox are updated when you save. Fields without a tick are left unchanged on all selected tracks.
In this example, several ABBA tracks have been imported with different spellings of the artist name. By selecting them all and ticking the **Artist** checkbox, you can correct them all to "ABBA" in one step.
Tick the checkbox next to a field to change it across all selected tracks. Here the Artist is being corrected to ABBA.
## Bulk Analysing Cue Points
You can also bulk analyse cue points in the selected tracks by clicking the **Analyse All** button in the Bulk Edit dialog. This runs cue point detection across every selected track in one step, so you do not need to open and analyse each track individually.
## Bulk Editing Tags
When bulk editing tags, you can choose how the tags you enter are applied to the selected tracks. Tick the **Tags** checkbox, choose an operation, then enter the tags you want to apply, add, or remove in the **Tags** field.
Three operation modes are available:
- **Overwrite**: Replaces all existing tags on the selected tracks with the tags you enter. Any tags previously assigned to the tracks are removed, and only the new tags you specify are applied.
- **Add**: Adds the tags you enter to the selected tracks without removing any existing tags. Use this to supplement the tracks' current tags with additional ones.
- **Remove**: Removes the specific tags you enter from the selected tracks while leaving all other existing tags intact. Use this to clean up tags that are no longer relevant.
Click **Save Tracks** to apply your changes to all selected tracks, or **Close** to discard them.
---
# Add New Tracks Wizard
The Add New Tracks Wizard guides you through importing new tracks into your PlayIt Live library. To open it, go to **Manage > Tracks...** and click the **Add New** button in the [Manage Tracks](/PlayItLive/218/tracks/manage-tracks) window.
The first page of the wizard asks you to choose how you would like to add tracks.
The Add New Tracks Wizard showing the source selection options.
### From Individual File(s)
Select this option to add one or more specific audio files. When you click **Next**, you will be prompted to browse and select the files you wish to add.
### From a Folder
Select this option to add all supported audio files from a folder. When you click **Next**, you will be prompted to choose a folder. All audio files found in the folder will be imported.
### From a CSV Import File
Select this option to import track data from a CSV file. When you click **Next**, you will be prompted to select a CSV file containing track metadata and file paths. See [CSV Track Import](/PlayItLive/218/tracks/csv-track-import) for details on how to create a CSV file and the full list of supported columns.
To generate a template CSV file, go to **Manage > Tracks** and export the current list of tracks using the **Export track list to CSV** button. You can then modify the exported file to import a new set of tracks.
### Back
Click **Back** to return to the previous page of the wizard. This button is disabled on the first page.
### Next
Click **Next** to proceed to the next step. Depending on the source option you selected, you will be prompted to choose your files, folder, or CSV import file.
### Cancel
Click **Cancel** to close the wizard without adding any tracks.
---
# CSV Track Import
PlayIt Live can import tracks from a CSV (Comma-Separated Values) file using the [Add New Tracks Wizard](/PlayItLive/218/tracks/add-new-tracks-wizard). This is useful when migrating track metadata from another playout system, a music scheduling tool, or a spreadsheet.
## Before You Start
The CSV importer expects data in a specific format. If you are exporting from another system, you will almost certainly need to convert and reformat the data before it can be imported into PlayIt Live. This requires some manual effort and familiarity with spreadsheet tools such as Microsoft Excel or Google Sheets.
In particular, all duration and cue point values must be in **decimal seconds**. Formats like `3:45` or `0:08.5` are not accepted because they are ambiguous (they could represent minutes:seconds or hours:minutes). You will need to convert these values yourself before importing. See [Value Formats](#value-formats) below for details.
The best approach is to export a few tracks from PlayIt Live first using the CSV export in [Manage Tracks](/PlayItLive/218/tracks/manage-tracks). This gives you a template showing the exact column names and value formats that the importer expects.
## Creating a CSV File
The CSV file must have a header row with column names, followed by one row per track. You can create the file in any spreadsheet application and export it as CSV, or write it in a text editor.
### Minimal Example
At minimum, each track needs a file path and a duration:
```
Path,Artist,Title,Duration
C:\Music\Katrina and the Waves - Walking on Sunshine.mp3,Katrina and the Waves,Walking on Sunshine,239
C:\Music\Journey - Don't Stop Believin'.mp3,Journey,Don't Stop Believin',250.5
C:\Music\Queen - Bohemian Rhapsody.mp3,Queen,Bohemian Rhapsody,354
```
### Full Example
A more complete CSV file with timing and metadata columns:
```
Path,Artist,Title,Duration,Intro,Cue In,Cue Out,Genre,Year,Type
C:\Music\Walking on Sunshine.mp3,Katrina and the Waves,Walking on Sunshine,239,8.5,0,228,Pop,1985,Song
C:\Music\Bohemian Rhapsody.mp3,Queen,Bohemian Rhapsody,354,15,0,340,Rock,1975,Song
```
## Value Formats
Every column has a specific value format. Using the wrong format will cause the row to be skipped during import.
### Decimal Seconds
All duration and cue point columns must be in **decimal seconds** using a dot (`.`) as the decimal separator.
Correct
Incorrect
`239`
`3:59`
`8.5`
`0:08.5`
`228.75`
`3:48.75`
`0`
`0:00`
If your source data uses `minutes:seconds` format, you will need to convert it. In a spreadsheet, you can use a formula such as `=MINUTE(A1)*60+SECOND(A1)` to convert a time value in cell A1 to total seconds.
### Text
Text values (Artist, Title, Album, etc.) are plain strings. If a value contains a comma, the entire value must be enclosed in double quotes in the CSV file. Most spreadsheet applications handle this automatically when exporting to CSV.
### Boolean
Boolean columns (No Fade, Sweeper, Disabled, Ignore Validity Year?, Gain Set Manually?) accept `true` or `false` (case-insensitive). If the column is missing or empty, the value defaults to `false`.
### Date
Date columns (Valid From, Expires) accept standard date formats such as `2026-01-15`. The time portion is ignored.
### Decimal
Decimal columns (Gain DB, Loudness Target LUFS, Tempo Adjust Percentage) use a dot (`.`) as the decimal separator. For example, `-3.5` for a gain reduction of 3.5 dB.
## Column Reference
### Required Columns
Only the **Path** and **Duration** columns are needed for a valid import. All other columns are optional. If a column is missing from the header, the field is left empty or set to its default value.
Column
Format
Description
**Path**
Text
The full file path to the audio file on disk. Used for playback and duplicate detection.
**Duration** or **Duration (seconds)**
Decimal seconds
The total duration of the track (e.g. `239` or `228.5`).
### Track Information
Column
Format
Description
Artist
Text
The artist or performer name.
Title
Text
The track title.
Album
Text
The album name.
Genre
Text
The genre (e.g. Pop, Rock, Jazz).
Year
Text
The release year.
Type
Text
The track type. Must be one of the type identifiers listed below, or left empty.
Tags
Text
Semicolon-separated tags (e.g. `upbeat;classic;80s`).
Comments
Text
Free-text comments about the track.
Out Cue
Text
The out cue text (e.g. "and don't it feel good!").
ISRC
Text
The International Standard Recording Code.
Record Label
Text
The record label name.
Track ID
Text
A custom track identifier.
#### Track Type Values
The Type column must use one of the following values exactly as shown below.
Value
Description
`Song`
A music track.
`Station ID`
A station identification jingle.
`Promo`
A promotional announcement.
`Commercial`
A commercial or advert.
`News`
A news bulletin or clip.
`Bed`
A background music bed.
`Station ID + Bed`
A combined station ID with a background bed.
If the Type column is left empty, the type will be inferred automatically.
### Cue Points and Timing
Column
Format
Default
Description
Intro
Decimal seconds
Not set
The intro duration. The point at which vocals or the main content begins.
Cue In
Decimal seconds
0
The cue in point. Playback starts from this point.
Cue Out
Decimal seconds
Same as Duration
The cue out point. The next track begins at this point.
Early Out
Decimal seconds
Not set
The early out point. Used to play a sweeper early.
Hook Start
Decimal seconds
Not set
The start of the track's hook section.
Hook End
Decimal seconds
Not set
The end of the track's hook section.
### Playback Control
Column
Format
Default
Description
No Fade
Boolean
false
Set to `true` to disable the fade-out at the cue out point of the track.
Sweeper
Boolean
false
Set to `true` to mark the track as a sweeper and allow it to play over other tracks.
Disabled
Boolean
false
Set to `true` to disable the track from being scheduled.
Valid From
Date
Not set
The date at midnight from which the track becomes available (e.g. `2026-01-15`).
Expires
Date
Not set
The date at midnight after which the track is no longer available (e.g. `2026-02-15`).
Ignore Validity Year?
Boolean
false
Set to `true` to ignore the year part of Valid From and Expires so the track recurs every year between those dates. Only takes effect when both Valid From and Expires are set.
### Audio Processing
Column
Format
Default
Description
Gain DB
Decimal
Not set
Audio gain adjustment in decibels (e.g. `-3.5`).
Gain Set Manually?
Boolean
false
Set to `true` if the gain value was manually configured rather than auto-detected by Loudness Analysis.
Loudness Target LUFS
Decimal
Not set
The loudness normalisation target in LUFS stored by the Loudness Analysis feature.
Tempo Adjust Percentage
Decimal
Not set
Percentage adjustment to the playback tempo.
### Scheduling
Column
Format
Description
Dayparting
Text
Controls when the track is allowed to play. The value starts with `Y` (enabled) or `N` (disabled), followed by semicolon-separated day and hour pairs using the format `DayCode|Hour`. Day codes are `Mo`, `Tu`, `We`, `Th`, `Fr`, `Sa`, `Su`. Hours are 0 to 23. For example, `Y;Mo|09;Mo|10;Fr|14` enables the track on Mondays at 9am and 10am, and Fridays at 2pm.
## Error Handling
- If a row contains a malformed value (e.g. text in a numeric column), that row is skipped and the error is logged. The rest of the import continues.
- Columns can appear in any order in the CSV file.
- Extra columns not recognised by PlayIt Live are ignored.
- If a value contains a comma, enclose it in double quotes (e.g. `"Earth, Wind & Fire"`).
---
# Add New Tracks Additional Options
After selecting your source in the [Add New Tracks Wizard](/PlayItLive/218/tracks/add-new-tracks-wizard), the Additional Options page lets you configure how the import will be processed.
The Add New Tracks Wizard showing the additional options for a folder import.
### Source
Displays a summary of the source you selected on the previous page. For a folder import, this shows the folder path. For individual files, it shows the number of files selected.
### Include Sub Folders
When importing from a folder, tick this option to also scan all sub-folders within the selected folder for audio files. This option is only available when importing from a folder.
### Analyse Silence
When ticked, PlayIt Live will analyse the silence at the start and end of each track and cue in and out points. This is recommended for most imports. The parameters for the silence analysis can be configured from **Settings > General**.
### Duplicate Handling
Controls what happens when an imported track has the same file path as an existing track in your library. This section is only available when your library already contains tracks.
- **Replace any tracks with the same file path**: If a file is found that has the same path as a track in the system, it will be overwritten by the new track file.
- **Skip any tracks with the same file path**: If a file is found that has the same path as a track in the system, it will be ignored and will not change the existing track already added to PlayIt Live.
- **Duplicate any tracks with the same file path**: If a file is found that has the same path as a track in the system, it will be added again, resulting in two instances of the same track in the system.
---
# Add New Tracks Progress
After configuring your [additional options](/PlayItLive/218/tracks/add-new-tracks-additional-options), the wizard begins importing your tracks. The progress page shows the status of the import as each file is loaded and processed.
The Add New Tracks Wizard showing an import in progress.
### Current File
Displays the file path of the track currently being imported. This updates as each file is processed.
### Artist and Title
Shows the artist and title of the track currently being processed, as read from the embedded tag information within the file. If this information is missing, the artist and title are determined from the filename in the format `Artist - Title.ext` where `ext` is the file extension.
### Overall Progress
A progress bar showing the overall completion of the import, along with text indicating how many tracks have been processed out of the total. If any tracks were ignored during the import, the count of ignored tracks is also displayed. Tracks are ignored if they are not valid audio files, have no duration, or if the [duplicate handling option](/PlayItLive/218/tracks/add-new-tracks-additional-options) is set to skip and a track with the same file path already exists in the library.
---
# Add New Tracks Review
After the [import progress](/PlayItLive/218/tracks/add-new-tracks-progress) completes, the wizard moves to the review page. Here you can choose which tracks to include in the import and review or edit each track's metadata before it is saved to your library.
The Add New Tracks Wizard showing the review page with a track selected for editing.
### Track List
Displays all the tracks discovered during the import, listed alphabetically by artist and title. Each track has a checkbox that controls whether it will be included when you complete the wizard. All tracks are checked by default. Click a track to select it and view its details in the track editor panel.
### Track Checkbox
Each track in the list has a checkbox. Uncheck a track to exclude it from the import. Only checked tracks will be added to your library when you click **Finish**. This is useful if some of the discovered files are not tracks you want in your library.
### Track Editor
When you select a track from the list, the track editor panel appears on the right side. This shows the track's metadata as read from the file's tags, including artist, title, album, genre, year, and other fields. The fields shown here are the same as those in the [Edit Track window](/PlayItLive/218/tracks/edit-track), so you can set them up consistently before the track is imported. You can edit any of these values before the track is imported. Changes are saved for that track when you select a different track or proceed to the next page.
---
# Add New Tracks Group
After [reviewing your tracks](/PlayItLive/218/tracks/add-new-tracks-review), the final page of the wizard is the group assignment section. Here you can add the imported tracks to an existing track group, create a new group for them, or leave them in the All Tracks group. Click **Finish** to add the tracks to your library.
The Add New Tracks Wizard showing the group assignment options.
### Leave in All Tracks Group
Select this option to leave the imported tracks without assigning them to a particular track group. The tracks will still appear in the All Tracks group.
### Add to Existing Group
Select this option to add the imported tracks to an existing track group. Choose the group from the dropdown list.
### Add to New Group
Select this option to add the imported tracks to a new track group. Enter the name of the new group in the text box.
### Finish Button
Click the **Finish** button to complete the wizard and add the tracks to your library.
---
# Track Groups
As the name suggests, Track Groups are used to group tracks by certain criteria. There are three types of track group:
- **Listed**: Manually select a list of tracks to add to the group.
- **Filtered**: Select a set of filters to dynamically select tracks based on information stored on the track.
- **Grouped**: Combine multiple track groups into one track group.
Track groups are used on the main interface to filter tracks in the track list. They are also used in [playout policies](/PlayItLive/218/playout-policies/overview), [playout patterns](/PlayItLive/218/playout-pattern/overview), and [clocks](/PlayItLive/218/scheduling/clocks).
## Customising the playout log with track groups
It is possible to change the icon and colour of a track on the playout log on the main interface. When editing a track group, you can optionally select an icon and colour for the track group. There are a number of built-in icons but it is possible to add your own.
To add your own icons, go to the **C:\\ProgramData\\PlayIt Live\\icons** folder on your computer. Please note that **C:\\ProgramData\\** is a hidden folder, so you should type the full path into Windows Explorer or the Run window.
The built-in icons are 256x256 PNG icons with transparency. To add your own icons to PlayIt Live, simply add the images to this folder. PlayIt Live uses the filename without extension to store which icon is associated with each track group. Therefore you should not use the same filename with different extensions for different icons. You should also not prefix your images with **playit-**. Anything with this prefix could be removed or overwritten by a new version of PlayIt Live. Once you have added your icons to the folder they will be visible for use in PlayIt Live.
---
# Manage Track Groups Window
The Manage Track Groups window lists all the track groups in the system. Open it from the **Manage > Track Groups** menu.
The Manage Track Groups window showing a list of track groups with their types and track counts.
### Search Box
Use the search box to find a track group by name.
### Track Group List
Displays the **Name**, **Type**, **Track Count**, and **Hidden?** state of each track group. Double-click an entry in the list to begin editing. Depending on the type, this will open the [Edit Listed Track Group](/PlayItLive/218/track-groups/edit-listed), [Edit Filtered Track Group](/PlayItLive/218/track-groups/edit-filtered), or [Edit Grouped Track Group](/PlayItLive/218/track-groups/edit-grouped) window.
Each row also includes:
- **Hidden?** checkbox. Check it to hide the track group from the main interface track group selector.
- **Clone** icon. Click it to make a copy of the track group.
- **Delete** icon. Click it to delete the track group from the system.
### Add New
Click **Add New** to begin adding a new track group. This opens the [Choose Track Group Type](/PlayItLive/218/track-groups/choose-type) window.
### Edit
Click **Edit** to begin editing the selected track group. Depending on the type, this will open the [Edit Listed Track Group](/PlayItLive/218/track-groups/edit-listed), [Edit Filtered Track Group](/PlayItLive/218/track-groups/edit-filtered), or [Edit Grouped Track Group](/PlayItLive/218/track-groups/edit-grouped) window.
### OK
Click **OK** to save changes and close the window.
### Cancel
Click **Cancel** to discard changes and close the window.
### Move Tracks
Use the **Move Tracks** feature to easily move tracks between existing Listed Track Groups. See [Move Tracks Window](/PlayItLive/218/track-groups/move-tracks).
---
# Choose Track Group Type Window
When you click **Add New** in the [Manage Track Groups](/PlayItLive/218/track-groups/manage-track-groups) window, this dialog appears to let you choose which type of track group to create.
The Choose Track Group Type window with the three track group type options.
### Listed Track Group
A Listed Track Group lets you manually select a fixed list of tracks to include in the group. Select this option and then click **OK** to open the [Edit Listed Track Group](/PlayItLive/218/track-groups/edit-listed) window.
### Filtered Track Group
A Filtered Track Group dynamically selects tracks based on filter conditions applied to track properties such as artist, genre, or year. Select this option and then click **OK** to open the [Edit Filtered Track Group](/PlayItLive/218/track-groups/edit-filtered) window.
### Grouped Track Group
A Grouped Track Group combines multiple existing track groups into a single group, letting you treat several groups as one. Select this option and then click **OK** to open the [Edit Grouped Track Group](/PlayItLive/218/track-groups/edit-grouped) window.
### OK
Click **OK** to continue creating a track group of the selected type.
### Cancel
Click **Cancel** to stop creating a new track group.
---
# Edit Listed Track Group Window
The Edit Listed Track Group window allows you to manually select which tracks belong to the track group.
The Edit Listed Track Group window showing the track list and track group track list side by side.
### Track Group Name
The name of the track group.
### Track Search Box
Enter text into the search box to filter the track list by artist - title.
### Track List
List of tracks not already in the track group. You can select the columns that are displayed in this grid by right-clicking the header and selecting **Select columns...**. You can right-click a track in the track list to show additional options, including the ability to preview the audio to hear what the track sounds like.
### Add to Track Group
Click the **\>** button to add the selected tracks from the track list to the track group.
### Remove from Track Group
Click the **<** button to remove the selected tracks from the track group.
### Track Group Track List
List of tracks in the track group. You can select the columns that are displayed in this grid by right-clicking the header and selecting **Select columns...**. You can right-click a track in the track list to show additional options, including the ability to preview the audio.
### Colour
Tick the **Colour** box to show a colour for any tracks in this track group when they are displayed on the playout log on the main interface. Click in the colour box to change the colour.
### Icon
Tick the **Icon** box to show an icon for any tracks in this track group when they are displayed on the playout log on the main interface. Click in the icon box to change the icon, and the Select Icon window will be shown. To add your own icons, see the [Customising the playout log](/PlayItLive/218/track-groups/overview#customising-the-playout-log-with-track-groups) section.
### Priority
The priority is used to determine which track group is used when displaying a track on the playout log on the main interface that appears in multiple track groups. The track group with the highest priority will be used when displaying the colour or icon.
### OK
Click **OK** to confirm changes to the track group.
### Cancel
Click **Cancel** to discard changes to the track group.
---
# Edit Filtered Track Group Window
The Edit Filtered Track Group window allows you to create dynamic track groups using filters. For example, you can filter tracks by songs by artists that start with A.
The Edit Filtered Track Group window showing filter conditions and matched tracks.
### Track Group Name
The name of the track group.
### Filter Builder
The filter builder lets you define one or more conditions that tracks must match to be included in the group.
Each filter row contains:
- **Field Selector**: choose the track property to filter on, such as Artist, Title, Genre, Year, or Type.
- **Operation Selector**: choose how the field value is compared, such as Contains, Does Not Contain, Starts With, Ends With, or Is Empty.
- **Filter Value**: enter the value to compare against.
When you have more than one filter row:
- **And / Or Selector**: choose how to combine the conditions. **And** requires tracks to match both conditions. **Or** requires tracks to match either condition.
- **Open / Close Parentheses**: use parentheses to group conditions and control the order of evaluation. Use the up and down arrows to add or remove parentheses.
Use the **Add** button to add a new filter condition and the **Remove** button to delete the selected condition.
### Open Parentheses
Use parentheses to form complex filters. Use the up and down arrows to increase and decrease the number of opening parentheses.
### Close Parentheses
Use parentheses to form complex filters. Use the up and down arrows to increase and decrease the number of closing parentheses.
### Add Filter
Click the **Add** button to add a new filter condition.
### Remove Filter
Click the **Remove** button to remove the selected filter condition.
### Matched Tracks
As the filter is updated, the **Tracks matched by this filter** list updates to show the tracks that match the current filter conditions.
### Colour, Icon and Priority
See the [Colour, Icon and Priority](/PlayItLive/218/track-groups/edit-listed#colour) settings on the Edit Listed Track Group page.
---
# Edit Grouped Track Group Window
The Edit Grouped Track Group window allows you to combine multiple existing track groups into a single track group.
The Edit Grouped Track Group window showing the track group selections.
### Track Group Name
The name of the track group.
### Invert Selection
If this checkbox is checked, the tracks in this group will be the inverse of the selected groups. That is, this track group will include only tracks that do **not** appear in the selected track groups.
### Track Group Selections
Lists all the track groups in the system. Click a checkbox to include the selected track group in this grouped track group.
### Colour, Icon and Priority
See the [Colour, Icon and Priority](/PlayItLive/218/track-groups/edit-listed#colour) settings on the Edit Listed Track Group page.
### OK
Click **OK** to confirm changes to this track group.
### Cancel
Click **Cancel** to discard changes to this track group.
---
# Move Tracks Window
You can use the Move Tracks window to easily move tracks from one Listed Track Group to another. Open it by clicking **Move Tracks** in the [Manage Track Groups](/PlayItLive/218/track-groups/manage-track-groups) window.
The Move Tracks window showing two track groups side by side with move controls.
### From Listed Track Group
Select the track group you want to move tracks from. Select the tracks you wish to move and click the right arrow. You can select multiple tracks while holding the **Ctrl** key. You can also double-click tracks to move them to the other track group. Right-click the header and select **Select columns...** to customise the displayed columns. Right-click a track to show additional options, including the ability to preview the audio.
### To Listed Track Group
Select the track group you want to move tracks to. Select the tracks you wish to move back and click the left arrow. You can select multiple tracks while holding the **Ctrl** key. You can also double-click tracks to move them to the other track group. Right-click the header and select **Select columns...** to customise the displayed columns. Right-click a track to show additional options, including the ability to preview the audio.
### Move Right
Move the selected tracks from the track group on the left to the track group on the right.
### Move Left
Move the selected tracks from the track group on the right to the track group on the left.
### OK
Save changes and close the window.
### Close
Close the window without saving changes.
---
# Multiple Artist Splits
Multiple Artist Splits define the text used to separate combined artist names in the Artist field of a track. Without splits configured, PlayIt Live treats a name such as *Take That feat. Lulu* as a single distinct artist, so artist-separation rules in Playout Policies will not apply to the individual artists within that name.
For example, adding a split with the text *feat.* causes PlayIt Live to recognise *Take That* and *Lulu* as separate artists. Playout Policies can then prevent either artist from being played too close together, regardless of whether the track credit is listed as the combined name or individually.
### List
The list of existing Multiple Artist Splits.
- **Split Text** - The text used to split combined artist names into separate artists.
- **Disabled** - A tick indicates the split is disabled and will not be used when separating artists.
- **Clone** - Click to create a copy of the split.
- **Delete** - Click to remove the split.
### Add New
Click to add a new Multiple Artist Split. Opens the [Edit Multiple Artist Split](/PlayItLive/218/artist-splits/edit) window to enter the details of the split.
### Edit
Click to edit the selected Multiple Artist Split. Opens the [Edit Multiple Artist Split](/PlayItLive/218/artist-splits/edit) window to modify the details of the split.
### OK
Click **OK** to save changes and close the window.
### Cancel
Click **Cancel** to discard changes and close the window.
### Apply
Click **Apply** to save changes without closing the window.
---
# Edit Multiple Artist Split Window
### Split Text
The text used to separate a Track Artist into multiple artists. Include spaces either side of the text if you intend to split by a word. For example, *with* on its own could match George Michael *with* Elton John but also Bill *With*ers.
### Matched Artists
This table shows all the artists that are matched given the entered split text. Here you can see if the split text is achieving the desired outcome.
### Disabled
Use this checkbox to disable this Multiple Artist Split so it is not considered by the scheduler.
### OK
Click **OK** to save the Multiple Artist Split and close the window.
### Cancel
Click **Cancel** to discard changes and close the window.
---
# Related Artists
Related Artists are used to associate artists with each other so they are considered as the same artist when scheduling with playout policies. For example, you may not want a solo singer in a band to be played close to a song by that band, e.g. *Robbie Williams* and *Take That*. The order of the two artists in a pair does not matter, so there is no need to add both *Robbie Williams / Take That* and *Take That / Robbie Williams*.
### List
The list of existing Related Artists.
- **Artist 1** - The first artist in the related pair.
- **Artist 2** - The second artist in the related pair.
- **Disabled** - A tick indicates the related artist pair is disabled and will not be considered when scheduling.
- **Clone** - Click to create a copy of the related artist pair.
- **Delete** - Click to remove the related artist pair.
### Add New
Click to add a new Related Artist pair. Opens the [Edit Related Artist](/PlayItLive/218/related-artists/edit) window to enter the details of the pair.
### Edit
Click to edit the selected Related Artist pair. Opens the [Edit Related Artist](/PlayItLive/218/related-artists/edit) window to modify the details of the pair.
### OK
Click **OK** to save changes and close the window.
### Cancel
Click **Cancel** to discard changes and close the window.
### Apply
Click **Apply** to save changes without closing the window.
---
# Edit Related Artist Window
### Artist 1
The first artist in the Related Artist. It does not matter in which order artists are entered.
### Artist 2
The second artist in the Related Artist. It does not matter in which order artists are entered.
### Disabled
Use this checkbox to disable this Related Artist so it is not considered by the scheduler.
### OK
Click **OK** to save the Related Artist pair and close the window.
### Cancel
Click **Cancel** to discard changes and close the window.
---
# Monitored Folders
Monitored Folders can watch the state of a Windows folder (and optionally its sub-folders) for new, updated or deleted track files. Monitored Folders can be accessed via **Manage** > **Monitored Folders**.
When a file is added to the folder, it will be added to the PlayIt Live database if it is a valid track file. The track file can also be automatically analysed for cue points and added to a track group.
When a file is updated in the folder, it will be updated in the PlayIt Live database, updating the duration, cue points and any file metadata contained within the file, if desired.
When a file is deleted from the folder, it will be deleted from the PlayIt Live database, if desired.
If you delete a track from **Manage** > **Tracks**, but the underlying audio file still exists in a monitored folder, the track will be re-added to the database on the next folder scan. To permanently remove a track that belongs to a monitored folder, delete the audio file from the folder itself rather than removing the track from Manage > Tracks.
Monitored folders work by periodically scanning for changes in the folder, every 30 seconds. Folders with a large number of files or sub-folders will take longer to scan. For this reason, do not use `C:\` as the folder to scan for changes to every file on your computer. This will likely never complete. Choose a folder where you know audio files are located.
Use Monitored Folders if you have dynamic content, e.g. news or weather, from a folder such as Dropbox. Create a Monitored Folder with a Path to the shared Dropbox folder to pick up changes automatically.
You can check the [Monitored Folders Status](/PlayItLive/218/monitored-folders/status) window for recent changes to your monitored folders.
---
# Manage Monitored Folders Window
From the Monitored Folders window you can see the list of existing Monitored Folders.
### List
The list of existing Monitored Folders. From here you can add, edit and delete monitored folders. Double-click an entry to open the [Edit Monitored Folder](/PlayItLive/218/monitored-folders/edit) window.
### Add New
Click to add a new Monitored Folder.
### Edit
Click to edit the selected Monitored Folder.
### OK
Click **OK** to save changes and close the window.
### Cancel
Click **Cancel** to discard changes and close the window.
### Apply
Click **Apply** to save changes without closing the window.
---
# Edit Monitored Folder Window
### Path
The path to the folder you want to monitor.
### Include Sub-Folders
If checked, sub-folders of the folder will also be scanned. Avoid folders with a large number of sub-folders as this will take a long time to scan.
### Analyse Cue Points
If checked, when a track file is added the cue points of the track will be analysed.
### Re-analyse Cue Points
If checked, when a track file is updated the cue points of the track will be re-analysed. Do not use this option if you manually set cue points as these will be overwritten.
### Update Track Fields
If checked, when a track file is updated the fields of the track will be updated from the file. Do not use this option if you manually change the track fields as these will be overwritten.
### Delete Tracks
If checked, a track will be deleted if the track file is deleted. A track file is determined to be deleted if it is not found after scanning the folder.
If a network folder or external drive is used in a monitored folder and this folder is disconnected or the drive is unplugged, PlayIt Live will warn in the notification bar that the folder is no longer accessible. Tracks will not be deleted in this case.
If this folder is regularly updated where a file is deleted and subsequently replaced with a file of the same name, you should switch this option off. When a track is added through a monitored folder it is assigned a unique identifier, and that identifier is stored in the playout log and clocks. If the track file is later deleted and the deletion is processed by the monitored folder, the track record is removed and any playout log or clock entries that referenced it will show a "missing track" message. With this option off, the existing track record is kept: clocks and the playout log will maintain the original reference and use the new track file once it appears.
### Add Tracks to Track Group
If checked, new tracks will be added to the selected track group. Tracks will not be re-added to this track group if they are subsequently removed from the group.
### Disabled
If checked, the monitored folder will be disabled and will not be monitored.
### OK
Click **OK** to save the monitored folder settings.
### Cancel
Click **Cancel** to discard changes and close the window.
---
# Monitored Folders Status
The Monitored Folders Status window shows what PlayIt Live's [Monitored Folders](/PlayItLive/218/monitored-folders/overview) feature is doing right now. The upper list summarises every monitored folder and its current scanning state, while the lower **Recent events** log records the individual actions taken as files are added, changed, or removed.
The Monitored Folders Status window: the upper list summarises each folder's scan status, and the lower Recent events log shows what happened to individual files in the selected folder.
### Folder list
The upper list of monitored folders showing path, status, file count, last scan duration, last scan summary, and next scan countdown.
### Recent events
The Recent events log for the selected folder, with Time, Type, and Message columns.
To open this window, click **View status...** on the [Monitored Folders](/PlayItLive/218/monitored-folders/overview) settings page.
## Understanding the folder list
The upper list shows one row per monitored folder. The columns are:
Column
What it shows
**Path**
The folder being monitored.
**Status**
The folder's current state: **Idle** (waiting for the next scan), **Scanning** (a scan is in progress), **Paused** (the folder could not be found), **Disabled** (monitoring has been turned off for this folder), or an **Error** message if the last scan failed.
**File Count**
The number of files found in the folder during the last scan. Shows `--` if the folder has not been scanned yet.
**Last Scan Duration**
How long the last scan took, for example `2.140s`. Shows `--` if the folder has not been scanned yet.
**Last Scan Summary**
What the last scan found, for example `2 new track(s); 1 changed track(s)`, or `No changes` if nothing changed.
**Next Scan In**
A countdown to the next automatic scan, in seconds. Folders are re-scanned automatically every 30 seconds.
The list refreshes automatically while the window is open.
A folder scan can repeatedly report new files. This happens when a folder contains files that are not valid audio tracks: because they are never added to the track library, each scan treats them as new again. The **Recent events** log makes these files easy to spot. Look for **Warning** entries such as `New file is not a track`.
## The Recent events log
Below the folder list is the **Recent events** log. Where the folder list tells you the *summary* of the last scan, the events log tells you exactly *which* files were affected and what happened to each one.
Select a folder in the upper list to see its events. The log shows up to the 100 most recent events for that folder, newest first, and updates automatically. The columns are:
Column
What it shows
**Time**
The date and time the event occurred, in your local time zone.
**Type**
The severity of the event: **Info**, **Warning**, or **Error**.
**Message**
A description of what happened, usually naming the file involved.
### What each event type means
- **Info**: a normal monitoring action completed successfully. Examples: `Adding track from file: `, `Updating track from file: `, `Deleting track: `, and `Deleted file is not an existing track: `.
- **Warning**: something was skipped or needs your attention, but monitoring continues. Examples: `New file is not a track: ` and `Changed file is not a track: ` (the file could not be loaded as an audio track), and `Paused: folder not found` (the folder is currently unavailable).
- **Error**: a scan failed. The message includes the underlying error, for example `Error: `.
The events log is held in memory and lists only recent activity. It is cleared when PlayIt Live restarts, and only the last 100 events per folder are kept. It is intended for live troubleshooting, not as a permanent audit trail.
## Example: finding out why a file did not import
Suppose a presenter copies a new jingle into a monitored folder but it never appears in the track library. Open the Monitored Folders Status window and select that folder. In the **Recent events** log you might see a **Warning** entry reading `New file is not a track: jingle-final.wav`.
That tells you the file *was* detected, but PlayIt Live could not load it as a track, usually because the audio is corrupt, the format is unsupported, or the file is still being written. You can then re-export or re-copy the file and click **Re-scan now** to try again, watching the log for an **Info** entry such as `Adding track from file: jingle-final.wav` to confirm it imported.
## Re-scanning immediately
Click **Re-scan now** to force every monitored folder to be scanned immediately, without waiting for the automatic countdown. This is the quickest way to confirm that a file you have just added or fixed is now being picked up. New activity appears in the **Recent events** log for the selected folder as the scan runs.
Click **Close** to close the window. Monitoring continues in the background whether or not this window is open.
---
# Logged Tracks
Logged tracks are tracks that have been played in the past by PlayIt Live. Stored with each track is a timestamp to tell you when it was played.
In **Decks Mode** a track is logged if it is played for more than 75% of its duration.
In **Live-Assist Mode** a track is logged if it has started playing and exists in the playout log in the past.
## Logged Tracks Window
The Logged Tracks window shows a list of the recently logged tracks. It is possible to export the visible list to CSV format to import into Excel or another spreadsheet application for reporting.
### Past 24 hours
Filters the logged tracks list to those logged in the past 24 hours.
### Past 7 days
Filters the logged tracks list to those logged in the past 7 days.
### Past 30 days
Filters the logged tracks list to those logged in the past 30 days.
### Custom
Filters the logged tracks list by a custom date range. Select the dates using the calendar drop down and select the time.
### Logged Track List
Displays the list of logged tracks matching the selected date filter.
### Auto Export...
Auto Export automatically exports logged tracks as they are played. When enabled, a CSV file is created for each hour or day (depending on your file grouping selection), and track information is appended to that file each time a track is logged. Click the **Auto Export...** button to configure the export folder and select which track fields to include. The exported files can be imported into spreadsheet applications or other systems such as third-party schedulers for reconciliation.
### Export to CSV...
Click the **Export to CSV...** button to export the current visible logged track list to CSV (comma separated values) format. This format can be imported into spreadsheet applications for reporting purposes. When you click the button a window will be shown allowing you to select the fields you wish to export.
Click **Export** to select a file to export to.
### Close
Click the **Close** button to close the Logged Tracks window.
---
# Playout Policies
Playout policies define a set of rules to ensure the correct tracks are played. Playout policies restrict artists and tracks from being repeated too often. They can be filtered by track group.
There are three types of playout policy:
**Track Separation Playout Policy** ensures that the same track, artist or title is not repeated for a period of time. For example, tracks in a track group of Songs can be prevented from repeating for at least 2 hours while tracks in a track group of Jingles are not repeated for only at least 10 minutes.
**Daypart Separation Playout Policy** ensures that a track is not repeated again in the same daypart (e.g. Breakfast) for a period of days. This means regular listeners to the Breakfast show will not hear the same song repeated during the times when they regularly listen. Daypart Separation Playout Policies require the **Advanced Scheduling** module.
**Track Set Separation Playout Policy** ensures that any track in the same set is not played again for a specified period of time. Track sets can be defined by track group, tag, or filter. This policy is useful for ensuring variety within specific categories of content. For example, you can ensure *Local Artists* tagged tracks are separated by at least 1 hour to spread local content throughout the day, or for rock formats, ensure *Classic Rock* filtered tracks are separated by at least 30 minutes from other classic rock content. Track Set Separation Playout Policies require the **Advanced Scheduling** module.
---
# Manage Playout Policies
Lists all the playout policies in the system. Double-click an entry to begin editing.
### Playout policy list
Lists all the playout policies in the system. Double-click an entry to begin editing and launch the [Edit Track / Artist / Title Separation Playout Policy](/PlayItLive/218/playout-policies/edit-track-artist-separation), [Edit Daypart Separation Playout Policy](/PlayItLive/218/playout-policies/edit-daypart-separation), or [Edit Track Set Separation Playout Policy](/PlayItLive/218/playout-policies/edit-track-set-separation) window.
Each row includes a **Delete** icon. Click it to remove the playout policy from the system.
### Add New
Click **Add New** to begin adding a new playout policy to the system. Opens the [Choose Playout Policy Type](/PlayItLive/218/playout-policies/choose-type) window.
### Edit
Click **Edit** to begin editing the selected playout policy. Opens the [Edit Track / Artist / Title Separation Playout Policy](/PlayItLive/218/playout-policies/edit-track-artist-separation), [Edit Daypart Separation Playout Policy](/PlayItLive/218/playout-policies/edit-daypart-separation), or [Edit Track Set Separation Playout Policy](/PlayItLive/218/playout-policies/edit-track-set-separation) window.
### OK
Click **OK** to save changes and close the window.
### Cancel
Click **Cancel** to discard changes and close the window.
---
# Choose Playout Policy Type Window
### Track / Artist / Title Separation Playout Policy
Track / Artist / Title Separation Playout Policies ensure that the same track, artist or title is not repeated for a period of time. Selecting this type will open the [Edit Track / Artist / Title Separation Playout Policy](/PlayItLive/218/playout-policies/edit-track-artist-separation) window.
### Daypart Separation Playout Policy
Daypart Separation Playout Policies ensure that the same track is not repeated in the same daypart (e.g. Breakfast) for a period of time. This feature requires the **Advanced Scheduling** module, indicated by the **AS** indicator. Selecting this type will open the [Edit Daypart Separation Playout Policy](/PlayItLive/218/playout-policies/edit-daypart-separation) window.
### Track Set Separation Playout Policy
Track Set Separation Playout Policies ensure that any track in the same set (track group, tag, or filter) is not played again for a period of time. This feature requires the **Advanced Scheduling** module, indicated by the **AS** indicator. Selecting this type will open the [Edit Track Set Separation Playout Policy](/PlayItLive/218/playout-policies/edit-track-set-separation) window.
### OK
Confirm your selection.
### Cancel
Cancel your selection and close the window.
---
# Edit Track / Artist / Title Separation Playout Policy Window
### Track Separation Time
Use the up and down arrows to change the minimum number of hours or minutes that should pass before a track is played again. Use the dropdown to change the time unit.
### Artist Separation Time
Use the up and down arrows to change the minimum number of hours or minutes that should pass before an artist is played again. Use the dropdown to change the time unit.
### Title Separation Time
Use the up and down arrows to change the minimum number of hours or minutes that should pass before a title is played again. Use the dropdown to change the time unit.
**What is the difference between track separation and title separation?** Track separation ensures that the same recording is not played too frequently by recognising each track instance as unique. Title separation deals with different songs that share the same title, such as Christmas songs. For example, multiple artists might have their own versions of *Silent Night*. Bear in mind this will also separate completely different songs that happen to have the same title, such as *Hello* by Adele and *Hello* by Lionel Richie, or *The Power of Love* by Jennifer Rush, *The Power of Love* by Frankie Goes to Hollywood and *The Power of Love* by Huey Lewis and the News.
### Specific Track Groups
Check the checkbox to ensure this playout policy is only applied to the selected track groups. Leave the checkbox unchecked to apply the policy to all tracks.
### Name
The name of the playout policy.
### Disabled
Disable a playout policy so it is not considered by the scheduler.
### OK
Click **OK** to confirm changes to the playout policy.
### Cancel
Click **Cancel** to discard changes.
---
# Edit Daypart Separation Playout Policy Window
A Daypart Separation Playout Policy ensures that a track is not repeated again in the same daypart (e.g. Breakfast) for a period of days. This means regular listeners will not hear the same song repeated during the times when they regularly listen.
Premium Feature · Advanced Scheduling
AS [Purchase →](https://www.playitsoftware.com/Account/Subscription/AdvancedScheduling)
Daypart Separation requires the **Advanced Scheduling** module. Start a free two-week trial from within PlayIt Live via **Help > Licensing Information**.
### Separation Time
The number of days to wait before playing the same track again in this daypart.
### Daypart
The daypart for this policy. If no dayparts are shown, or to update a daypart, click the **Manage Dayparts** button.
### Specific Track Groups
Check the checkbox to ensure this playout policy is only applied to the selected track groups. Leave the checkbox unchecked to apply the policy to all tracks.
### Name
The name of the playout policy.
### Disabled
Disable a playout policy so it is not considered by the scheduler.
### OK
Click **OK** to confirm changes to the playout policy.
### Cancel
Click **Cancel** to discard changes.
---
# Manage Dayparts Window
A daypart defines a period of time during the week, typically a regular listening period for a target listener, such as Breakfast or Drive. Dayparts are used by Daypart Separation Playout Policies to prevent the same track from being played during a daypart for a period of days.
### Daypart list
Lists all the dayparts in the system. Double-click an entry to begin editing and launch the [Edit Daypart](/PlayItLive/218/playout-policies/edit-daypart) window.
Each row includes a **Delete** icon. Click it to remove the daypart from the system.
### Add New
Click **Add New** to create a new daypart. Opens the [Edit Daypart](/PlayItLive/218/playout-policies/edit-daypart) window to enter the daypart details.
### Edit
Click **Edit** to edit the selected daypart. Opens the [Edit Daypart](/PlayItLive/218/playout-policies/edit-daypart) window to modify the daypart details.
### OK
Click **OK** to save changes and close the window.
### Cancel
Click **Cancel** to discard changes and close the window.
---
# Edit Daypart Window
A daypart defines a period of time during the week, typically a regular listening period for a target listener, such as Breakfast or Drive. Dayparts are used by Daypart Separation Playout Policies to prevent the same track from being played during a daypart for a period of days.
### Name
The name of the daypart.
### Days/Hours
The Days/Hours section shows which hours on which days apply to the daypart. In this example, Drive is defined as the 4pm, 5pm, and 6pm hours, Monday to Friday.
To change whether an hour is assigned to the daypart, click the cell and type **Y** or **N** for Yes or No and press **Enter**. To change every day for a specific hour, click the column heading and type **Y** or **N**. To change every hour for a specific day, click the row heading and type **Y** or **N**. You can also drag to select a range of hours and type **Y** or **N**.
With a range selected, you can press **Delete** to clear the selected cells.
Blank cells represent "No" entries.
### OK
Click **OK** to save changes.
### Cancel
Click **Cancel** to discard changes.
---
# Edit Track Set Separation Playout Policy Window
Track Set Separation Playout Policies ensure that any track in the same set (track group, tag, or filter) is not played again for a specified period of time. This policy is useful for ensuring variety within specific categories of content.
Premium Feature · Advanced Scheduling
AS [Purchase →](https://www.playitsoftware.com/Account/Subscription/AdvancedScheduling)
Track Set Separation requires the **Advanced Scheduling** module. Start a free two-week trial from within PlayIt Live via **Help > Licensing Information**.
### Separation Time
Use the up and down arrows to change the minimum number of hours or minutes that should pass before any track in the selected set is played again. Use the dropdown to change the time unit.
### Set Type and Selection
Choose how to define the track set for this policy:
- **Track Group:** Select a track group to use all the tracks within that group as the set.
- **Tag:** Select a tag to use all tracks that have been tagged with the selected tag.
- **Custom Filter:** Click **Select filter...** to choose a custom filter. The filter interface is the same as creating a Filtered Track Group.
### Specific Track Groups
Check the checkbox to ensure this playout policy is only applied to tracks in the selected track groups. Leave the checkbox unchecked to apply the policy to all tracks regardless of track group.
### Name
The name of the playout policy. Choose a descriptive name that clearly indicates what the policy does.
### Disabled
Disable a playout policy so it is not considered by the scheduler.
### OK
Click **OK** to confirm changes to the playout policy.
### Cancel
Click **Cancel** to discard changes.
---
# Playout Pattern
The playout pattern is the repeating sequence of track groups that the scheduling engine uses to build the playout log. For example, a playout pattern can be configured with the following track groups:
- Songs
- Jingles
- Promos
This will result in Songs, Jingles, and Promos being scheduled back to back, repeating over each hour of the week. The scheduling engine fills each hour by cycling through the pattern, selecting a track from each group in turn.
You can override the playout pattern for individual hours using [Clocks](/PlayItLive/218/scheduling/edit-clock#playout-pattern-override).
To configure the playout pattern, open the [Manage Playout Pattern window](/PlayItLive/218/playout-pattern/manage).
---
# Manage Playout Pattern Window
The Manage Playout Pattern window allows you to configure which track groups are included in the playout pattern and the order in which they are used.
### Track Group List
Lists all available track groups that can be added to the playout pattern.
### Add to Playout Pattern
Click the **\>** button to add the selected track group from the track group list to the playout pattern.
### Remove from Playout Pattern
Click the **<** button to remove the selected track group from the playout pattern.
### Playout Pattern Track Group List
Lists the track groups currently in the playout pattern, in the order they will be used by the scheduling engine.
### Move Up
Click the **Up** button to move the selected playout pattern track group up the list.
### Move Down
Click the **Down** button to move the selected playout pattern track group down the list.
### OK
Click **OK** to save changes to the playout pattern.
### Cancel
Click **Cancel** to discard changes.
---
# Scheduling
It is possible to schedule items in the playout log for the future. This allows for future planning and to see what tracks will play ahead of time.
Typically, hour-long templates called clocks are created and then scheduled to individual hours. The playout log can then be scheduled and set in time. The playout log can be tweaked by the user for their needs.
A detailed video demonstrating the scheduling features in PlayIt Live can be found on the PlayIt Software YouTube channel:
## How scheduling works
- [Clocks](/PlayItLive/218/scheduling/clocks) define the structure of each hour. They are templates that specify what types of content should play and in what order.
- The [Playout Pattern](/PlayItLive/218/playout-pattern/overview) assigns clocks to hours of the week, creating a repeating weekly schedule.
- [Clock Schedule](/PlayItLive/218/scheduling/clock-schedule) assigns clocks to the hours of the week using reusable weekly templates, and lets you apply one-off overrides to individual hours.
- The [Playout Log](/PlayItLive/218/scheduling/playout-log) is the generated output from the scheduling engine. It shows the actual items that will play at each time.
- [Advert Scheduling](/PlayItLive/218/adverts/overview) lets you schedule advert blocks across the playout log.
- [Scheduled Events](/PlayItLive/218/scheduled-events/overview) trigger actions at specific times, such as switching audio sources or running plugin commands.
---
# Clocks
Clocks are hour-long templates used to define how an hour of playout content should sound. When a clock is scheduled, the playout log will generate items to schedule based on the clock items.
There are two types of clock:
- **Standard:** a full hour-long clock that defines the complete structure of an hour.
- **Partial:** a reusable mini clock that can be inserted into other clocks to avoid repeating common sequences of clock items.
## Clock item types
A clock can contain the following types of clock item:
- **[Track](/PlayItLive/218/scheduling/edit-track-settings):** plays a specific track from your library. The scheduler always inserts the chosen track at this position, which is useful for fixed elements such as a news jingle or station identifier that must play at the same point every hour.
- **[Track Group](/PlayItLive/218/scheduling/edit-track-group-settings):** the scheduler selects a track from the chosen [track group](/PlayItLive/218/track-groups/overview) using a selection strategy, taking [playout policies](/PlayItLive/218/playout-policies/overview) into account. Use this for music rotations where you want variety rather than a fixed track.
- **[Break Note](/PlayItLive/218/scheduling/edit-break-note-settings):** a non-audio text marker in the playout log that reminds the presenter of something, such as a station ident or a live read. A break note can have a duration, during which silence is played.
- **[Fixed Time Marker](/PlayItLive/218/scheduling/edit-fixed-time-marker):** anchors scheduling to a specific point in the hour. Items before the marker play normally; items after it are held until the marker's time is reached. Can be configured as Hard (cuts off any playing item to hit the time exactly), Soft (waits for the current item to finish), or Not Before (prevents items after it from playing before the specified time). Use fixed time markers to ensure news bulletins, ad breaks, or other timed content go to air at the right moment.
- **[Voice Track](/PlayItLive/218/scheduling/edit-voice-track-settings):** inserts a placeholder for a presenter link recorded ahead of time. The presenter records the link in the [Segue Editor](/PlayItLive/218/main-window/segue-editor) or via [Remote Voice Tracking](/PlayItLive/218/remote-access/remote-voice-tracking), and it is played back at this position in the log. Use voice tracks to pre-produce shows that sound live.
- **[Remote URL](/PlayItLive/218/scheduling/edit-remote-url-settings):** plays audio from an internet or network address. This can be a static audio file hosted on a server, or a continuous live stream such as an Icecast or Shoutcast feed. Use this to pull in a remote feed, for example a national network programme or a DJ streaming from a remote location.
- **[Aux Input](/PlayItLive/218/scheduling/edit-aux-input-settings):** plays live audio from a physical input on your sound card for a set duration. Typically used to bring in a live news feed from an external provider, for example IRN or Sky News over satellite.
- **[Advert Block](/PlayItLive/218/scheduling/edit-advert-block-settings):** reserves a slot for a group of adverts. The actual advert tracks played are determined by the corresponding advert block entry in the [advert log](/PlayItLive/218/adverts/log) for the scheduled hour, matched by the block's start time. Use advert blocks to define where commercial breaks fall in your schedule. Requires the **Advanced Scheduling** module.
- **[Scheduled Event Action](/PlayItLive/218/scheduled-events/overview):** triggers a [scheduled event action](/PlayItLive/218/scheduled-events/overview) inline at this exact position in the playout log as part of playout, rather than at a fixed clock time. Use this when you need an action (such as switching automation on or off) to happen at a specific point in the running order rather than at a specific time.
- **[Hook Sequence](/PlayItLive/218/scheduling/edit-hook-sequence-settings):** plays short clips (hooks) from multiple tracks back to back, typically with station identifiers or sweepers between them. Used to promote songs coming up in the next hour or to showcase tracks from a particular group. Requires the **Advanced Scheduling** module.
- **[Merge Start / End](/PlayItLive/218/scheduling/edit-merge-start-settings):** defines a segment into which external content (typically a commercial traffic log) can be merged. Place a Merge Start item at the beginning and a Merge End item at the end of the segment, then use the [Merge External Log File](/PlayItLive/218/scheduled-events/merge-external-log) scheduled event action to insert the external content. Requires the **Advanced Scheduling** module.
- **[Partial Clock](/PlayItLive/218/scheduling/edit-partial-clock-settings):** inserts a previously created partial clock into the current clock. Partial clocks are reusable mini-clocks containing commonly used sequences of clock items, keeping your programming consistent without duplicating entries. Items are inserted verbatim, including any fixed time markers, which maintain their absolute time positions.
## Managing clocks
To manage clocks, open the [Manage Clocks window](/PlayItLive/218/scheduling/manage-clocks). To edit a clock, open the [Edit Clock window](/PlayItLive/218/scheduling/edit-clock).
---
# Manage Clocks Window
Lists all the clocks in the system. Double-click an entry to begin editing and launch the [Edit Clock window](/PlayItLive/218/scheduling/edit-clock).
### Clocks list
Shows the list of clocks in the system. Each clock displays its name and type. Double-click an entry to begin editing.
Each row has a **Clone** button to create a copy of the selected clock, which is useful for making small adjustments without rebuilding the entire clock. Each row also has a **Delete** button to remove the clock from the system.
### Add New
Click **Add New** to create a new clock and launch the [Edit Clock window](/PlayItLive/218/scheduling/edit-clock).
### Edit
Click **Edit** to begin editing the selected clock and launch the [Edit Clock window](/PlayItLive/218/scheduling/edit-clock).
### OK
Click **OK** to save changes.
### Cancel
Click **Cancel** to discard changes.
### Apply
Click **Apply** to save changes without closing the window.
---
# Edit Clock Window
The Edit Clock window allows you to create and edit clocks. A clock is a template for an hour of programming, containing a list of items that define the order and type of content to be scheduled. This window is launched from the [Manage Clocks window](/PlayItLive/218/scheduling/manage-clocks).
### Clock name
The name of the clock.
### Colour
The colour of the clock as displayed on the [Clock Grids](/PlayItLive/218/scheduling/clock-grids) view.
### Clock type
Determines how the clock functions within the scheduling system. There are two types:
- **Standard:** A standard clock is a full hour-long template that can be scheduled directly onto the Clock Schedule window. Standard clocks contain all the items that will make up an hour of programming.
- **Partial:** A partial clock is a reusable mini clock that contains a sequence of clock items designed to be inserted into other clocks. Partial clocks cannot be scheduled directly but are instead inserted into standard clocks using a Partial Clock item. This allows you to define commonly used sequences (such as a top of the hour sequence) once and reuse them across multiple different clocks. Partial clocks require the Advanced Scheduling module.
### Clock item list
The list of items in the clock. Each item features its approximate play time, type, settings, segue flag, segue style, protected flag, and notes. Clock item rows are highlighted with different colours depending on their type or track group, making it easier to visually distinguish between different elements in your clock at a glance.
To duplicate an item, select it and press **Ctrl+D**. You can also copy a clock item with **Ctrl+C** and paste it with **Ctrl+V**. Click and drag items to re-order them in the list.
The columns are:
- Play Time The approximate play time of a clock item, determined from the sum of all previous item durations. The duration of each item varies depending on the choice of settings. For a track group item, the duration is determined from the average duration of all tracks in the group. A fixed time marker resets the play time to the fixed time.
- **Type:** The type of the clock item.
- **Settings:** The settings of the clock item. Click the edit icon to launch the edit settings window, such as the [Edit Track Settings window](/PlayItLive/218/scheduling/edit-track-settings), [Edit Track Group Settings window](/PlayItLive/218/scheduling/edit-track-group-settings), or other settings windows depending on the item type.
- **Segue?:** When checked, the scheduled playout log item will have the segue flag set.
- Segue Style The segue style to apply to the scheduled playout log item. If set to '--' the default will be used. For tracks marked as sweeper, the default from Settings will be used.
- Protected? When checked, the scheduled playout log item will be protected. Protected items will not be dropped by Fixed Time Markers or the Auto Adjust feature. Use this for items that must be played during an hour, such as advert blocks.
- **Notes:** Click the edit icon to add notes about this clock item. This is purely for informational purposes.
To remove a clock item, select it and press the **Delete** key, or right-click the item and choose **Delete** from the context menu.
### Add
Click the **Add Clock Item** button to add a clock item to the end of the list.
### OK
Click **OK** to confirm changes to the clock.
### Cancel
Click **Cancel** to discard changes.
## Playout pattern override
The [playout pattern](/PlayItLive/218/playout-pattern/overview) is the repeating sequence of track groups that the scheduling engine cycles through to build the playout log. Normally a single playout pattern, configured in the [Manage Playout Pattern window](/PlayItLive/218/playout-pattern/manage), applies to every hour of the week. Each clock you schedule fills its track group items by drawing from this one station-wide pattern.
A playout pattern override lets an individual clock use its **own** sequence of track groups instead of the station default. The override is a property of the clock itself, set on the **Playout Pattern** tab of the Edit Clock window, so wherever that clock is scheduled, its override applies for those hours.
This is useful when a particular type of programming should mix content differently from the rest of your output. For example, you might run a relaxed weekend overnight clock that should play two songs between each jingle, or a specialist music show clock that draws from a different balance of track groups than your daytime rotation. Rather than changing your station-wide pattern, you give just those clocks an override, and every other hour continues to use the default pattern unchanged.
Premium Feature · Advanced Scheduling
AS [Purchase →](https://www.playitsoftware.com/Account/Subscription/AdvancedScheduling)
The playout pattern override requires the **Advanced Scheduling** module. Start a free two-week trial from within PlayIt Live via **Help > Licensing Information**.
The **Playout Pattern** tab is only shown for Standard clocks; it is hidden for Partial clocks, which are inserted into other clocks rather than scheduled directly.
On the Playout Pattern tab, tick Override playout pattern to give this clock its own sequence of track groups in place of the station default.
### Override playout pattern
The **Override playout pattern** checkbox that enables the clock-level override. When it is unticked, the track group list below is disabled and the clock uses the station-wide playout pattern.
### Playout pattern
The track group list defining this clock's playout pattern, enabled only when the override is ticked. Build the sequence of track groups you want this clock to use, for example two songs between each jingle.
To give a clock its own playout pattern:
1. Open the clock in the Edit Clock window and select the **Playout Pattern** tab.
2. Tick **Override playout pattern**. The track group list below becomes editable.
3. Build the sequence of track groups you want this clock to use. The list is pre-filled from your current station-wide pattern as a starting point, which you can then adjust.
4. Click **OK** to save. The clock will now use this pattern for every hour where it is scheduled.
When **Override playout pattern** is left unticked, the clock uses your station-wide [playout pattern](/PlayItLive/218/playout-pattern/overview) as normal. This is the default for every clock, so clocks you do not explicitly override are unaffected. Unticking the override on a clock that previously had one restores it to the station default.
You must add at least one track group to the list when the override is enabled. If the list is empty, PlayIt Live will prompt you to add a track group before the clock can be saved.
---
# Select Track
The Select Track window allows you to select a specific track for a clock item. This window is launched when you edit the settings of a **Track** type clock item in the [Edit Clock window](/PlayItLive/218/scheduling/edit-clock).
### Track Group selector
Use the dropdown to filter the track list by track group.
### Track search box
Use the search text box to filter the track list by artist and title.
### Track list
Select the track you wish to include by clicking it in the list. Double-click a track to immediately confirm your selection.
### OK
Click **OK** to confirm your selection.
### Cancel
Click **Cancel** to discard your selection.
---
# Edit Track Group Settings Window
The Edit Track Group Settings window allows you to select a track group and scheduling strategy for a clock item. This window is launched when you edit the settings of a **Track Group** type clock item in the [Edit Clock window](/PlayItLive/218/scheduling/edit-clock).
### Track group list
Select the track group you wish to include in the clock. Double-click a track group to immediately confirm your selection.
### Track scheduling strategy
Select the scheduling strategy PlayIt Live uses when deciding which track to select from the track group. The options are:
- **Default from settings:** Use the scheduling strategy as defined in [Settings](/PlayItLive/218/settings/live-assist-mode).
- **Smart Selection:** Selects a track using a weighted random algorithm. A track played longer ago is given a larger weight, increasing its chance of being selected.
- **Random:** Select a track entirely at random from the track group.
- **Most Rested:** Selects the track from the track group that was played longest ago.
### OK
Click **OK** to confirm your selection.
### Cancel
Click **Cancel** to discard your selection.
---
# Edit Break Note Settings Window
The Edit Break Note Settings window is used to configure a break note clock item. Break notes are text markers in the playout log that indicate a break point (e.g., for a news bulletin). This window is launched from the [Edit Clock window](/PlayItLive/218/scheduling/edit-clock).
### Duration
Use the up and down arrows to change the duration of the break note.
### Notes
Use the Notes text to indicate the purpose of the break to the presenter.
### OK Button
Click **OK** to save the settings and close the window.
### Cancel Button
Click **Cancel** to discard changes and close the window.
---
# Edit Fixed Time Marker Settings Window
The Edit Fixed Time Marker Settings window is used to configure a fixed time marker in a clock. Fixed time markers anchor the schedule to a specific point in the hour. This window is launched from the [Edit Clock window](/PlayItLive/218/scheduling/edit-clock).
### Fixed Time
The time within the hour that this marker targets. Use the up and down arrows to select the fixed time. For example, within the 20:00 (8pm) hour, a fixed time marker of --:15:00 would fix the time around 20:15:00 (8:15pm).
### Hard
A hard fixed time marker forces the schedule to hit this time exactly. Any playing items will immediately fade out and stop, and playout will advance to the next item after the fixed time marker.
### Soft
A soft fixed time marker is a target time. Any playing items will finish before advancing to the next item after the fixed time marker.
### Not Before
A "not before" marker ensures that items after this point are not scheduled before the specified time. Not Before fixed time markers are implicitly inserted when a new hour is scheduled.
### OK Button
Click **OK** to save the settings and close the window.
### Cancel Button
Click **Cancel** to discard changes and close the window.
---
# Edit Voice Track Settings Window
The Edit Voice Track Settings window is used to configure a voice track clock item. Voice tracks are placeholder items in the schedule that can be recorded by a presenter or voice talent. This window is launched from the [Edit Clock window](/PlayItLive/218/scheduling/edit-clock).
### Placeholder Duration
The intended duration of the voice track. This is used to estimate the duration of the track in the playout log.
### Description
Notes or instructions for the voice track that will be visible to the presenter or voice talent recording the track. This can include talking points, show flow information, or any other guidance about what should be recorded in this voice track segment.
### OK Button
Click **OK** to save the settings and close the window.
### Cancel Button
Click **Cancel** to discard changes and close the window.
---
# Edit Remote URL Settings Window
The Edit Remote URL Settings window is used to configure a remote URL clock item. Remote URL items can play audio from the internet or your internal network. This window is launched from the [Edit Clock window](/PlayItLive/218/scheduling/edit-clock).
It is possible to choose either a File or Live Stream:
- A **File** URL typically refers to a static file located on a server which is downloaded by PlayIt Live when it is loaded into a player. Remote files are intended to be a fixed length duration and this must be provided to PlayIt Live in order to ensure the item is scheduled with the correct length (as this is not known until load time).
- A **Live Stream** URL typically refers to an audio stream provided by a streaming media server such as Icecast or Shoutcast and could be an internet radio station or a remote DJ stream. PlayIt Live assumes the live stream will run forever so will attempt to restart the stream if the connection is dropped. PlayIt Live will play the live stream until the specified duration has elapsed. Live streams can also be stopped manually, or by using a hard fixed time marker.
For bringing in a remote presenter, outside broadcast, or recurring live DJ stream, consider using [Priority Streams](/PlayItLive/218/priority-streams/overview) instead of a Remote URL clock item. Priority Streams are configured centrally under **Manage > Priority Streams** and do not need to be added to individual clocks. The stream takes over live-assist playout automatically whenever it is connected and active, so you can change the stream URL or settings in one place without editing every clock that uses it. Priority Streams also handle reconnection and silence detection automatically, making them more robust for live feeds than a Remote URL clock item.
### Title
The title of the stream for your reference.
### History
Use the History button to use a recent Remote URL. This is handy if you regularly use the same Remote URL and want to quickly populate the settings.
### URL
The internet address of the file or stream to play. This should refer to a file or an internet stream. Please note that playlist files (m3u or pls) are not supported as they are actually playlist text files that contain the stream to play.
### Type
The type of audio the URL refers to. Choose **File** for a static audio file, or **Live Stream** for a continuous audio stream.
### Duration
For file URLs, this is the expected duration of the file used for scheduling. Use the **Get Duration From File** button to automatically fetch the duration from the remote file. For live stream URLs, this is the duration the live stream will play for.
### OK Button
Click **OK** to save the settings and close the window.
### Cancel Button
Click **Cancel** to discard changes and close the window.
---
# Edit Aux Input Settings Window
The Edit Aux Input Settings window is used to configure an aux input clock item. Aux input items can play live audio from an external input device on your computer. This is typically used to pull in a live news feed from an external provider such as IRN/Sky News over satellite. This window is launched from the [Edit Clock window](/PlayItLive/218/scheduling/edit-clock).
### Title
The title for the item. This is shown on the live log.
### Input device
The input device to pull the audio from. This can be a stereo or a mono device. Please note that the mono channel of a device cannot be used at the same time if it is used within a stereo channel.
### Duration
The duration to play the audio for. The aux input will play live audio from the selected device for this duration and then stop.
### OK Button
Click **OK** to save the settings and close the window.
### Cancel Button
Click **Cancel** to discard changes and close the window.
---
# Edit Advert Block Settings Window
The Edit Advert Block Settings window is used to configure an advert block clock item. An advert block represents a block of adverts to be played together. The advert tracks that are actually played are determined by the corresponding advert block 'start time' for the scheduled hour in the advert log. This window is launched from the [Edit Clock window](/PlayItLive/218/scheduling/edit-clock).
Premium Feature · Advanced Scheduling
AS [Purchase →](https://www.playitsoftware.com/Account/Subscription/AdvancedScheduling)
Advert blocks require the **Advanced Scheduling** module. Start a free two-week trial from within PlayIt Live via **Help > Licensing Information**.
### Start Time
The start time is used to indicate the approximate air time of the advert block within the hour. It is used to match up with the corresponding advert block in the advert log. Note that this does not mean the advert block will play at exactly this time past the hour. If you wish to do this, place a fixed time marker before the advert block.
### Max Duration
This is the maximum duration of the advert block. When the advert log is scheduled, the corresponding advert block will be no longer than this duration.
### Max Advert Slots
This is the maximum number of adverts that will play in this block. When the advert log is scheduled, there will be no more than this number of adverts in the advert block.
### Opener Track
A track that will play at the beginning of the advert block, before any adverts. This is typically used for a jingle or station identifier to introduce the commercial break. The opener track will only play if there are adverts scheduled into the block. If there are no adverts in the advert log for this block, then the opener track will not play.
### Closer Track
A track that will play at the end of the advert block, after all adverts have finished. This is typically used for a jingle or station identifier to close out the commercial break. The closer track will only play if there are adverts scheduled into the block. If there are no adverts in the advert log for this block, then the closer track will not play.
### OK Button
Click **OK** to save the settings and close the window.
### Cancel Button
Click **Cancel** to discard changes and close the window.
For more information, see [Advert Scheduling](/PlayItLive/218/adverts/overview).
---
# Edit Hook Sequence Settings Window
The Edit Hook Sequence Settings window is used to configure a hook sequence clock item. Hook sequences are special items that can play a series of short clips of songs known as hooks back-to-back. This is typically used to promote current types of songs on your station, or songs that will be playing in the next 15-60 minutes. This window is launched from the [Edit Clock window](/PlayItLive/218/scheduling/edit-clock).
Premium Feature · Advanced Scheduling
AS [Purchase →](https://www.playitsoftware.com/Account/Subscription/AdvancedScheduling)
Unlock this feature by adding the Advanced Scheduling module to your PlayIt Live licence.
A 3-song hook sequence will be of the following form:
### In Track
A station identifier or audio such as "Coming Up" that opens the sequence.
### Song 1 Hook
A short snippet of the song. The Hook Start and Hook End defined on the track is used for the best hook selection. If no Hook Start or Hook End is defined, a hook starting at 20% into the track will be used.
### Transition Track
A short sweeping track to link Song 1 hook and Song 2 hook together.
### Song 2 Hook
A short snippet of the second song.
### Transition Track
A short sweeping track to link Song 2 hook and Song 3 hook together.
### Song 3 Hook
A short snippet of the third song.
### Out Track
The final element to play, typically another station identifier or audio such as "Stay Tuned".
The target duration is used to determine the length of the hook sequence. If the duration of the hooks is too short or too long, their durations will be adjusted proportionally to meet the target duration.
### Name
The name of the hook sequence.
### Number of Songs
The number of songs in the hook sequence. Only tracks with the type 'Song' will be considered.
### Target Duration
The target duration of the hook sequence in seconds.
### Type
There are 4 types of hook sequence:
**Track Group Random:** plays hooks from unique random songs selected from the chosen track group.
**Coming Up:** plays hooks from songs scheduled to play in the near future. When using the **minutes** option, hooks are selected from songs scheduled within the specified time period. When using the **songs** option, hooks are selected from the next X songs in the playout log.
**Coming Up (Reversed):** the same as Coming Up, but the hooks play in reverse order (last song first).
**Coming Up (Random):** the same as Coming Up, but the hooks are played in a random order rather than in schedule order.
### Hook Elements
The hook elements are used at the start, between hooks, and at the end of the hook sequence. Each element can be a specific track or a random track from a specific track group. Typically hook elements are only a few seconds long.
### Advanced Scheduling Indicator
The **AS** indicator shows whether the **Advanced Scheduling** module has been licensed. It is required to use hook sequences. If the indicator is shown in red, click it to purchase or start a free trial of the module.
### OK Button
Click **OK** to save the settings and close the window.
### Cancel Button
Click **Cancel** to discard changes and close the window.
---
# Edit Merge Start Settings Window
The Edit Merge Start Settings window is used to configure a merge start clock item. A merge start item allows you to schedule the insertion of external content, such as commercial traffic logs, into your playout log at a specified point. This window is launched from the [Edit Clock window](/PlayItLive/218/scheduling/edit-clock).
Premium Feature · Advanced Scheduling
AS [Purchase →](https://www.playitsoftware.com/Account/Subscription/AdvancedScheduling)
Unlock this feature by adding the Advanced Scheduling module to your PlayIt Live licence.
Place a Merge Start item into your clock at the point where you want to insert external content, followed by a Merge End to indicate the end of the merge segment. Use the Merge External Log File scheduled event action to perform the merge operation. This is typically used to insert commercial traffic logs.
### Start Time
The start time specifies the intended time at which the Merge Start item will take effect in the playout log. This ensures the correct timed content from the external merge log, such as a commercial traffic log, is merged.
### Duration
The duration indicates the approximate length of the merged content. This helps the scheduler allocate sufficient time for the merged content to fit into the playout log.
### Advanced Scheduling Indicator
The **AS** indicator shows whether the **Advanced Scheduling** module has been licensed. It is required to use merge start items. If the indicator is shown in red, click it to purchase or start a free trial of the module.
### OK Button
Click **OK** to save the settings and close the window.
### Cancel Button
Click **Cancel** to discard changes and close the window.
---
# Edit Partial Clock Settings Window
The Partial Clock Settings window allows you to select which partial clock will be inserted at this position in the parent clock. This window is launched from the [Edit Clock window](/PlayItLive/218/scheduling/edit-clock).
This window displays a list of all available partial clocks that have been created in your system. Note that only clocks with the type 'Partial' will be displayed here.
Once inserted, the partial clock items will be dynamically added to the parent clock verbatim, including any fixed time markers at their absolute positions. Partial clocks can be expanded in the parent clock by clicking the \[+\] icon.
### Description
A description of what this window is used for.
### Clock List
The list of available partial clocks to select from. Click on a partial clock to select it.
### OK Button
Click **OK** to confirm the selection and close the window.
### Cancel Button
Click **Cancel** to discard the selection and close the window.
---
# Clock Schedule
Clocks must be scheduled before the playout log scheduler will use them to build the playout log. The Clock Schedule window is where you build weekly templates and view the resolved schedule.
A single clock grid is always available. Using more than one grid requires a licence with the **Advanced Scheduling** module; without it, only the base (lowest layer) grid takes effect.
The window has two views, switched with the toggle at the top:
- The **Clock Grids** view is where you build and edit the reusable weekly templates that drive the schedule.
- The **Schedule View** shows the resolved schedule on a calendar and is where one-off overrides are made.
## In this section
- [Clock Grids](/PlayItLive/218/scheduling/clock-grids): build and edit weekly templates, each assigning a clock to every hour of the week.
- [Schedule View](/PlayItLive/218/scheduling/schedule-view): view the resolved schedule for any week and apply one-off overrides to individual hours.
## Legacy calendar mode
Earlier versions of PlayIt Live scheduled clocks using a per-date calendar. If your station is still using that mode, see [Legacy Clock Schedule](/PlayItLive/218/scheduling/legacy-calendar).
---
# Clock Grids
The Clock Grids view is part of the [Schedule Clocks](/PlayItLive/218/scheduling/clock-schedule) window. It is where you build and edit the weekly templates that drive the schedule. Each grid assigns a clock to each hour of the week and can be limited to specific [date ranges](#date-ranges) or [week recurrence](#recurrence-and-the-reference-week). Multiple grids are stacked using the [Layer](#layers) value.
> **Note:** Using more than one clock grid requires a licence with the **Advanced Scheduling** module. A single grid can always be used. If the module is not licensed, only the base (lowest layer) grid takes effect and a banner explains how to enable the rest.
## Editing the grid
Each cell of a grid represents one hour of one day of the week. Assign a clock to a cell in any of the following ways:
**Drag and drop:** drag a clock from the clock list on the right-hand side onto a cell. If you have a range of cells selected, dropping a clock onto the selection applies it to every selected cell at once.
**Right-click menu:** right-click a cell or selection to open a context menu with the following options:
- **Assign '*clock name*'** - apply the clock currently selected in the clock list to the selected cells.
- **Clear** - remove the clock assignment from the selected cells, leaving them empty so they fall through to the layer below.
- **Copy** - copy the selected cells.
- **Paste** - paste copied cells over the selection.
**Copy and paste:** select one or more cells, then press **Ctrl+C** to copy and **Ctrl+V** to paste. This shortcut also works in the Schedule View.
## Layers
Each grid has a **Layer** number that controls the order in which grids are combined to produce the final schedule. PlayIt Live starts with the clocks from the lowest-numbered layer and then stacks each successive layer on top, with higher-numbered layers overriding the hours set by the layers below.
**Clock grids do not need to be fully filled in.** Where a higher-layer grid leaves a cell empty, the clock from the layer below still takes effect for that hour. Only the hours you explicitly assign in a higher layer are overridden; everything else falls through to the base.
For example, you might have:
- **Layer 0 - Standard Week**: a fully filled grid covering every hour of the week with your normal clock rotation.
- **Layer 1 - Weekend Music**: a grid with clocks assigned only to Saturday and Sunday. Monday to Friday are left empty, so those hours come from Layer 0 as normal.
- **Layer 2 - Bank Holiday**: a grid with clocks assigned only to the hours of a bank holiday day. All other cells are empty and fall through to whichever layer below them has a clock for that hour.
The Weekend Music grid at Layer 1 fills only Saturday and Sunday. The empty weekday cells fall through to the Standard Week grid on Layer 0.
If two grids share the same layer number, the one that comes first alphabetically by name is applied first, and the next one stacks on top of it. For example, if both "Evening Jazz" and "Evening News" are at Layer 1, "Evening Jazz" is applied first and "Evening News" overrides any hours it covers.
> **Note:** When Advanced Scheduling is not licensed, only the base (lowest-numbered) grid stays active so the week keeps full cover. Higher overlays take effect once Advanced Scheduling is enabled.
## Recurrence and the reference week
By default a grid applies every week. Use **Repeat every N weeks** to make a grid apply only on a repeating cycle of weeks.
For example, a station that runs a different schedule on alternate weeks could set up:
- **Week A**: a grid set to repeat every 2 weeks, with its reference week set to any week where Week A should play.
- **Week B**: a second grid also set to repeat every 2 weeks, with its reference week set to the following week.
Both grids sit at Layer 0 and cover the full week, so on any given week exactly one of them is active. Because this requires two grids, a licence with the **Advanced Scheduling** module is needed.
The reference week is the anchor PlayIt Live uses to count the cycle. Weeks are counted in whole steps from the reference week, and the grid is active when the count from the reference is an exact multiple of the interval. **Week starts on** sets which day each week begins on, so the cycle lines up correctly with your schedule.
Recurrence combines with layers and date ranges: an every-other-week grid can sit at Layer 1 and only override the hours it needs to change, leaving the weekly base at Layer 0 to fill in everything else.
## Date ranges
A grid with no date ranges is active all the time. Add one or more **date ranges** to restrict a grid to only the periods you specify. Outside those ranges the grid is ignored and the layers below take over as normal.
Use date ranges when a grid should only apply for a known period of time rather than running indefinitely. Common examples:
- **Seasonal programming**: a Christmas schedule grid with a date range of 23 December to 2 January. Outside that range the standard week beneath it plays as normal.
- **One-off events**: a bank holiday grid active only on that day, leaving every other day unaffected.
- **Temporary changes**: a grid covering a promotional period or a sports season, automatically switching off when the period ends without having to remember to disable it manually.
A grid can have more than one date range, so you can reuse the same grid for recurring fixed dates without duplicating it. Date ranges also combine with recurrence: a grid set to repeat every other week and limited to a date range will only apply on the active weeks within that range.
**Ignore year on dates:** when you add or edit a date range you can tick **Ignore year on dates** to make it repeat every year. The year you enter is ignored and only the day and month are matched, so the range switches on automatically each year between the same dates. A Christmas grid with a range of 23 December to 2 January and this option ticked will apply every festive season without you having to update the dates, including the wrap across the new year. Recurring ranges are listed by day and month only, with a *(recurring)* badge, and never show a *(past)* suffix because they apply every year.
Click **Edit Date Ranges...** in the grid properties to open the Date Ranges window.
---
# Schedule View
The Schedule View is one of the two views of the [Clock Schedule](/PlayItLive/218/scheduling/clock-schedule) window. It shows the resolved schedule as it will be evaluated by the playout log scheduler, with the active clock for every hour of the visible week, taking every enabled clock grid and any one-off overrides into account.
Hours can also be overridden one at a time without changing the underlying grids. Overrides take precedence over every grid layer and are shown with a pin indicator.
## Using the schedule grid
The schedule grid works similarly to a spreadsheet. Each cell represents one hour in one day of the visible week, showing which clock is assigned to that slot.
**Editing a clock assignment:** double-click a cell to edit the clock assigned to that hour. Overriding a single hour this way does not affect the underlying clock grids.
**Assigning a clock by drag and drop:** drag a clock from the clock list on the right-hand side onto a cell to override that hour. If you have a range of cells selected, dropping a clock onto the selection applies it to every selected cell at once.
**Right-click menu:** right-click a cell or selection to open a context menu with the following options:
- **Assign '*clock name*'** - apply the clock currently selected in the clock list to the selected cells as an override.
- **Clear Override** - remove the one-off override from the selected cells so they fall back to the clock resolved from the grids.
- **Copy** - copy the selected cells.
- **Paste** - paste copied cells over the selection.
**Keyboard navigation:** use the arrow keys (**↑**, **↓**, **←**, **→**) to move between cells.
**Copy and paste:** select one or more cells, then press **Ctrl+C** to copy and **Ctrl+V** to paste. This shortcut also works in the Clock Grids view.
**Selecting multiple cells:** click and drag with the mouse to select a range of cells, or hold **Shift** and press the arrow keys to extend the selection, the same approach as selecting cells in a spreadsheet.
**Overridden hours:** any hour that has been overridden is shown with a pin indicator, distinguishing it from hours resolved from the clock grids.
## Daylight saving time
On days where the clocks change, the Schedule View adjusts the row layout automatically.
**Spring forward (clocks go forward, e.g. last Sunday in March in the UK):** the skipped hour does not exist in that timezone on that day. Its cell is shown as unavailable in the spring-forward day's column. The clock grid's assignment for that hour is simply not used; the playout log scheduler moves straight on to the next valid hour.
**Fall back (clocks go back, e.g. last Sunday in October in the UK):** the repeated hour appears twice in the row list. The second occurrence is labelled **01:00 (2nd)** to distinguish it. Both rows resolve the same clock from the clock grid, since the grid assigns one clock per local hour. To use a different clock for the second occurrence, drag a clock from the picker onto the **(2nd)** row in the Schedule View to place an override on that specific hour.
---
# Legacy Clock Schedule
The legacy clock schedule assigns clocks to individual hours on specific dates using a calendar. This mode is kept for stations that have not yet switched to [Clock Grids](/PlayItLive/218/scheduling/clock-grids).
To switch to Clock Grids, a migration wizard is available from the banner shown at the top of this window. It analyses your existing schedule and creates equivalent clock grids before switching mode.
To switch back to this mode after migrating, open **File > Settings > Live-Assist Mode** and change **Clock scheduling mode** to Legacy. Your legacy schedule is never deleted when you switch away, so switching back restores it exactly as it was.
Some stations prefer this mode for highly irregular schedules where each day differs significantly from the last and a repeating weekly template would need constant overriding. In that case, the per-date calendar gives direct control over every individual hour without any layer or recurrence logic to reason about.
## Schedule calendar
The schedule calendar shows a weekly grid where each cell represents one hour of the day. Assigned clocks appear as coloured blocks. Use **Previous Week** and **Next Week** to navigate. The current day and hour are highlighted in red.
To add a new clock assignment, click a free slot on the grid, then choose a clock from the picker that appears. Click **Add New** to add an assignment without dragging. Double-click an existing assignment to edit its time and clock; if the assignment is recurring, you will be asked whether to edit that occurrence or all occurrences. Click **OK** to save changes or **Cancel** to discard them.
### Previous Week
The **Previous Week** navigation button.
### Next Week
The **Next Week** navigation button.
### Day heading
A day column heading. The current day is highlighted in red.
### Hour heading
An hour row heading. The current hour is highlighted in red.
### Clock assignment
A coloured clock assignment block spanning one or more hours.
### Add New
The **Add New** button, which adds an assignment without dragging.
### OK
The **OK** button, which saves your changes.
### Cancel
The **Cancel** button, which discards your changes.
## Migrating to Clock Grids
The banner provides three buttons: **Migrate and Switch** (opens the migration wizard), **Switch Without Migrating**, and **Dismiss**.
---
# Playout Log
The playout log is the generated sequence of items that the automation system plays out. It shows past events that have already been played and future events that are scheduled to play.
The playout log is built by the scheduling engine from the clocks assigned to each hour. When a clock is scheduled, the scheduling engine generates playout log items matching the clock items for that hour. If no clock has been scheduled for an hour, the [playout pattern](/PlayItLive/218/scheduling/overview) is used to generate the playout log items instead.
You can view and edit the playout log, manually add or remove items, re-schedule ranges of hours, and import or export the log to external files.
- [Edit Playout Log](/PlayItLive/218/scheduling/edit-playout-log): view and edit the playout log, schedule or unschedule ranges, and add items manually
- [Edit Playout Log (Scheduled)](/PlayItLive/218/scheduling/edit-playout-log-scheduled): the columns shown in the playout log when items are scheduled
- [Import Playout Log](/PlayItLive/218/scheduling/import-playout-log): import a playout log generated by an external scheduler
- [Export Playout Log](/PlayItLive/218/scheduling/export-playout-log): export the playout log to a file
---
# Edit Playout Log
The Edit Playout Log window allows you to view and edit the [playout log](/PlayItLive/218/scheduling/playout-log) for a selected date and time range. Use it to manually add or remove items, schedule or unschedule clock items for a range of hours, and import or export the log.
### Range start time selector
Use the date and time selectors to show in the playout log list only items that begin on or after the selected time.
### Range end time selector
Use the date and time selectors to show in the playout log list only items that begin before the selected time.
### Import
Click **Import** to import a playout log generated by an external scheduler. See [Import Playout Log](/PlayItLive/218/scheduling/import-playout-log).
### Export
Click **Export** to export the log to the PlayIt Live Playout Log format so it can be imported to another date or time. See [Export Playout Log](/PlayItLive/218/scheduling/export-playout-log).
### Schedule
Click **Schedule** to schedule clocks for the selected date range. The scheduling engine will generate playout log items from the clock items assigned to each hour in the range. If no clock is scheduled for an hour slot, the playout pattern will be used.
### Unschedule
Click **Unschedule** to remove all scheduled items from the selected date range.
### Playout log
The playout log grid shows all scheduled items in the selected date range. See [Edit Playout Log (Scheduled)](/PlayItLive/218/scheduling/edit-playout-log-scheduled) for a description of the columns and a populated example.
### Add
Click **Add** to manually add a new item to the playout log below the selected item.
### OK
Click **OK** to save changes and close the window.
### Cancel
Click **Cancel** to close the window without saving.
### Apply
Click **Apply** to save changes without closing the window.
## Replacing a track
When a scheduled item in the playout log is a track, you can swap it for a different track without re-running the whole log. This is useful when a single scheduled song is no longer suitable, for example the file has become unavailable, you have the wrong version of a song, or you simply want a different track in that slot, but you do not want to unschedule and re-schedule the entire hour.
To replace a track, click the pencil edit icon in the item's **Settings** cell. For an existing scheduled track item this opens the **Replace Track** picker, which lists candidate replacement tracks. (For an empty or newly added row, it instead opens the basic Select Track form so you can choose the first track.)
The Replace Track picker shows the original track, a source filter, a search box, and a list of candidate replacements:
### Original
The **Original:** label showing the scheduled track being replaced, with its artist, title and duration.
### Source
The **Source** dropdown used to choose which track group the candidates are drawn from, or **All Tracks**.
### Search
The search box for filtering candidates by artist or title, or with a filter expression.
### Candidate list
The list of candidate replacement tracks, showing the **Artist**, **Title**, **Duration** and **Diff** columns. Candidates that would break a scheduling rule are highlighted with an amber tint and left bar.
### Advanced
The **Advanced** section, where you can turn on playout policy violation checking. This is part of the premium **Advanced Scheduling** module.
### Violation legend
The colour legend shown while violating tracks are highlighted, explaining that an amber row **Violates playout policy**.
### Replace Track
The **Replace Track** button, enabled once a candidate is selected.
### Cancel
The **Cancel** button.
The picker provides:
Element
What it does
**Original**
Shows the track currently in the log slot, with its artist, title and duration.
**Source**
Limits the candidate list to a single [track group](/PlayItLive/218/track-groups/overview), or **All Tracks** to consider every track. When the track was scheduled from a track group item in the clock, the dropdown is preselected to that source track group, so the replacement candidates start from the same group the track was originally scheduled from. If the track was not scheduled from a track group (for example a specific track item), the dropdown defaults to **All Tracks**.
**Search**
Filters the candidates. Type plain text to match the artist or title, or use a filter expression such as `Artist CONTAINS cher AND ActiveDuration > 180` for more precise matching.
**Artist** / **Title** / **Duration**
The candidate's artist, title and duration. You can add or remove columns by right-clicking a column header.
**Diff**
How much longer (`+`) or shorter (`-`) each candidate is than the original track, in seconds, helping you pick a replacement of a similar length. The list is sorted by this column by default, so the candidates closest in length to the original appear first.
Only tracks that are enabled and currently valid (not disabled, and within any start and expiry dates) appear as candidates, and the track currently in the slot is left out of the list. Right-click a candidate to **Preview** it or view its **Track Play History**.
Select the replacement you want and click **Replace Track** (or double-click the candidate). The scheduled item is updated to use the new track in place of the original. Click **Cancel** to close the picker without making a change.
### Checking for playout policy violations
The **Advanced** section at the bottom of the picker helps you avoid choosing a replacement that would break your scheduling rules. Tick **Check playout policy violations** and PlayIt Live flags any candidate that would violate a [playout policy](/PlayItLive/218/playout-policies/overview) (for example an artist or title separation policy), or that would be unavailable at the time the item is scheduled to play.
Choose how flagged candidates are treated:
- **Highlight violating tracks** keeps every candidate in the list but tints the offending rows amber, with a matching left bar. A **Violates playout policy** colour legend appears beside the option so the highlight is easy to identify. You can still select a highlighted track if you want to override the rule.
- **Hide violating tracks** removes the offending candidates from the list entirely, leaving only replacements that satisfy your policies.
PlayIt Live remembers your choice, so the picker opens with the same setting the next time you replace a track.
Playout policy violation checking is part of the premium **Advanced Scheduling** module. If you do not have Advanced Scheduling, the **Advanced** section is disabled.
---
# Edit Playout Log (Scheduled)
When the [Edit Playout Log](/PlayItLive/218/scheduling/edit-playout-log) window contains scheduled items, the playout log grid displays the following columns for each item.
### Hour group
Each playout log item belongs to an hour group. Items are grouped by the hour in which they are scheduled to play.
### Played
Displays **Y** when the item has been played.
### Play Time
Each playout log item has an approximate play time. Assuming previous hours do not over or under run, this time should be accurate.
### Hour position
The position in the hour. The position can be changed by dragging the item up or down the list.
### Type
The type of the playout log item. The available options are:
- **Track**: Choose a specific track to play.
- **Fixed Time Marker**: Choose a fixed time marker to keep to time within the hour.
- **Break Note**: Choose a break note to include in this position in the playout log.
- **Voice Track**: Choose a voice track to insert a voice track placeholder and record a voice track via the main interface.
- **Remote URL**: Choose a remote URL file or stream to include in this position in the log.
- **Aux Input**: Choose an external audio input to include in this position in the log.
- **Advert Block**: Choose an advert block to play a sequence of adverts together as part of the advert log.
- **Scheduled Event Action**: Choose a scheduled event action to trigger an automated action at this position in the log.
- **Hook Sequence**: Choose a hook sequence to play a series of track hooks back to back.
- **Merge Start**: Marks the beginning of a segment where external content (such as commercial traffic logs) will be merged into the playout log.
- **Merge End**: Marks the end of a merged content segment.
### Settings
The settings for the playout log item. Click the pencil icon to begin editing and launch the settings window. The settings windows used for the playout log item settings are similar to the clock item settings: [Edit Track Settings](/PlayItLive/218/scheduling/edit-track-settings), [Edit Break Note Settings](/PlayItLive/218/scheduling/edit-break-note-settings), [Edit Fixed Time Marker Settings](/PlayItLive/218/scheduling/edit-fixed-time-marker), [Edit Voice Track Settings](/PlayItLive/218/scheduling/edit-voice-track-settings), [Edit Remote URL Settings](/PlayItLive/218/scheduling/edit-remote-url-settings), [Edit Aux Input Settings](/PlayItLive/218/scheduling/edit-aux-input-settings), [Edit Hook Sequence Settings](/PlayItLive/218/scheduling/edit-hook-sequence-settings), or [Edit Merge Start Settings](/PlayItLive/218/scheduling/edit-merge-start-settings).
### Reason
The Reason column shows the source of the playout log item, indicating where it came from during the scheduling process. This will display either the clock name and which specific clock item generated this playout log item, or indicate that it came from the playout pattern. This information is useful for understanding how your schedule was built and troubleshooting any scheduling issues.
### Segue?
Check the segue checkbox to ensure that, when playing the item, the player automatically advances to the next item when it reaches the out point.
### Segue Style
The segue style to use for the playout log item. More information about segue styles can be found on the [Segue Editor](/PlayItLive/218/main-window/segue-editor) section.
### Protected?
Protected items will not be dropped by Fixed Time Markers or the Auto Adjust feature. Use this for items that must be played during an hour, for example, advert blocks.
### Delete button
Click the Delete button to remove the item from the playout log.
---
# Import Playout Log
The Import Playout Log window allows you to import logs from an external scheduler. The import feature supports the [PlayIt Playout Log Format](/PlayItLive/218/scheduling/playit-playout-log-format) (.pipl), [M3U Playlist](/PlayItLive/218/scheduling/m3u-playlist-format), and Scott Studios (SS32) format (deprecated).
The Scott Studios (SS32) format is deprecated and will be removed in a future update. Please contact support if you wish to learn more about this.
When a file is imported, the entire log for the selected date range will be cleared and replaced with the imported file. Click **Import** to import the file, then review the updated log in the [Edit Playout Log](/PlayItLive/218/scheduling/edit-playout-log) window before applying the changes. If there are any errors processing the imported log file, you will be prompted to view these when the import process has completed.
### Import file
The file path to import. Click **Browse** to select a file.
### Format
The format of the file to be imported. Supported formats are PlayIt Playout Log (.pipl), M3U Playlist, and Scott Studios (SS32).
### Base Audio Folder
The Base Audio Folder used by the importer. This is optional and used with the M3U or SS32 format. These formats can contain relative paths to files, so the Base Audio Folder is used to resolve an absolute path.
### Date range
The date range to import into. Any existing log entries for the selected date range will be cleared and replaced with the imported log.
### Status
Shows any issues with the selected import file. If the duration of the file content does not match the date range, you will be prompted to change the duration of the date range to match.
### Import
Click **Import** to start the importing process.
### Cancel
Click **Cancel** to close the window.
---
# PlayIt Playout Log Format
The PlayIt Playout Log Format (.pipl) is a delimited text file format used by PlayIt Live to import and export playout logs. It supports all playout log item types including tracks, fixed time markers, break notes, voice tracks, URLs, aux inputs, advert blocks, hook sequences, and more.
For the full specification and an online validator, see the [PlayIt Playout Log Format specification website](https://pipl.playitsoftware.com/).
---
# M3U Playlist Format
The M3U Playlist format is a simple text file containing a list of audio file paths. PlayIt Live supports importing M3U files as playout logs via the [Import Playout Log](/PlayItLive/218/scheduling/import-playout-log) window.
## Hour markers
To separate the playlist into hours, use a `# Hour:` comment to indicate which hour the following tracks belong to:
```
# Hour: 00:00
C:\Music\Jingles\Station ID.mp3
C:\Music\Songs\Artist - Title.mp3
C:\Music\Songs\Artist - Another Title.mp3
# Hour: 01:00
C:\Music\Jingles\Promo.mp3
C:\Music\Songs\Artist - Song.mp3
```
File paths can be absolute or relative. When using relative paths, Base Audio Folder
## Special items
Special items - fixed time markers, break notes, voice tracks, URLs, aux inputs, and advert blocks - are added using comment lines that start with `#`, followed by the item type and a list of `Field=value` settings.
**Field syntax:** separate fields with a semicolon (`;`). Wrap any value that contains spaces in double quotes (for example `Notes="News on the hour"`); values without spaces do not need quotes.
**Duration format:** durations are written as minutes and/or seconds - `3m` (3 minutes), `5s` (5 seconds), or `3m02s` (3 minutes 2 seconds). Seconds may include a decimal, such as `1m1.5s`.
### Fixed time markers
`Type` can be `Hard`, `Soft`, or `NotBefore`, and `TargetTime` is the time past the start of the hour.
```
# Fixed Time Marker: Type=Hard; TargetTime=3m02s
# Fixed Time Marker: Type=Soft; TargetTime=3m
# Fixed Time Marker: Type=NotBefore; TargetTime=5s
```
- `Type=Hard; TargetTime=3m02s` is a Hard fixed time marker at 3 minutes 2 seconds past the hour.
- `Type=Soft; TargetTime=3m` is a Soft fixed time marker at 3 minutes past the hour.
- `Type=NotBefore; TargetTime=5s` is a Not Before fixed time marker at 5 seconds past the hour.
### Break notes
```
# Break Note: Duration=1m1s; Notes="News on the hour"
```
This is a break note lasting 1 minute and 1 second with the notes "News on the hour".
### Voice track placeholders
```
# Voice Track Placeholder: Duration=1m
```
This is an empty voice track placeholder lasting 1 minute, ready for a presenter to record into.
To import a voice track that already has a recording, use the `Voice Track` form and point it at the recorded audio file:
```
# Voice Track: PlaceholderDuration=1m; RecordingDuration=55s; RecordingPath="C:\Recordings\VT_0900.wav"
```
- `PlaceholderDuration` is the length reserved in the log.
- `RecordingDuration` (optional) is the length of the recorded audio.
- `RecordingPath` (optional) is the path to the recorded audio file.
### Remote URLs
```
# URL: Duration=1m; Title="News"; URL="https://example.com/news.mp3"; Type=File
# URL: Duration=60m; Title="Simulcasted show"; URL="https://example.com/live"; Type=Live
```
- `Type=File` plays a remote audio file for the given `Duration` (the first line above).
- `Type=Live` connects to a live stream (the second line above). `LiveStream` is also accepted.
### Aux inputs
```
# Aux Input: Duration=2m; Title="Sky News"; DeviceName="Microphone (USB Audio Codec)"
```
This is an aux input lasting 2 minutes from the named audio device. Set `DeviceName` to the device's display name exactly as it appears in PlayIt Live.
### Advert blocks
```
# Advert Block: StartTime=15m; Duration=3m; Slots=6
```
An advert block scheduled at `StartTime` past the hour, lasting `Duration`, with `Slots` advert slots reserved.
---
# Export Playout Log
The Export Playout Log window allows you to export the playout log for a selected date range to a text file. The exported file can be imported back into PlayIt Live at a different date or time, or distributed to presenters for show planning.
### Date range
The date range to export.
### Format
The format of the export. Choose **PlayIt Playout Log Format** to export in a format that can be [imported](/PlayItLive/218/scheduling/import-playout-log) back into PlayIt Live at a different time. Choose **Plain Text Format** to export a human-readable version for distributing to presenters for show planning.
### Export
Click **Export** to export the selected date range. You will be prompted to select a file to save the playout log to.
### Close
Click **Close** to close the window without exporting.
---
# Advert Scheduling
Some images on this page may not display correctly if you have an ad blocker installed. Disable your ad blocker on this site to see all images.
Premium Feature · Advanced Scheduling
AS [Purchase →](https://www.playitsoftware.com/Account/Subscription/AdvancedScheduling)
Advert scheduling requires the **Advanced Scheduling** module. Without it, you cannot schedule the advert log or play advert blocks. You can try the module by going to **Help > Licensing Information** and clicking **Start Trial**.
Advert scheduling allows the scheduling of adverts (also called spots, commercials or traffic). This is accomplished by setting up Advert Campaigns with Adverts, then adding an Advert Block to the Playout Log and scheduling the Advert Log for that hour.
## Key Concepts
**Advert Campaign**
An advert campaign represents an advert sales order: a request from a customer to play a set of adverts a specified number of times, during certain times of the day for a period of time. Advert campaigns in the same category will never be scheduled in the same block.
**Advert**
An advert represents a cut of audio to play as part of an advert campaign. An advert also stores at what times of the day the audio will play, up to a maximum number of plays. Adverts feature a duration field which is used to schedule the advert. This is best kept to a multiple of 5 seconds (for example, 10, 15, or 30 seconds) to ensure that adverts can be fitted into advert blocks of 1 minute, 2 minutes, etc.
**Advert Block**
An advert block is a sequence of adverts that are played together as part of the advert log.
**Advert Log**
The historical and future log of the adverts that have played and will play.
**Advert Block Item**
An Advert Block item can be added to a Clock or the Playout Log in order to play out the adverts.
Adding an Advert Block item to the playout log instructs the playout engine to look up the adverts from the Advert Log for the specified hour and start time and load them into a player. Despite being multiple tracks, advert block items only take up one player: the same player is reused for each advert track.
Adding an Advert Block item to a clock will add the equivalent item to the Playout Log for any hour the clock is scheduled into.
When Advert Blocks are used in Live Assist you will be warned when no adverts have been scheduled in the Advert Log for that block. If you switch Log Scheduler on then advert blocks will automatically be scheduled for the upcoming hour.
**Advert Play Report**
When adverts have been played it is possible to produce a report of when they were played. This report can be presented to the customer as proof that the adverts were played.
## Scheduling adverts step by step
The advert workflow has four stages: set up your campaigns and adverts, add advert blocks to your clocks, then schedule the playout log and the advert log. The Playout Log (your music and content) and the Advert Log (your adverts) are kept deliberately separate, so scheduling your music never disturbs your adverts and scheduling your adverts never disturbs your music. An advert block's **start time** is what links a block in the playout log to its adverts in the advert log.
### 1\. Create an advert campaign
From the **Manage** menu, open **Advert Campaigns** and click **Add New**. A campaign represents a sales order from an advertiser. Set the **Company**, a **Date Range** (the campaign is only scheduled automatically between these dates), and one or more **Categories**. Adverts in campaigns that share a category are never placed in the same advert block, so competing advertisers are kept apart. See [Edit Advert Campaign](/PlayItLive/218/adverts/edit-campaign).
### 2\. Add adverts to the campaign
Within the campaign, click **Add New** to add an advert and choose its audio with **Track** or **File**. PlayIt Live reads the **Duration** automatically - keep cuts to a multiple of 5 seconds (such as 20, 25, or 30 seconds) so the scheduler can fill blocks to exact minutes. Use the **Plays** grid to set how many times the advert runs in each hour and day: click a cell - or a row or column heading to set a whole day or hour at once - and type a number, or enter `0` to exclude that slot. For example, you might schedule an advert only during Breakfast and Drive on weekdays. Click **Calculate** next to **Max Plays** to cap the total number of plays across the whole campaign. See [Edit Advert](/PlayItLive/218/adverts/edit-advert).
### 3\. Add advert blocks to your clocks
An advert block reserves a space in the hour for adverts to be played together. From the **Manage** menu open **Clocks**, edit a clock, and add an **Advert Block** item. In its [settings](/PlayItLive/218/scheduling/edit-advert-block-settings) set the **Start Time** (an approximate position in the hour, used to tie the block to the advert log rather than an exact air time), the **Max Duration** (for example 1m30s), and the **Max Advert Slots** (for example 6). A block can run shorter than its maximum if there are not enough adverts to fill it. Assign the clock to the hours you want adverts in using your [clock schedule](/PlayItLive/218/scheduling/clock-schedule).
### 4\. Schedule the playout log
When an hour is scheduled, its advert block appears in the [playout log](/PlayItLive/218/scheduling/edit-playout-log) as an empty placeholder. At this point the adverts themselves are not yet decided - they can still change right up until air - so the block simply holds a single slot ready to be filled. Despite playing several adverts, the block only uses one player.
### 5\. Schedule the advert log
Before you schedule the advert log, make sure the [playout log](/PlayItLive/218/scheduling/edit-playout-log) for those hours has already been scheduled and that each hour contains its **Advert Block** items. The advert scheduler only fills advert blocks that already exist in the playout log - if the hour has not been scheduled, there is nothing for it to fill.
Fill the blocks with adverts in one of two ways:
- **Automatically** - switch the **Log Scheduler** on (the ON/OFF button on the main interface) and PlayIt Live schedules adverts into the upcoming hour for you.
- **Manually** - from the **Manage** menu open the [Advert Log](/PlayItLive/218/adverts/log), choose a date range, and click **Schedule**. PlayIt Live fills each advert block for those hours from your campaigns.
Once scheduled, the advert block shows its actual duration (which may be less than the maximum) and a pin indicator in the playout log. At air time the scheduled adverts play out one after another from that single advert block item.
Prefer to watch? See the full walkthrough: [Advert scheduling in PlayIt Live](https://www.youtube.com/watch?v=lsn2BrEDsLQ).
## Troubleshooting: adverts are not scheduling
If you schedule the advert log (or switch the Log Scheduler on) but no adverts appear, work through the checks below. They are listed roughly in the order the scheduler applies them.
**No Advert Block in the playout log for that hour.** The scheduler only fills advert blocks that already exist in the [playout log](/PlayItLive/218/scheduling/edit-playout-log). If the hour has not been scheduled, or its clock contains no **Advert Block** item, there is nothing to fill. Schedule the hour first and confirm an Advert Block item is present.
**The Advanced Scheduling module is not licensed.** Advert blocks and advert log scheduling require the **Advanced Scheduling** module. Without it, adverts will not schedule or play. Start a trial from **Help > Licensing Information**.
**The scheduled date range does not cover the blocks.** In the [Advert Log](/PlayItLive/218/adverts/log) window, check that the selected date and time range actually includes the hours that contain advert blocks.
**The campaign is not eligible for that hour.** A campaign is only considered when it is **not disabled** and the hour falls within its **Date Range**. Confirm the campaign is enabled and that its start and end dates straddle the hour you are scheduling. See [Edit Advert Campaign](/PlayItLive/218/adverts/edit-campaign).
**The advert is set to zero plays for that day and hour.** Each advert's **Plays** grid controls which day-and-hour slots it may play in. If the cell for that day and hour is `0` (or blank), the advert is never placed in that hour. Open the advert and check the grid. See [Edit Advert](/PlayItLive/218/adverts/edit-advert).
**The advert has reached its Max Plays.** Once the number of plays already scheduled or played across the campaign reaches the advert's **Max Plays**, no further plays are scheduled. Raise **Max Plays** (or click **Calculate**) if the cap is too low.
**The block is full.** The scheduler never exceeds a block's **Max Duration** or **Max Advert Slots**. If the block is short or has few slots, some adverts are left out. An advert whose duration is longer than the block's **Max Duration** can never fit, so keep advert durations comfortably within the block length.
**Two adverts share a category.** Adverts in campaigns with the same **Category** are never placed in the same block. If several eligible adverts share a category, only one of them goes into each block - add more blocks in the hour, or review your categories.
**The hour was already scheduled and is not being overwritten.** When the Log Scheduler fills adverts automatically, it will not replace advert log items that are already present for an hour. If you changed a campaign after the hour was scheduled, the existing items remain until you reschedule manually: in the [Advert Log](/PlayItLive/218/adverts/log) window, **Unschedule** the range and then **Schedule** it again.
## Related Pages
- [Advert Campaigns](/PlayItLive/218/adverts/campaigns)
- [Advert Log](/PlayItLive/218/adverts/log)
- [Advert Play Report](/PlayItLive/218/adverts/play-report)
---
# Advert Campaigns
Some images on this page may not display correctly if you have an ad blocker installed. Disable your ad blocker on this site to see all images.
An advert campaign represents an advert sales order, a request from a customer to play a set of adverts a specified number of times, during certain times of the day, for a period of time. Advert campaigns in the same category will never be scheduled in the same block.
Premium Feature · Advanced Scheduling
AS [Purchase →](https://www.playitsoftware.com/Account/Subscription/AdvancedScheduling)
Advert Scheduling requires the **Advanced Scheduling** module. Start a free two-week trial from within PlayIt Live via **Help > Licensing Information**.
### Licencing information
A reminder that Advert Scheduling is a premium module and requires the **Advanced Scheduling** module. Click the **See Licensing Information** link to start a trial.
### Campaign List
The list of advert campaigns. Each campaign shows its name. Select a campaign and click **Edit** to open the [Edit Advert Campaign](/PlayItLive/218/adverts/edit-campaign) window, where you can set the campaign dates, company, categories, and adverts.
### Add New
Click **Add New** to create a new advert campaign. Opens the [Edit Advert Campaign](/PlayItLive/218/adverts/edit-campaign) window to enter the campaign details.
### Edit
Click **Edit** to edit the selected advert campaign. Opens the [Edit Advert Campaign](/PlayItLive/218/adverts/edit-campaign) window to modify the campaign details.
### OK
Click **OK** to save changes and close the window.
### Cancel
Click **Cancel** to discard changes and close the window.
### Apply
Click **Apply** to save changes without closing the window.
---
# Edit Advert Campaign
Some images on this page may not display correctly if you have an ad blocker installed. Disable your ad blocker on this site to see all images.
The Edit Advert Campaign window lets you configure the details of an advert campaign, including the name, company, date range, categories, and the individual adverts that belong to the campaign.
### Campaign Name
The name of the campaign. This is displayed in the [Campaign List](/PlayItLive/218/adverts/campaigns).
### Company
The name of the company or customer placing the campaign. Existing company names are suggested as you type.
### Date Range
The range of dates between which the advert scheduler will automatically schedule this campaign. It is still possible to manually schedule the campaign outside these dates.
### Categories
The categories this campaign belongs to. Categories are used to prevent adverts of the same kind being played in the same advert block. For example, you would not want two competing fast food restaurants to be played in the same advert block. Adverts in campaigns with the same category will never be played in the same advert block.
### Adverts
The list of adverts that belong to this campaign. An advert represents an audio cut that can be played at specified times of the day or week, up to a maximum number of plays for the campaign.
- Click **Add New** to add a new advert. Opens the [Edit Advert](/PlayItLive/218/adverts/edit-advert) window.
- Click **Edit...** to edit the selected advert. Opens the [Edit Advert](/PlayItLive/218/adverts/edit-advert) window.
- Click **Delete...** to remove the selected advert from the campaign.
### Disabled
Tick this checkbox to disable the campaign. A disabled campaign will not be scheduled automatically by the advert scheduler.
### OK / Cancel
Click **OK** to save changes and close the window. Click **Cancel** to discard any changes.
---
# Edit Advert
Some images on this page may not display correctly if you have an ad blocker installed. Disable your ad blocker on this site to see all images.
The Edit Advert window lets you configure an individual advert within a campaign, including the audio cut to play, its duration, which hours and days it should be scheduled, and the maximum number of times it should play during the campaign.
### Advert Audio
The audio cut to play for this advert. Choose from an existing track already added to PlayIt Live, or choose an audio file from disk.
- Select **Track** and click the track name link to pick a track from the PlayIt Live library.
- Select **File** and click the file path link to pick an audio file directly from disk.
### Duration
The duration of the advert in whole seconds. This is used by the advert scheduler to ensure an advert block does not over-run. This field is automatically populated when you select a track or audio file.
A duration that is a multiple of 5 (e.g. 5, 10, 15, 30 seconds) helps the scheduler fit adverts into whole minutes such as 1 minute or 2 minutes.
### Plays
The Plays grid shows how many times the advert should be played in each hour of the day and day of the week. By default, the advert tries to play once in every hour where an advert block is scheduled.
For example, you could set the advert to only be scheduled during Breakfast (6am to 10am) and Drive (4pm to 7pm).
- To change plays for a specific day and hour, click the cell, type the number of plays, and press **Enter**.
- To change plays for every day at a specific hour, click the column heading, type the number of plays, and press **Enter**.
- To change plays for every hour on a specific day, click the row heading, type the number of plays, and press **Enter**.
### Max Plays
The maximum number of times this advert will play during the campaign dates. Click the **Calculate** link to calculate the maximum based on the campaign duration and the selected plays above.
### OK / Cancel
Click **OK** to save the advert. Click **Cancel** to discard changes.
---
# Advert Log
Some images on this page may not display correctly if you have an ad blocker installed. Disable your ad blocker on this site to see all images.
The Edit Advert Log window allows you to view and edit scheduled advert items. Use it to schedule adverts for a date range based on the Advert Block items in your playout log, or to manually add and adjust advert log entries.
### Date range
Use the date and time selectors to choose the range of hours to view and edit advert log items for.
### Schedule
Click **Schedule** to schedule adverts for the selected date range. The scheduler will populate advert log items based on the Advert Block items in the playout log.
If no items appear after scheduling, check that the playout log contains Advert Block items for the selected range. See [Edit Playout Log](/PlayItLive/218/scheduling/edit-playout-log).
### Unschedule
Click **Unschedule** to remove all scheduled advert log items for the selected date range.
### Hour group
Advert log items are grouped by hour. The hour group heading shows which hour the items below it belong to.
### Advert block group
Within each hour, items are further grouped by advert block. The block group heading shows the start time of the block. Click the pencil icon to change the start time.
Each block must have a corresponding Advert Block item in the playout log for the same hour. See [Edit Playout Log](/PlayItLive/218/scheduling/edit-playout-log).
### Advert row
Each row represents an advert to be played. Use the dropdowns to select the campaign and advert. The **Played?** and **Play Time** columns are populated automatically once the advert has been played.
### Add and Add Block
Click **Add** to add a new advert row in the current block. Click **Add Block** to add a new advert row in a new block.
### OK, Cancel, and Apply
Click **OK** to save changes and close the window. Click **Cancel** to close the window without saving. Click **Apply** to save changes without closing the window.
---
# Advert Play Report
Some images on this page may not display correctly if you have an ad blocker installed. Disable your ad blocker on this site to see all images.
The Advert Play Report window generates a report showing the times that adverts were played. You can give this report to customers as proof of plays.
### Advert Campaign
Select the advert campaign to generate a play report for.
### Date range
Use the start and end date selectors to set the date range for the report.
### Set to Campaign Dates
Click **Set to Campaign Dates** to automatically set the start and end dates to the campaign's scheduled start and end dates.
### Generate Play Report...
Click **Generate Play Report...** to generate the report. You will be prompted to choose a location to save the file. The report is saved as a CSV file, which can be opened in Microsoft Excel or Google Sheets.
---
# Scheduled Events
Scheduled Events can be used to trigger actions at a specific time, either once or on a recurring basis. For example, you may wish to start playout at a specific time, change the playout mode to Automation ON when PlayIt Live starts, or automatically merge adverts every hour.
To get started, go to **Manage > Scheduled Events** and click **Add New**.
### Event List
The list of configured scheduled events. Each event shows its name. Disabled events appear greyed out.
### Add New
Click **Add New** to create a new scheduled event.
### OK / Cancel / Apply
Click **Apply** to save your changes without closing the window. Click **OK** to save and close. Click **Cancel** to discard any unsaved changes.
## Creating and Editing Events
Double-click an event in the list, or click **Add New**, to open the event editor.
### Name
Enter a descriptive name for the event.
### Trigger
Choose when the event fires:
- **Once:** fires at a single specific date and time.
- **Daily:** fires every day at the selected time, with optional additional hours.
- **Weekly:** fires on selected days of the week at the selected time.
- **On startup:** fires each time PlayIt Live starts.
### Start Time
The time at which the event triggers. For Daily and Weekly events, this sets the base time; extra hours or days can be added below.
### Additional Hours (Daily)
When using the **Daily** trigger, tick additional hours to fire the event at multiple times throughout the day. Ticking every hour causes the event to run hourly.
### Additional Days (Weekly)
When using the **Weekly** trigger, tick additional days of the week. Ticking every day causes the event to run at the same time every day.
### Actions
The list of actions that will run when the event fires. Click the **\[+\]** button to add an action. Use **Move Up** and **Move Down** to reorder actions. Actions run sequentially in the order listed.
### Expires
Tick **Expires** and set a date to automatically stop the event triggering after that date.
### Disabled
Tick **Disabled** to prevent the event from triggering without deleting it.
### OK / Cancel
Click **OK** to save the event and return to the Scheduled Events list. Click **Cancel** to discard changes.
## Actions
Every event has a list of actions that run sequentially when the event fires. Click the **\[+\]** button in the event editor to add an action.
### Action Types
Select the type of action to add. Double-click an action, or select it and click **Next**, to proceed. Some actions require additional parameters which you will be prompted for after selecting the action type.
### Next/Finish and Cancel
Click **Next** to continue configuring the selected action. If no additional parameters are required, click **Finish** to add the action. Click **Cancel** to close without adding an action.
Actions are grouped by area. Some actions run immediately with no further configuration; others prompt you for parameters after you select them. The actions with the most detailed parameters have their own pages, linked below.
### Available actions
**Live Assist**
- **Start Playout** - start live-assist playout.
- **Pause Playout** - pause playout.
- **Stop Playout** - stop playout.
- **Play Next** - play the next item in the playout log.
- **Fade Out Beds** - fade out any currently playing beds.
- **Auto Adjust** - run [Auto Adjust](/PlayItLive/218/tools/auto-adjust) to re-time the playout log.
- **Change Playout Mode** - switch the playout mode (for example Automation On or Off).
- [**Insert Track**](/PlayItLive/218/scheduled-events/insert-track) - insert a track, track group, or file into the log at a chosen position.
- [**Insert Special**](/PlayItLive/218/scheduled-events/insert-special) - insert a fixed time marker, break note, URL, or aux input.
- [**Insert/Import External Log/Playlist**](/PlayItLive/218/scheduled-events/insert-external-log) - insert or import an external log or playlist file.
- [**Merge External Log File**](/PlayItLive/218/scheduled-events/merge-external-log) - merge items from a dated external log file for the rest of the hour or day.
**Decks Mode** (apply when PlayIt Live is in Decks Mode)
- **Play / Pause / Fade Out / Stop / Eject Deck** - control the chosen deck.
- **Load Track** - load a track, track group, or file into the chosen deck.
**QuickCarts**
- **Play / Pause / Fade Out / Stop / Eject QuickCart** - control the cart at a chosen page, row, and column.
- **Load QuickCart** - load a track, track group, or file into a chosen cart slot.
**Priority Streams**
- **Change Open State** - set a priority stream (or all streams) to Closed, Pre-Open, or Open.
**Internet Broadcast**
- **Start All Streams** - start all configured encoder streams.
- **Stop All Streams** - stop all encoder streams.
**Now Playing**
- **Update Now Playing** - publish a now-playing update with a given "Artist - Title" text.
**External Devices**
- **Trigger Output** - trigger a named external device output, such as a GPIO line.
**Scripting**
- **Run PowerShell Script** - run a PowerShell script, optionally waiting for it to finish.
- **Send HTTP Request** - send an HTTP request (method, URL, headers, and body) to an endpoint.
- **Send TCP/UDP Request** - send a TCP or UDP packet to an address and port.
- [**Run Utility Command**](/PlayItLive/218/scheduled-events/run-utility-command) - run the built-in PlayIt CLI to copy files or download audio from an FTP server.
**Helpers**
- **Wait For Time** - pause the action sequence for a set number of seconds before the next action runs.
After an action is configured, it appears in the actions list. Use the **Clone** button on either the Events list or the Actions list to quickly duplicate an existing event or action.
When the specific time is reached, or PlayIt Live is started, the scheduled events will be triggered.
Events are triggered sequentially. If two events are set to fire at the same time, all actions in the first event run before any actions in the second event begin.
---
# Insert Track Action
Use the Insert Track action to insert a track into the log at a specific position. Select from a **Track** from the Track List, a **Track Group**, or a **File** from the file system.
### Insert From
Choose the source for the track to insert:
- **Track:** select a specific track from the Track List.
- **Track Group:** select a Track Group and PlayIt Live will pick a track from it.
- **File:** browse to an audio file on the file system.
### Track
The track to insert when **Track** mode is selected. Click the link to open the track selection window and choose a track.
### Track Group
The Track Group to select from when **Track Group** mode is selected. Click the link to open the Track Group selection window.
### File
The audio file to insert when **File** mode is selected. Click the link to browse for the file.
### Position
Where to insert the track in the log:
- **To Play Next:** after the currently playing track.
- **End Of Current Hour:** at the end of the current clock hour.
- **Start Of Next Hour:** at the start of the next clock hour.
- **End Of Next Hour:** at the end of the next clock hour.
### Try to Respect Playout Policies
When **Track Group** mode is selected, tick this option to make PlayIt Live try to insert a track from the group that does not violate the current playout policies. If no qualifying track can be found, a track is chosen at random from the group.
This option only applies when inserting from a Track Group.
### Analyse Silence
When **File** mode is selected, tick this option to automatically analyse the file for silence at the start and end of the track before inserting it.
This option only applies when inserting from a File.
---
# Insert Special Item Action
Use the Insert Special action to insert special playout log item types into the log at a specific position.
### Type
The type of special item to insert:
- **Fixed Time Marker:** inserts a Fixed Time Marker to trigger a hard time event in the log.
- **Break Note:** inserts a Break Note item as a cue for a presenter.
- **Remote URL:** inserts a Remote URL item to stream audio from an internet source.
- **Aux Input:** inserts an Aux Input item to switch to an external audio source.
### Settings
Click the link to configure the settings for the selected item type. The settings available depend on the type chosen.
### Position
Where to insert the item in the log:
- **To Play Next:** after the currently playing track.
- **End Of Current Hour:** at the end of the current clock hour.
- **Start Of Next Hour:** at the start of the next clock hour.
- **End Of Next Hour:** at the end of the next clock hour.
---
# Insert/Import External Log/Playlist Action
The Insert/Import External Log/Playlist action brings a log from an external scheduler or a playlist from another media player into the playout log. It works in one of two modes, chosen by the **Mode** setting: **Insert** drops the items into the log at a chosen position while keeping the existing log, and **Import** replaces the current log with the file's items - exactly as the [Import Playout Log](/PlayItLive/218/scheduling/import-playout-log) window does.
### From
Choose how to locate the external log file:
- **Specific file:** select a fixed file from the file system.
- **Dated file:** select a folder and define a date pattern so the correct file is picked automatically based on the current date and time.
### Dated file
When **Dated file** mode is selected, specify the folder where the log files are stored and a date pattern that matches the file naming convention. The example below the pattern shows the resolved file name for the current date and time.
This is useful for cases such as an Adverts folder, where the files are named based on the time they should play and the correct one is picked dynamically from the current date and time.
For example, selecting the folder `C:\PlayoutLogs` with the pattern `%yyyy%-%MM%-%dd%` will look for the file `C:\PlayoutLogs\2024-12-18.pipl` on 18th December 2024.
See [Date Pattern Parts](#date-pattern-parts) below for all available pattern tokens.
### Specific file
When **Specific file** mode is selected, click the link to browse for the log or playlist file to insert.
### Format
The format of the external log or playlist file. Select the format that matches the files produced by your external scheduler or media player.
### Mode
How to add the log items to the playout log:
- **Insert:** drops the items from the file into the log at the selected position, keeping the existing items.
- **Import:** replaces the current log with the items from the file - the same as importing through the [Import Playout Log](/PlayItLive/218/scheduling/import-playout-log) window.
### Position
Where to insert the log items in the playout log:
- **Play Next:** after the currently playing track.
- **End Of Current Hour:** at the end of the current clock hour.
- **Start Of Next Hour:** at the start of the next clock hour.
- **End Of Next Hour:** at the end of the next clock hour.
### Hour offset
Adjusts the reference hour, relative to the current hour when the action runs. For example, set to `1` to target the next hour rather than the current one. The offset moves the insert position and, when using a **Dated file**, the date and time the file name is resolved from.
This matters for a **daily log** named by date (such as `%yyyy%-%MM%-%dd%`): because the file name is built from the offset time, an offset that crosses midnight rolls the date forward and selects a different day's file. For example, an event running at 23:00 with an offset of `1` resolves the **next day's** file rather than today's.
## Date Pattern Parts
Dynamic date parts are enclosed in `%` signs. Any other text in the pattern is treated as a literal string.
Pattern
Description
Example
`%yy%`
2-digit year
`24`
`%yyyy%`
4-digit year
`2024`
`%M%`
Month of year
`6`
`%MM%`
Month of year, zero-padded
`06`
`%MMM%`
Abbreviated month name
`Jun`
`%MMMM%`
Full month name
`June`
`%d%`
Day of month
`3`
`%dd%`
Day of month, zero-padded
`03`
`%ddd%`
Abbreviated day name
`Sat`
`%dddd%`
Full day name
`Saturday`
`%H%`
Hour in 24-hour clock
`7`
`%HH%`
Hour in 24-hour clock, zero-padded
`07`
`%h%`
Hour in 12-hour clock
`7`
`%hh%`
Hour in 12-hour clock, zero-padded
`07`
`%tt%`
AM/PM designator
`PM`
---
# Merge External Log File Action
The Merge External Log File action merges external playout content, such as commercial traffic logs, into the playout log. Items from the external file are inserted between Merge Start and Merge End segments already present in the log.
### Folder
The folder where the external log files are stored. Click **Browse...** to select the folder path.
### Date Pattern
The naming convention of the external log files, using dynamic date parts enclosed in `%` signs. This ensures the correct file is loaded based on the current date and time. The example below the field shows the resolved file name.
See [Date Pattern Parts](#date-pattern-parts) below for all available pattern tokens.
### Merge Type
Determines the scope of the merge:
- **Day:** merges all items from the external file for the remainder of the day.
- **Hour:** merges only the items from the file that fall within the current hour.
### Hour Offset
Adjusts which hour's items are merged, relative to the current hour when the action runs.
- **`0`** (default) - merge the items for the hour in which the action runs.
- **`1`** - merge the items for the **next** hour. Use this when the action fires near the end of an hour to prepare the hour that is about to start. For example, an hourly event set to fire at **xx:45** with an offset of `1` merges the upcoming hour just before it begins, so the content is ready when the hour starts.
Match the offset to how far ahead the action runs: if your event triggers one hour before the content should air, set the offset to `1`; if it triggers within the same hour the content airs, leave it at `0`.
**Merging the next day from the previous day:** combine the offset with **Merge Type: Day** to prepare tomorrow's content tonight. Because the dated file name is resolved from the offset hour, an offset that crosses midnight rolls the date forward. For example, a Daily event triggering at **23:00** with an Hour Offset of `1` reaches **00:00 the next day**, so PlayIt Live resolves the next day's file - such as `2024-12-19.pipl` when run on 18 December - and merges the whole of that day. The next day must already be scheduled in the playout log for its Merge Start and Merge End markers to be present.
## Date Pattern Parts
Dynamic date parts are enclosed in `%` signs. Any other text in the pattern is treated as a literal string.
Pattern
Description
Example
`%yy%`
2-digit year
`24`
`%yyyy%`
4-digit year
`2024`
`%M%`
Month of year
`6`
`%MM%`
Month of year, zero-padded
`06`
`%MMM%`
Abbreviated month name
`Jun`
`%MMMM%`
Full month name
`June`
`%d%`
Day of month
`3`
`%dd%`
Day of month, zero-padded
`03`
`%ddd%`
Abbreviated day name
`Sat`
`%dddd%`
Full day name
`Saturday`
`%H%`
Hour in 24-hour clock
`7`
`%HH%`
Hour in 24-hour clock, zero-padded
`07`
`%h%`
Hour in 12-hour clock
`7`
`%hh%`
Hour in 12-hour clock, zero-padded
`07`
`%tt%`
AM/PM designator
`PM`
## PIPL File Format
The PIPL format is a tab-separated file where each line contains a start time and a track ID:
```
00:30:00 SPOT001
00:30:00 SPOT002
00:30:00 SPOT003
01:30:00 SPOT001
01:30:00 SPOT002
01:30:00 SPOT003
```
Each line contains a **Start Time** and a **Track ID** separated by a tab character. The start time specifies when the item should be positioned within the scheduled hour, and the Track ID matches the identifier of a track in the Track List.
The full PIPL format definition can be found at [https://pipl.playitsoftware.com](https://pipl.playitsoftware.com).
## Typical Workflow
### 1\. Prepare the external log files
Use your external traffic software to generate log files and save them in a consistent location, such as `C:\MergeLogs`, following a clear naming convention using a date pattern such as `%yyyy%-%MM%-%dd%.pipl`.
### 2\. Set up the Merge Action
1. Go to **Manage > Scheduled Events**.
2. Add a new Scheduled Event and select the trigger time.
3. Add a new action and select **Merge External Log File**.
4. Configure the action:
- **Folder:** `C:\MergeLogs`
- **Date pattern:** `%yyyy%-%MM%-%dd%.pipl`
- **Merge type:** Day (to merge items for the remainder of the day)
- **Hour offset:** `0` (to begin merging from the current hour)
With these settings, if today is 18th December 2024, PlayIt Live will look for the file `C:\MergeLogs\2024-12-18.pipl`.
Alternatively, you can add a Scheduled Event Action to the playout log at the position where you want the Merge Action to be executed.
### 3\. Insert Merge Start and Merge End items
In your clocks, insert a Merge Start item where the external content should begin, and a Merge End item to define where the merge segment ends. These items act as markers in the playout log.
When the Scheduled Event runs, PlayIt Live reads the merge log file and inserts its items between the Merge Start and Merge End markers. For each item in the merge file, PlayIt Live finds the **last** Merge Start whose start time is earlier than or equal to that item's time, and inserts the item after it. Any items already sitting between that Merge Start and the following Merge End are removed first, so the merged content replaces whatever was there.
### Before and after the merge
Suppose the 00:00 hour is scheduled from a clock that has a Merge Start at **30:00** (30 minutes past the hour) followed by a Merge End, ready to receive a commercial break. Before the merge runs, the playout log for that hour looks like this:
```
00:00 Station ID
00:00 Sample Artist 1 - Song A
00:00 Sample Artist 2 - Song B
[ Merge Start - 30:00 ]
[ Merge End ]
00:00 Sample Artist 3 - Song C
```
When the merge runs against a file containing these lines:
```
00:30:00 SPOT001
00:30:00 SPOT002
00:30:00 SPOT003
```
the three spots (timed at 00:30) are matched to the Merge Start at 30:00 and inserted between the markers, giving:
```
00:00 Station ID
00:00 Sample Artist 1 - Song A
00:00 Sample Artist 2 - Song B
[ Merge Start - 30:00 ]
SPOT001
SPOT002
SPOT003
[ Merge End ]
00:00 Sample Artist 3 - Song C
```
If the hour already had spots between the Merge Start and Merge End from an earlier merge, they are cleared out and replaced by the new ones, so re-running the merge is safe. Place several Merge Start markers in an hour - for example at 15:00, 30:00, and 45:00 - to route the merge file's items into different breaks: each item ends up after the last Merge Start at or before its own time.
---
# Run Utility Command Action
The **Run Utility Command** action runs the built-in **PlayIt CLI** - `PlayIt.Cli.exe`, found in the `PlayIt.Cli` folder of your PlayIt Live installation - with the parameters you provide. It is typically used as a step in a [scheduled event](/PlayItLive/218/scheduled-events/overview) to get audio or log files into place, for example copying the newest recording into a folder, or downloading files from an FTP server, before another action imports them.
## Parameters
- **Name** - a label for the command so you can recognise it in the actions list.
- **Parameters** - the command line passed to the PlayIt CLI: the command name followed by its options (see below).
- **Wait for completion** - when ticked, the scheduled event waits for the command to finish before running the next action. Tick this when a later action depends on the file being in place.
Each command writes its progress to the event log, and files are copied or downloaded via a temporary file that is renamed into place once complete, so a half-written file is never picked up by a [monitored folder](/PlayItLive/218/monitored-folders/overview).
## Available commands
### copy-file
Copies a single file to another location.
Option
Required
Description
`--source`
Yes
The path of the source file.
`--destination`
Yes
The destination folder, or a full file path. Missing folders are created.
```
copy-file --source "C:\Recordings\latest.mp3" --destination "D:\Playout\Imports"
```
### copy-newest-file
Copies the newest file in a folder to another location. Useful when an external system writes a new file each time and you only want the most recent one.
Option
Required
Description
`--source`
Yes
The source folder.
`--destination`
Yes
The destination folder, or a full file path.
`--filter`
No
A wildcard filter for which files to consider, for example `*.mp3`.
`--regex-filter`
No
A regular expression filter, for example `Part [0-9]+`.
`--strategy`
No
How "newest" is decided: `LastModifiedDate` (default), `CreatedDate`, or `FileNameAlpha` (reverse alphabetical - useful when files are named in a sortable format such as `YYYYMMDDHHMMSS`).
```
copy-newest-file --source "C:\Incoming\News" --destination "D:\Playout\News.mp3" --filter *.mp3
```
### download-ftp-file
Downloads a single file from an FTP or FTPS server.
Option
Required
Description
`--host`
Yes
The server host name.
`--port`
No
The port number (default `21`).
`--username`
No
The username.
`--password`
No
The password.
`--remote-file-path`
Yes
The path of the file on the server.
`--local-file-path`
Yes
Where to save the file locally.
`--encryption-mode`
No
For FTPS: `None` (default), `Implicit`, `Explicit`, or `Auto`.
```
download-ftp-file --host ftp.example.com --username user --password pass --remote-file-path /news/bulletin.mp3 --local-file-path "D:\Playout\bulletin.mp3"
```
### download-ftp-directory
Downloads the files in a directory from an FTP or FTPS server.
Option
Required
Description
`--host`
Yes
The server host name.
`--port`
No
The port number (default `21`).
`--username`
No
The username.
`--password`
No
The password.
`--remote-directory-path`
Yes
The remote directory to download.
`--local-directory-path`
Yes
The local folder to download the files into.
`--filter`
No
A wildcard filter for which files to download, for example `*.mp3`.
`--regex-filter`
No
A regular expression filter.
`--encryption-mode`
No
For FTPS: `None` (default), `Implicit`, `Explicit`, or `Auto`.
```
download-ftp-directory --host ftp.example.com --username user --password pass --remote-directory-path /adverts --local-directory-path "D:\Playout\Adverts" --filter *.mp3
```
Pair this action with a [monitored folder](/PlayItLive/218/monitored-folders/overview), or an [Insert/Import External Log/Playlist](/PlayItLive/218/scheduled-events/insert-external-log) action, to bring the copied or downloaded audio into your library or playout log automatically.
---
# Priority Streams
Premium Feature · Advanced Scheduling
AS [Purchase →](https://www.playitsoftware.com/Account/Subscription/AdvancedScheduling)
Priority Streams requires the **Advanced Scheduling** module. Start a free two-week trial from within PlayIt Live via **Help > Licensing Information**.
Priority Streams is a feature allowing you to bring in an external stream such as a remote presenter/DJ or outside broadcast. When a priority stream is **live**, normal live-assist playout will stop and the priority stream will take over. If a priority stream is not connected or if it is too quiet or silent, it will not **go live** and not take over normal live-assist playout. The highest priority, **open**, **active** priority stream will take priority over normal live-assist playout.
A video demonstrating Priority Streams in PlayIt Live can be found on the PlayIt Software YouTube channel:
## How It Works
When a priority stream is **open**, PlayIt Live will continuously try to connect to a live URL (for Live URL streams) or check for connections on the direct stream connections port (for Direct Connection streams). If a connection is made and the volume level of the audio is sufficient (see the silence threshold in [Live-Assist Mode Settings](/PlayItLive/218/settings/live-assist-mode)) then the priority stream is considered **active**. Normal live-assist playout will fade and stop, or wait until the currently playing track finishes (depending on [settings](/PlayItLive/218/settings/live-assist-mode)) and then the priority stream will **go live**. If there are multiple **active** priority streams, the one with the highest priority will **go live**. If the priority is the same, the one that was **active** first will **go live**.
When the priority stream is no longer **active**, live-assist playout will resume its previous state (playing or stopped) or switch Automation on, depending on [settings](/PlayItLive/218/settings/live-assist-mode).
To control the open state of a priority stream automatically, use a **Change Open State** action under **Manage > Scheduled Events**, or add a **Scheduled Event Action** item in the playout log.
## Direct streams
A priority stream gets its audio in one of two ways, set by its **Type**:
- **Live URL:** PlayIt Live reaches out and connects to a remote Icecast or SHOUTcast server, pulling the audio from it.
- **Direct Stream Connection (a "direct stream"):** the direction is reversed - a remote encoder connects *in* to PlayIt Live and pushes its audio, the same way an encoder feeds an Icecast server.
A direct stream is useful when the remote presenter cannot host a stream URL of their own but can send audio to yours - for example a guest DJ broadcasting from home. The remote source authenticates as a PlayIt Live **user**, so each Direct Stream Connection priority stream is tied to the user who will stream to it, and the source must send **MP3** audio.
**To set up a direct stream:**
1. In **Settings > [Advanced Scheduling](/PlayItLive/218/settings/advanced-scheduling)**, tick **Allow direct stream connections on this port** and note the port number. If the presenter is remote, make sure that port is reachable from the internet (forward it on your router or firewall).
2. Under **Manage > [Users](/PlayItLive/218/users/overview)**, create a user for the presenter with a username and password.
3. Create a **Direct Stream Connection** priority stream (see [Edit Priority Stream](/PlayItLive/218/priority-streams/edit)) and choose that user.
4. Give the presenter your server address, the port, and their username and password. They point an Icecast-compatible encoder (such as BUTT or Mixxx) at those details and stream in **MP3** format. The exact encoder fields are listed on the [Advanced Scheduling](/PlayItLive/218/settings/advanced-scheduling) settings page.
5. While the priority stream is **open**, the incoming connection becomes **active** once it has valid audio above the silence threshold, and it **goes live** according to the priority rules described above.
Only one source can be connected as a given user at a time.
## Main Interface
When one or more priority streams are open, priority stream players are displayed below the main live-assist players. These indicate which priority streams are connected and playing.
### Priority Stream Panel
When priority streams have overridden main live-assist playout, this message bar is shown:
### Priority Stream Override Message
## Usage Scenarios
### Allowing a stream to take over live-assist automation at any time
1. Simply create an **open** priority stream.
2. Stream audio to the live URL or to the direct stream connections port.
### Allow a stream to take over live-assist automation after the news
1. Create a **closed** priority stream.
2. Add to the playout log the following items:
- Hard Fixed Time Marker 00:00
- Scheduled Event Action: Change Priority Stream Open State: Close \[All Priority Streams\]
- Track: News
- Track: News Out Jingle
- Scheduled Event Action: Change Priority Stream Open State: Open the priority stream
- Additional items matching the format of the streaming show, as backup if the stream disconnects
3. Stream audio to the live URL or to the direct stream connections port. When the priority stream is **open** it will **go live**.
### Pre-buffer a stream before going live
1. Create a **closed** priority stream.
2. Add to the playout log the following items:
- Hard Fixed Time Marker 00:00
- Scheduled Event Action: Change Priority Stream Open State: Close \[All Priority Streams\]
- Track: News
- Scheduled Event Action: Change Priority Stream Open State: Pre-Open the priority stream
- Track: News Out Jingle
- Scheduled Event Action: Change Priority Stream Open State: Open the priority stream
- Additional items matching the format of the streaming show, as backup if the stream disconnects
3. Stream audio to the live URL or to the direct stream connections port. When the priority stream is **open** it will **go live**.
Scheduled Event Actions can be added to clocks to automate the control of priority stream open states. When creating clocks with Scheduled Event Actions to bring in priority streams, add track or track group items that match the format of the show being streamed so that automation can take over if the priority stream disconnects.
## Terminology
**Active:** An active priority stream is one that is **open**, is connected, and has a volume level above the silence threshold. If a stream disconnects or falls below the silence threshold for a period of time, it will be considered inactive.
**Go Live:** The priority stream with the highest priority that is **active** will be faded up. Depending on settings, normal live-assist playout will fade and stop, or the current track will finish before the priority stream is faded up.
**Open:** PlayIt Live will try to connect to the live URL or check for audio on the direct stream connection port. Open streams can **go live**.
**Pre-Open:** As Open, but the stream will not **go live**. Use this to pre-buffer a stream before **opening** and **going live**.
**Closed:** PlayIt Live will not check for connections for the priority stream and will not **go live**.
## Related Pages
- [Manage Priority Streams](/PlayItLive/218/priority-streams/manage)
- [Edit Priority Stream](/PlayItLive/218/priority-streams/edit)
---
# Manage Priority Streams Window
The Manage Priority Streams window shows all configured priority streams and lets you add, edit, clone, and delete them. For an explanation of how priority streams work, see the [Priority Streams overview](/PlayItLive/218/priority-streams/overview).
### Priority Stream List
Lists all the priority streams stored in the database. The list shows the name, connection details, priority, and open state for each stream. Double-click an entry to open the [Edit Priority Stream](/PlayItLive/218/priority-streams/edit) window. Click the **Clone** button to duplicate a priority stream, or the **Delete** button to remove it from the database.
### Add New
Click **Add New** to create a new priority stream. Opens the [Edit Priority Stream](/PlayItLive/218/priority-streams/edit) window.
### Edit
Click **Edit** to edit the selected priority stream. Opens the [Edit Priority Stream](/PlayItLive/218/priority-streams/edit) window.
### OK
Click **OK** to save changes and close the window.
### Cancel
Click **Cancel** to discard changes and close the window.
### Apply
Click **Apply** to save changes without closing the window.
---
# Edit Priority Stream Window
The Edit Priority Stream window lets you configure a priority stream. For an explanation of how priority streams work, see the [Priority Streams overview](/PlayItLive/218/priority-streams/overview).
### Name
The name of the priority stream. This is shown on the main interface when the stream is not Closed.
### Type
The type of the priority stream:
- **Live URL:** PlayIt Live connects to a remote Icecast or SHOUTcast streaming server and pulls the audio.
- **Direct Stream Connection:** PlayIt Live accepts an incoming connection from an Icecast-compatible client.
See [Live-Assist Mode Settings](/PlayItLive/218/settings/live-assist-mode) for more details.
### Parameters
The connection parameters for the selected type.
If **Live URL** is selected, enter the URL of the stream to connect to (for example, `http://192.168.1.50:8000/stream`).
If **Direct Stream Connection** is selected, choose the user who will log in and stream audio to activate this priority stream. You can create users under [Manage > Users](/PlayItLive/218/users/overview).
### Priority
The priority number for this stream. When multiple active priority streams are open at the same time, the one with the highest priority number will go live.
### Open State
The open state determines whether PlayIt Live will check for a connected stream.
- **Closed:** PlayIt Live will not check for a connected stream and this priority stream will never go live.
- **Pre-Open:** PlayIt Live will check for a connected stream but it will not go live. Use this to ensure a stream is loaded and buffered before opening.
- **Open:** PlayIt Live will check for a connected stream. If the stream is connected, has valid audio and is above the silence threshold defined in [Live-Assist Mode Settings](/PlayItLive/218/settings/live-assist-mode), the stream will go live.
When a priority stream goes live, it will take over any current live-assist playout as per the settings defined in [Live-Assist Mode Settings](/PlayItLive/218/settings/live-assist-mode).
### OK / Cancel
Click **OK** to save changes and close the window. Click **Cancel** to discard any changes.
---
# Users
Users can be managed within PlayIt Live to allow different people to log in and restrict them to certain permissions.
For example, an administrator can log in and have the ability to change all settings and manage all types of entities, such as tracks and clocks. Alternatively, a presenter can be restricted to just the main interface and cannot add new tracks or change audio devices in settings.
---
# Manage Users Window
Users can be managed via **Manage > Users**.
### Require users to log in
Tick this box to require users to log in to use PlayIt Live. Please ensure before you tick this box that you know correct usernames and passwords and how to log into the system.
### Users list
This list shows all the users in the system, including their Display Name, Username and Last Logged In time. You can delete a user using the delete icon. You cannot delete the administrator user.
### Management controls
Click **Add New** to add a new user.
Click **Edit** to edit the selected user. You can also double-click the user in the list.
Click **OK** to save any changes and close the window.
Click **Cancel** to discard any changes.
Click **Apply** to save any changes without closing the window.
---
# Edit User
### Display name
The real name of the user. This is displayed on the main interface to show who is currently logged in.
### Username
The username used by the user to log in. This must be unique and cannot be used by any other user.
### Password
The password used by the user to log in. The password must be at least 6 characters long. If editing a user, you can leave this blank to keep the existing password. Use the **Generate** button to quickly generate a new password that can be given to the user.
Tick the **User must change password at next login** box to require the user to change the password to something they can remember.
Passwords are cryptographically hashed and stored in the database. The actual password is not stored and cannot be retrieved if forgotten. Take care not to lock yourself out of the system.
### Permissions
This section allows you to select what features the user is allowed to use. Ticking **Is Admin?** will allow the user to use any feature and perform any action. Where the user does not have permission to perform a particular action, that section will be disabled or hidden on the user interface.
### Remote Voice Tracking and Remote Studio
Use the grid to select the hours that the user should be allowed to record voice tracks and access and broadcast using Remote Studio. Select one or multiple cells and enter Y or N for Yes or No. No cells will be shown as blank. Select a weekday heading or hour heading to select the entire week or hour.
### Playout Log Editing
You can restrict the user when remote voice tracking by allowing them to either edit the full playout log for the hours they have access to, or only allow them to record voice tracks and adjust their segues. The default can be changed via the Voice Tracking tab in [Settings](/PlayItLive/218/settings/voice-tracking).
### Disabled
Tick this box to disable the user, preventing them from logging in.
### OK / Cancel
Click **OK** to save the changes. Click **Cancel** to discard the changes.
---
# Tools
PlayIt Live includes a range of tools to help you manage your track library, analyse your playout history and maintain your database. Access these tools from the **Tools** menu in the menu bar.
- [Missing Track File Analysis](/PlayItLive/218/tools/missing-track-file-analysis) - Find tracks that reference audio files that have been moved or deleted.
- [Duplicate Track File Analysis](/PlayItLive/218/tools/duplicate-track-file-analysis) - Find tracks whose file path already exists in PlayIt Live.
- [Track Play Count Analysis](/PlayItLive/218/tools/track-play-count-analysis) - Analyse how many times each track has been played over a given period.
- [Database Clean-up](/PlayItLive/218/tools/database-cleanup) - Remove old playout log items, voice tracks and orphaned files.
- [Monitored Folders Status](/PlayItLive/218/monitored-folders/status) - View the status of folders being monitored for new audio files.
- [Loudness Analysis](/PlayItLive/218/tools/loudness-analysis) - Analyse and normalise the loudness of your tracks.
- [Backup and Restore](/PlayItLive/218/tools/backup-and-restore) - Back up and restore your PlayIt Live database.
- [Auto Adjust](/PlayItLive/218/tools/auto-adjust) - Automatically adjust track tempos and segues to fit a time slot.
- [Mixdown Playout Log](/PlayItLive/218/tools/mixdown-playout-log) - Mix down a section of the playout log to a single audio file.
- [Internet Broadcast](/PlayItLive/218/tools/internet-broadcast) - Stream audio to Icecast or Shoutcast servers.
- [Now Playing](/PlayItLive/218/tools/now-playing) - Send now playing information to external services.
- [External Devices](/PlayItLive/218/tools/external-devices) - Control external hardware devices such as silence detectors and satellite receivers.
---
# Missing Track File Analysis
Use the Missing Track File Analysis window to find tracks that reference audio files that have been moved or deleted. This is useful if you have recently moved audio files to another folder and you need to update PlayIt Live to point your tracks to these new files.
To open the window, go to **Tools > Missing Track File Analysis**.
## Scanning for missing files
Click the **Scan for missing track files** button to begin scanning your track library.
Any tracks that are found with missing audio files will be displayed in the list.
## Resolving missing files
Click in the **Resolution** cell of a row to choose what to do with the track:
- **Do nothing** - Leave the track as it is.
- **Update path** - Update the track to point to a new file location. When choosing this option, select a new path from the **New Path** column. PlayIt Live will check all other tracks to see if they have also been moved to that location and will automatically set those to **Update path** if they have not already been resolved.
- **Delete track** - Remove the track from the library.
You can resolve multiple rows at once by selecting them using the **Ctrl** or **Shift** keys, then clicking the **Mark selected** button and choosing the resolution.
Once you have selected your resolutions, click the **Resolve** button to apply the changes.
---
# Duplicate Track File Analysis
Use the Duplicate Track File Analysis window to find tracks in your library that point to the same file path. This is useful if you have accidentally added the same audio file to PlayIt Live more than once.
This tool only detects tracks that share an identical file path. It will not detect duplicates in the following cases:
- The same audio content exists at two different file paths (e.g. copied to another folder).
- Two different files have the same filename but are in different folders.
- Two files contain the same audio but have different filenames.
To open the window, go to **Tools > Duplicate Track File Analysis...**.
## Scanning for duplicates
Click the **Scan for duplicate track files** button to begin scanning your track library.
Any tracks that share the same file path will be displayed in the list.
## Removing duplicates
Click the **Remove Duplicates** button to remove the duplicate tracks from your library. The original track and its audio file are kept; only the extra library entries are removed.
---
# Track Play Count Analysis
Track Play Count Analysis can be used to determine the number of plays tracks have had during a date/time range. This can be useful to ensure you have the desired balance of tracks or if you are producing an air play chart show.
To open Track Play Count Analysis, go to **Tools > Track Play Count Analysis**.
### Date Range
Select a start and end date to analyse the number of plays between.
### Analyse and Include Unplayed
Click **Analyse** to start the analysis of previous playout logs to determine the number of plays for each track. Tick **Include unplayed, scheduled tracks** to also include tracks that were scheduled but did not play, for example because they were dropped by a fixed time marker. This option will also include all tracks scheduled in a future date range.
### Results
Once the analysis is complete, the results will be displayed. The track will be shown along with the track group it is in and the number of plays it has had during the time range. You can sort by Track, Track Groups, or Plays.
### Export to CSV
Click **Export...** to save the results to a CSV file, which can be opened in Microsoft Excel or Google Sheets for further analysis.
### Close
Click **Close** to close the Track Play Count Analysis window.
---
# Database Clean-up
The Database Clean-up window is used to remove old data such as playout log items, voice tracks and uploaded audio store files.
To open the window, go to **Tools > Database Clean-up**.
## Clean-up options
- **Delete playout log items scheduled more than** - Delete playout log entries older than the specified number of days.
- **Delete voice track files scheduled more than** - Delete voice track audio files older than the specified number of days.
- **Delete orphaned voice track files** - Delete voice track files that are in the voice track recordings folder but are no longer referenced by any voice track items in the database.
- **Delete orphaned audio store files (remote uploads and remote voice tracks)** - Delete audio store files that are in the audio store folder but are no longer referenced by any tracks in the database.
## Running a cleanup
1. Select the cleanup options you want to apply and configure the number of days where applicable.
2. Click **Start Clean-up...** to begin.
3. You will be prompted to perform a **Dry Run** first, which shows what items would be deleted without actually deleting them.
4. When you are satisfied with the results, click **Clean-up Now** to apply the changes.
---
# Loudness Analysis
PlayIt Live can analyse your tracks, calculate an offset gain, and store this for each track in your database. When a track is played, this gain will be applied. This ensures each track has the same loudness when played.
The ITU-R BS.1770 algorithm is used to measure loudness. This is commonly known as LUFS normalisation.
To open Loudness Analysis, go to **Tools > Loudness Analysis**.
To begin Loudness Analysis, select a **Target Loudness** (default -16 LUFS) and click **Start Loudness Analysis**.
PlayIt Live will run Loudness Analysis in the background as it processes each track. Due to the complexity of the algorithm, it can take several hours to process all the tracks. This only needs to be done once. Leave PlayIt Live running so it is able to process the tracks in the background. Any new tracks that are added will be automatically processed in the background.
## When the results are not quite right
Loudness Analysis works well for most music, but it is not perfect. Tracks with a wide or varying range of levels - for example a quiet spoken intro that builds into a loud chorus, or material with a large dynamic range - can be measured in a way that makes them sound too loud or too quiet next to everything else. It is worth spot-checking the results and adjusting any tracks that stand out.
### Overriding a single track's gain
The gain that Loudness Analysis calculates is stored in each track's **Gain** value, which you can change by hand. Open the track in the [Edit Track](/PlayItLive/218/tracks/edit-track) window and adjust the **Gain** field (in decibels): positive values make the track louder, negative values make it quieter. Your value replaces the analysed one for that track.
### Resetting the analysed values
If you are not happy with the results and want to start again, you can clear the gain across many tracks at once:
1. Open [Manage Tracks](/PlayItLive/218/tracks/manage-tracks) and select the tracks to reset (press **Ctrl+A** to select all).
2. Click **Edit** to open the [Bulk Edit](/PlayItLive/218/tracks/bulk-editing) dialog.
3. Tick the **Gain** checkbox and set the value to *blank*.
4. Click **Save Tracks**.
This resets the gain on every selected track. You can then run Loudness Analysis again - with a different **Target Loudness** if you wish - to re-analyse from scratch.
---
# Backup and Restore
PlayIt Live can back up and restore your database and settings on demand or on a regular schedule.
Backups contain your **database and settings only** - they do **not** include your audio files. Tracks and voice track recordings are referenced by their file path, so the audio itself is not copied into the backup. Back up your audio files separately, and make sure they are present at the same paths when you restore, otherwise the restored library will point to missing files.
To open Backup and Restore, go to **Tools > Backup and Restore**.
### Backup location
The location where backup files are stored. Click the link to change the location of future backups.
### Revert To Default
Revert the backup location to the default location.
### Keep up to
The number of backups to keep.
### Back Up Now
Click **Back Up Now** to back up the database and settings immediately.
### Backup Status
The backup status updates while a backup is in progress.
### Recent backups
A list of backups in the current backups folder.
### Restore Selected
Restore the selected backup in the backups list. The backup will be marked to restore when PlayIt Live next restarts. When the backup is restored, any existing data will be overwritten and irretrievable.
### Restore From File
Restore a specific backup from a file. The backup will be marked to restore when PlayIt Live next restarts. When the backup is restored, any existing data will be overwritten and irretrievable.
### Scheduled backups
Schedule PlayIt Live to regularly back up the database and settings every specified number of days. This happens automatically in the background when PlayIt Live is running.
### Close
Closes the window. Any currently running backup will continue in the background.
## Restoring a backup
After marking a backup to restore and restarting PlayIt Live, you will be prompted to restore the backup.
Type **YES** into the text box and click **Restore** to restore the backup. Any existing data will be overwritten.
Click **Cancel** to abort the restore and use the existing data.
---
# Auto Adjust
The Auto Adjust feature automatically adjusts the tempos and segues of upcoming items so they fit neatly to a target time - the next fixed time marker, or the end of the hour - rather than over-running or under-running. It is useful for hitting a fixed point such as the top-of-hour news: PlayIt Live nudges each song slightly faster, or shortens the overlap between tracks, so the run lands on time instead of a song being cut off abruptly.
Adjustments are only applied to track items with the Type **Song**. You can change the type of a track by editing it under **Manage > Tracks**.
To open the Auto Adjust window, go to **Tools > Auto Adjust**. This feature requires the **Advanced Scheduling** module.
### Settings
Configure the maximum tempo adjustment (%) and the maximum segue adjustment (seconds). These values control how much Auto Adjust is allowed to modify items to fit the target time.
### Preview
Shows what Auto Adjust will do when the Apply button is clicked. Click the refresh icon to update the preview list. If there are not enough scheduled items, you will be prompted to schedule more from the playout pattern.
### Revert
Reverts the most recent Auto Adjust change to pre-adjusted values. This applies to tempos, segues and fade envelopes. Items that were soft deleted will not be restored.
### Apply
Applies the adjustments shown in the preview.
## How Auto Adjust works
When Auto Adjust is applied, the following steps are taken:
1. A **target time** is determined. This is the target time of the next fixed time marker, or the time of the start of the next hour, whichever arrives first.
2. If there are not enough items before the target time, you will be prompted to **Schedule** more items. Items will be scheduled based on the playout pattern.
3. If there are enough items:
- Each item starting after the target time is soft deleted.
- Each Song item will have its tempo adjusted up to the maximum tempo value in settings.
- For the remaining duration, each Song item will be shortened up to the maximum segue value in settings.
Auto Adjust will not adjust items that have already started playing. Custom volume envelopes set manually on items may be destroyed when Auto Adjust is applied.
## Automatically applying Auto Adjust
Auto Adjust can be automatically applied in one of two ways:
### Scheduled Event
Under **Manage > Scheduled Events**, click **Add New**. Here you can run an Auto Adjust action on a schedule, for example every hour at 1 minute past the hour.
### Scheduled Event Action in Clocks
In a clock, add an item with Type "Scheduled Event Action" and select Auto Adjust under Settings. When the clock is scheduled into the Clock Schedule and the Playout Log is scheduled, the Auto Adjust action will be applied when the item is reached.
When the Auto Adjust Scheduled Event Action is run, more items will be scheduled into the hour in order to fulfil the Auto Adjustment, if required.
---
# Mixdown Playout Log
The Mixdown Playout Log feature allows you to mix down a portion of your playout log into a single audio file. This is useful for creating pre-recorded shows, backups, or exporting audio for other uses such as playing while updating the software or restarting the computer. You can specify the range of items to include, choose the output file format, and control additional options such as saving CUE files for track markers.
To open the Mixdown Playout Log window, go to **Tools > Mixdown Playout Log**.
### Mixdown Range
Use the First item and Last item fields to specify the range of items in the playout log to include in the mixdown. Click **Select** to choose specific items directly from the playout log.
### Ignore Fixed Time Markers
Tick this option to ignore the effect of Fixed Time Markers. Any items skipped or truncated by Fixed Time Markers will be included in the mixdown.
### File Path
Define where the mixdown file will be saved on your computer. Use the **Browse** button to select a folder and file name for the output.
### Format
Choose the desired format for the mixdown audio file. Options include MP3 or WAV. For MP3, select the bitrate and audio quality settings.
### Save CUE File
Tick this option to save a CUE file alongside the mixdown file. A CUE file contains information about the tracks within the mixdown file, which can be read by playout systems including PlayIt Live.
### Open Folder After Mixdown
Enable this option to automatically open the folder where the mixdown file has been saved once the process is complete.
### Review Notes
Displays any important notes or warnings, such as items in the range that are unsupported by the mixdown process.
### Start Mixdown
Click this button to begin the mixdown process. The system will process the selected range and save the audio file in the specified location. Leave the Mixdown Playout Log window open until the mixdown process is complete.
---
# Internet Broadcast
The Internet Broadcast feature in PlayIt Live allows you to stream audio from your system to an internet streaming server including Icecast and SHOUTcast.
Open the Internet Broadcast window from **Tools > Internet Broadcast**.
### Broadcast Source
The Broadcast Source section displays the current audio source being used for the internet broadcast. It includes a visual audio level meter that shows the output levels in real-time. Click **Change Source...** to select a different audio input for the broadcast.
Changing the source while broadcasting will cause streams to disconnect and reconnect.
### Streams
The Streams section lists all configured broadcast streams. Each stream displays its name, status, elapsed streaming time and data sent. Use the buttons to manage streams:
- **Add Stream...** to create a new broadcast stream.
- **Edit Stream...** to modify an existing stream's configuration.
- **Delete Stream...**
Changing a stream while broadcasting will cause it to disconnect and reconnect.
Streams can be started or stopped individually by right-clicking the stream in the list.
### Auto Start Streams
When enabled, all configured streams will start broadcasting automatically when PlayIt Live launches.
### Show Status Control
Toggles the visibility of the broadcast status indicator on the main PlayIt Live interface.
### Start/Stop All Streams
Start or stop all enabled streams at once. Streams can also be started or stopped individually by right-clicking in the stream list.
---
# Edit Internet Broadcast Stream
The Edit Stream window is where you set up and customise your audio streaming configuration. It allows you to connect PlayIt Live to a streaming server, define the audio quality, and provide metadata about your station. You can also configure options like archiving audio to a local file and streaming track titles.
Open this window from the Internet Broadcast window by clicking **Add Stream...** or **Edit Stream...**.
### Name
Enter the name of the stream for identification purposes in the stream list.
### Import / Export Settings...
Import or export the stream settings to or from an XML file. This is useful for sharing settings between installations to avoid configuration errors.
### Server Details
Enter details as provided by your streaming provider:
- **Server type:** Select the server type (Icecast, SHOUTcast V1, SHOUTcast V2).
- **Server address:** The server's hostname or IP address.
- **Server port:** The port used by the server (e.g. 8000).
- **Username:** The username for authentication (e.g. source).
- **Password:** The password associated with the username.
- **Mount:** The mount point or stream path (e.g. /live). Icecast only.
- **SID:** The Stream ID. SHOUTcast V2 only.
### Audio Details
Configure the audio encoding settings:
- **Format:** The audio format (currently MP3).
- **Quality:** Set the bitrate, channels (stereo/mono) and sample rate.
### Station Details
Provide metadata about your station:
- **Station name:** The name of your station.
- **Description:** A brief description of the station.
- **Genre:** The genre (e.g. Pop, Rock).
- **URL:** Your station's website URL.
- **Private stream** Check this option if you do not want the stream to appear in public directories.
### Audio Archive
Save a copy of the broadcast audio to a local file:
- **Save audio to file:** Enable archiving and specify the file path using **Browse...**.
- **Split file every:** Optionally split the recording into new files at a specified interval in minutes.
### Enable title streaming
Stream track title metadata to the server. The Now Playing feature must be configured with an Internet Broadcast target to send to all connected streams. This is configured by default.
### Disabled
Temporarily disable this stream without deleting its configuration. Disabled streams do not start on Auto Start Streams or when the Start All Streams button is clicked.
### OK
Save all settings and close the window.
### Cancel
Close the window without saving changes.
---
# Now Playing
The Now Playing feature sends real-time track information to external targets such as streaming servers and third-party services. You can configure multiple targets, each with its own settings, and optionally filter which tracks trigger updates.
To open the Now Playing window, go to **Tools > Now Playing**.
### Targets
Displays the configured targets where Now Playing data is sent, such as text files, HTTP web requests, TCP/IP connections, or Internet Broadcast streams. Use **Add New...**, **Edit...**, and **Delete...** to manage targets. See [Edit Now Playing Target](/PlayItLive/218/tools/edit-now-playing-target).
### Defaults
Specifies the default track template, fallback template and delay used by targets. These can be overridden in each target if required.
- **Track Template** specifies the format for sending track data, using placeholders such as `{{artist}}` and `{{title}}`. For example, `{{artist}} - {{title}}` will send "Artist Name - Track Title". A full list of placeholders can be found on the [Now Playing Placeholders](/PlayItLive/218/tools/now-playing-placeholders) page.
- **Fallback Template** provides an alternative format for cases where no eligible track is playing. To prevent a target from sending data, you can use the text `^IGNORE^`.
- **Delay** sets a delay in seconds before sending Now Playing data to targets. This is useful for aligning updates with streaming delays.
### Filters
Check this option to apply the Track Template only to tracks that meet specific conditions. Otherwise the Fallback Template will be used. Use **Add New...**, **Edit...**, and **Delete...** to manage filters. When multiple filters are specified, only tracks that meet the criteria of all the filters will be eligible for sending Now Playing data. See [Edit Now Playing Filter](/PlayItLive/218/tools/edit-now-playing-filter).
### Processing Log
Displays a real-time log of actions performed by the Now Playing feature, including sent track information and filter evaluations.
### Manually Enter...
Allows you to manually specify and send Now Playing data if automated updates are not available, such as during a live set. Clicking this button opens a dialog to input custom track information.
### Close
Closes the Now Playing window.
---
# Edit Now Playing Target
To open this window, click **Add New...** or **Edit...** in the Targets section of the [Now Playing](/PlayItLive/218/tools/now-playing) window.
### Target Type
Select the type of target where the Now Playing data will be sent:
- **Text File** writes the information to a local text file.
- **HTTP Web Request** sends the information as an HTTP POST or GET request to a URL.
- **TCP/IP** transmits the information to a specified host and port.
- **Internet Broadcast** sends data to connected Internet Broadcast streams.
### Target Settings
The settings vary based on the selected target type.
#### Text File
- **File Path** specifies the location of the text file (e.g. `C:\NowPlaying\nowplaying.txt`).
- **Template** defines the format using placeholders (e.g. `{{text}}`). See [Now Playing Placeholders](/PlayItLive/218/tools/now-playing-placeholders).
#### HTTP Web Request
- **Method** selects between GET or POST.
- **URL** is the endpoint where the request will be sent.
- **POST Body** defines the content for POST requests, using placeholders. See [Now Playing Placeholders](/PlayItLive/218/tools/now-playing-placeholders).
- **Username** and **Password** provide credentials if the endpoint requires authentication.
#### TCP/IP
- **Host or IP Address** specifies the destination host or IP.
- **Port** is the port number for the connection.
- **Template** defines the data to send using placeholders (e.g. `{{text}}`). See [Now Playing Placeholders](/PlayItLive/218/tools/now-playing-placeholders).
- **New Line Handling** selects how new lines are handled (CR LF, LF).
- **Text Encoding** selects the encoding format (e.g. Unicode (UTF-8)).
#### Internet Broadcast
- **Template** defines the data format sent to connected streams. See [Now Playing Placeholders](/PlayItLive/218/tools/now-playing-placeholders).
### Override defaults
Allows you to override the default settings for this specific target:
- **Track Template** defines a custom format for eligible tracks.
- **Fallback Template** defines a custom format for ineligible tracks. Use `^IGNORE^` to prevent sending.
- **Delay** sets a custom delay in seconds before sending data.
### OK
Saves the target configuration and returns to the Now Playing window.
### Cancel
Discards any changes and closes the window without saving.
---
# Edit Now Playing Filter
### Save
Click **Save** to apply the configured filter and return to the Now Playing window.
### Cancel
Click **Cancel** to discard any changes and close the window.
To open this window, click **Add New...** or **Edit...** in the Filters section of the [Now Playing](/PlayItLive/218/tools/now-playing) window.
## Filter Type
Select the criteria for filtering tracks:
- **Is in any of these track groups** selects tracks that belong to any of the chosen track groups.
- **Is NOT in any of these track groups** selects tracks that do not belong to the chosen track groups.
- **Is any of these types** selects tracks based on specific types (e.g. Song, Station ID).
- **Is NOT any of these types** selects tracks that are not of the chosen types.
## Track Groups / Types
Based on the selected Filter Type, this section displays a list of either track groups or track types. Check the boxes next to the relevant items that should be included or excluded, depending on the chosen filter type.
Filters are evaluated for each track. When multiple filters are configured in the Now Playing window, only tracks that meet the criteria of all filters will send Now Playing updates.
---
# Now Playing Placeholders
The following placeholders can be used in track templates and fallback templates in the [Now Playing](/PlayItLive/218/tools/now-playing) and [Edit Now Playing Target](/PlayItLive/218/tools/edit-now-playing-target) windows.
Placeholder
Description
`{{text}}`
Uses the Track Template if a track is playing, or the Fallback Template if no track or an ignored track is playing.
`{{artist}}`
The artist of the track.
`{{title}}`
The title of the track.
`{{type}}`
The type of the track, e.g. Song.
`{{path}}`
The full path to the audio file.
`{{filepath}}`
Same as `{{path}}`.
`{{intro}}`
The intro point in seconds.
`{{duration}}`
The full duration in seconds.
`{{outcue}}`
The out cue of the track.
`{{segue}}`
The segue in seconds (the number of seconds from the end where the cue out point is set).
`{{cuein}}`
The cue in point in seconds.
`{{cueout}}`
The cue out point in seconds.
`{{genre}}`
The genre of the track.
`{{year}}`
The year of the track.
`{{activeduration}}`
The active duration in seconds (cue out minus cue in).
`{{added}}`
The date the track was added to the database.
`{{tags}}`
The tags of the track, comma-separated.
`{{comments}}`
The comments of the track.
`{{isrc}}`
The ISRC of the track.
`{{sweeper}}`
Whether the track is marked as a sweeper (True/False).
`{{nofade}}`
Whether the track is marked as "no fade" (True/False).
`{{disabled}}`
Whether the track is marked as disabled (True/False).
`{{validfrom}}`
The Valid From date of the track (format: YYYY-MM-DD).
`{{expires}}`
The Expires date of the track (format: YYYY-MM-DD).
`{{trackid}}`
The Track ID of the track.
`{{guid}}`
The internal GUID of the track.
`{{trackgroups}}`
The track groups the track belongs to, comma-separated.
`{{startedUtc}}`
The start time of the track in UTC (format: YYYY-MM-DDTHH:mm:ssZ).
`{{startedLocal}}`
The start time of the track in local time (format: YYYY-MM-DDTHH:mm:ss).
## HTML-encoded placeholders
HTML-encoded versions of these placeholders can be used by prefixing the placeholder name with `html-`, such as `{{html-artist}}` or `{{html-title}}`. This is useful when sending data to targets that expect HTML content.
## JSON-encoded placeholders
JSON-encoded versions of these placeholders can be used by prefixing the placeholder name with `json-`, such as `{{json-artist}}` or `{{json-title}}`. The value is escaped so it can be placed safely inside a JSON string, for example an HTTP Web Request POST body:
`{"artist":"{{json-artist}}","title":"{{json-title}}"}`
---
# External Devices
The External Devices feature allows you to integrate PlayIt Live with third-party hardware systems for complete studio automation. This GPIO-style interface enables bidirectional communication between PlayIt Live and external equipment such as on-air lights, control buttons, telephone hybrids, transmitter controllers, and other broadcast equipment.
External Devices is an advanced feature for broadcast engineers and technical staff familiar with serial communications, GPIO hardware, and microcontroller programming (Arduino, etc.). This feature requires the **Remote Management module**. If you are unsure about hardware integration or electrical connections, consult a qualified broadcast engineer before proceeding.
Open the External Devices window from **Tools > External Devices**.
### Hardware
Configure the physical devices that connect to your computer. PlayIt Live supports Serial Port, Broadcast Tools/Easy Driver, and X-keys USB GPIO hardware interfaces. See [Hardware](/PlayItLive/218/tools/external-devices-hardware) for details.
### Named Outputs
Define commands that PlayIt Live sends to your external hardware devices, such as turning on-air lights on or off. Named Outputs can be triggered by Scheduled Events. See [Named Outputs](/PlayItLive/218/tools/external-devices-named-outputs) for details.
### Named Inputs
Define signals received from your external hardware devices, such as button presses from a control panel. See [Named Inputs](/PlayItLive/218/tools/external-devices-named-inputs) for details.
### Input Triggers
Define actions that PlayIt Live performs when a Named Input is received. Each trigger links a Named Input to one or more scheduled event actions. See [Input Triggers](/PlayItLive/218/tools/external-devices-input-triggers) for details.
### Log
Displays real-time status messages and diagnostic information from the External Devices system. Monitor this panel when setting up new hardware or diagnosing connectivity issues. If your hardware is not responding, check the log for error messages.
---
# Hardware
The Hardware section is where you configure the physical devices that connect to your computer. PlayIt Live supports the following types of hardware interfaces:
- **Serial Port** - Connect devices via RS-232 serial ports or USB-to-Serial adapters. Compatible with Arduino boards, relay controllers, and custom hardware.
- **Broadcast Tools Switcher** - Direct integration with Broadcast Tools switcher equipment as well as the PIP-compatible [Easy Driver](https://easy-driver.co.uk/) relay control.
- **X-Keys USB GPIO** - Support for X-keys USB GPIO devices.
Click **Add New** to configure a new hardware device. Each hardware device must be properly configured before you can create Named Outputs or Named Inputs that use it.
## Configuring Hardware Devices
When you add or edit a hardware device, you configure its connection settings and communication parameters. The available settings depend on the hardware type you select.
### General Settings
**Type:** Select the hardware interface type.
**Name:** A descriptive name for this hardware device (e.g. "Serial", "Studio Controller", "Main GPIO"). This name will appear in dropdown menus when creating Named Outputs and Named Inputs.
**Disabled:** Check this box to temporarily disable the hardware device without deleting its configuration. While disabled, the device will not communicate with PlayIt Live, and any Named Outputs or Inputs using this hardware will not function.
### Serial Port Setup
**COM Port:** Select the serial port your device is connected to (e.g. COM1, COM3). Click **Refresh** to update the list of available ports if you have just connected your device.
**Baud Rate:** Communication speed in bits per second. Common values are 9600, 19200, 38400, 57600, and 115200. Must match your device's configuration. Default: 9600.
**Data Bits:** Number of data bits per character. Typically **8** for modern devices. Options: 5, 6, 7, or 8.
**Parity:** Error checking method. Options: None, Odd, Even, Mark, or Space. Most devices use **None**.
**Stop Bits:** Number of stop bits signaling the end of a byte. Options: 0, 1, 1.5, or 2. Most devices use **1**.
**Flow Control:** Hardware or software flow control for managing data transmission. Most simple devices use **None**.
**Encoding:** Character encoding for text communication. Options include ASCII and UTF8. Default: **ASCII**.
**Read Timeout:** Maximum time (in milliseconds) to wait for incoming data before timing out. Default: 1000 ms.
**Write Timeout:** Maximum time (in milliseconds) to wait when sending data before timing out. Default: 1000 ms.
### Broadcast Tools Switcher Setup
Broadcast Tools devices use a simplified serial configuration:
**COM Port:** Select the serial port your Broadcast Tools device is connected to. Click **Refresh** to update the available ports.
**Baud Rate:** Communication speed. Default is **9600**, which is standard for most Broadcast Tools equipment. Adjust only if your device is configured differently.
**Read Timeout:** Maximum time (in milliseconds) to wait for responses from the device. Default: 1000 ms.
**Write Timeout:** Maximum time (in milliseconds) to wait when sending commands. Default: 1000 ms.
Broadcast Tools devices typically use standardised protocols, so additional serial parameters (data bits, parity, stop bits) are pre-configured automatically.
### X-Keys USB GPIO Setup
X-Keys USB devices connect directly via USB and require minimal configuration:
**Specific Unit ID:** Check this box and enter a Unit ID number if you have multiple X-keys devices connected to the same computer. This allows PlayIt Live to target a specific device when multiple units are present. Leave unchecked if you only have one X-keys device connected. Enable and set a unique ID (1, 2, 3, etc.) for each device when using multiple units. The Unit ID must match the ID configured on your X-keys hardware.
X-keys devices are plug-and-play USB devices and do not require COM port or baud rate configuration.
---
# Named Outputs
Named Outputs are commands that PlayIt Live sends **to** your external hardware devices. Each output represents a specific action your hardware should perform, such as turning on a light, activating a relay, or switching equipment states.
When you create a Named Output, you specify:
- **Hardware** - Which configured hardware device will receive the command.
- **Output Name** - A descriptive name displayed in PlayIt Live (e.g. "On Air Light ON").
- **Output ID** - A unique identifier used for scheduling and API access (e.g. "ONAIR\_ON").
- **Command** - The actual text string sent to the device (e.g. `LIGHT_ON\r\n`).
Named Outputs can be triggered by Scheduled Events (using the "Trigger Output" scheduled event action) within **Manage > Scheduled Events** or within a Scheduled Event Action item in the playout log.
Common examples include controlling on-air indicators, activating recording equipment, or switching audio sources.
## Configuring Named Outputs
When you click **Add New** or **Edit** in the Named Outputs section, you configure the following settings:
### Hardware
Select which configured hardware device will receive this output command. The dropdown lists all hardware devices you have configured in the Hardware section. You must configure at least one hardware device before you can create Named Outputs.
### Output Name
A descriptive, human-readable name for this output that appears throughout PlayIt Live's interface. This name is displayed when selecting outputs in scheduled events and other PlayIt Live features.
### Output ID
A unique identifier used to reference this output in scheduled event actions and API calls. It must be unique across all Named Outputs. Click **Reset** to automatically generate a unique ID based on the Output Name you entered.
If you change the Output ID after it is already being used, any existing scheduled events or playout log items referencing the old Output ID will no longer work and must be manually updated. Only change the Output ID if absolutely necessary.
### Configuration - Command
The Command field contains the exact text string that will be sent to the hardware device when this output is triggered. This is the actual data transmitted to your device.
You can include special character sequences to send non-printable characters:
Sequence
Character
`\r`
Carriage return (CR)
`\n`
Line feed (LF)
`\t`
Tab character
`\\`
Literal backslash
`\xhh`
2-digit hexadecimal byte (e.g. `\x0D`)
`\uhhhh`
4-digit Unicode character
Each backslash must be escaped as `\\` when typing. For example, to send the text `\COMMAND` followed by a carriage return and line feed, type: `\\COMMAND\r\n`
---
# Named Inputs
Named Inputs are commands that PlayIt Live receives **from** your external devices. Each input represents a specific signal or event from your hardware, such as a button press, sensor activation, or status change.
When you create a Named Input, you specify:
- **Hardware** - Which configured hardware device will send the command.
- **Input Name** - A descriptive name displayed in PlayIt Live (e.g. "Next Track Button").
- **Input ID** - A unique identifier used for API access and logging (e.g. "BTN\_NEXT").
- **Command** - The exact text string that must be received from the device to trigger this input (e.g. `PLAY_NEXT\r\n`).
When PlayIt Live receives data from the hardware that matches the specified command string, the corresponding Named Input is triggered. This trigger can then execute actions through [Input Triggers](/PlayItLive/218/tools/external-devices-input-triggers).
## Configuring Named Inputs
When you click **Add New** or **Edit** in the Named Inputs section, you configure the following settings:
### Hardware
Select which configured hardware device will send this input command. The dropdown lists all hardware devices you have configured in the Hardware section. You must configure at least one hardware device before you can create Named Inputs.
### Input Name
A descriptive, human-readable name for this input that appears throughout PlayIt Live's interface. This name is displayed when creating Input Triggers and helps you identify the purpose of each input.
### Input ID
A unique identifier used to reference this input in scheduled event actions, triggers, and API calls. Must be unique across all Named Inputs. Click **Reset** to automatically generate a unique ID based on the Input Name you entered.
If you change the Input ID after it is already being used, any existing scheduled events or playout log items referencing the old Input ID will no longer work and must be manually updated. Only change the Input ID if absolutely necessary.
### Configuration - Command
The Command field contains the exact text string that must be received from the hardware device to trigger this input. When PlayIt Live receives data from the device that matches this command string, the corresponding Named Input is triggered.
When your external device (Arduino, control panel, etc.) sends data to PlayIt Live, that data is compared against all configured Named Input commands. If a match is found, the input is triggered and any associated Input Triggers are executed.
You can include special character sequences to match non-printable characters in the received data:
Sequence
Character
`\r`
Carriage return (CR)
`\n`
Line feed (LF)
`\t`
Tab character
`\\`
Literal backslash
`\xhh`
2-digit hexadecimal byte (e.g. `\x0D`)
`\uhhhh`
4-digit Unicode character
Each backslash must be escaped as `\\` when typing. For example, to match the string `\COMMAND` followed by a carriage return and line feed, type: `\\COMMAND\r\n`
### Command Matching
The command must match exactly for the input to trigger. Pay careful attention to:
- Letter case (most systems are case-sensitive)
- Line endings (`\r\n` vs `\n` vs none)
- Whitespace characters
- Any special characters or escape sequences
---
# Input Triggers
Input Triggers define what PlayIt Live should do when a Named Input is received from your external hardware. They connect incoming hardware signals to PlayIt Live automation actions, enabling physical controls and external systems to trigger specific behaviours in the software.
When your external hardware sends a command that matches a [Named Input](/PlayItLive/218/tools/external-devices-named-inputs), the corresponding Input Trigger is activated and executes its configured actions. Input Triggers can perform single actions or sequences of multiple actions.
## Configuring Input Triggers
Click **Add New** or **Edit** in the Input Triggers section to configure a trigger.
### Trigger Name
A descriptive name that explains what this trigger does. This helps you identify the trigger's purpose when managing multiple triggers.
### Input
Select which Named Input will activate this trigger. The dropdown shows all Named Inputs you have configured. When the selected input receives its matching command from the hardware, this trigger executes.
### Trigger Actions
The list of actions that will be executed sequentially when this trigger is activated. Actions are numbered and executed in order from top to bottom.
The actions available are the same as those that can be configured on [scheduled events](/PlayItLive/218/scheduled-events/overview). This means any action you can schedule to occur at a specific time can also be triggered by external hardware inputs.
Click **Add Action...** to add an action to the list.
### Disabled
Check this box to temporarily disable the trigger without deleting its configuration. While disabled, the trigger will not execute even when its associated Named Input is received. This is useful for testing or temporarily suspending automation without losing your configuration.
---
# Practical Examples
The following examples demonstrate complete setups for integrating PlayIt Live with external hardware using the External Devices feature.
## Controlling an On-Air Light with Arduino
This example demonstrates how to automatically control a studio "On Air" light using an Arduino connected via USB.
### Overview
An Arduino connected via USB controls an "On Air" light (LED, relay-controlled lamp, etc.). The Arduino listens for serial commands and turns the light on or off accordingly. PlayIt Live sends commands to the Arduino at scheduled times using Scheduled Event Actions in your playout log.
**Hardware required:**
- Arduino connected to your computer via USB
- Arduino programmed to respond to serial commands (e.g. `LIGHT_ON` and `LIGHT_OFF`)
- On Air light connected to Arduino output pin
- Arduino configured for 9600 baud serial communication
### Step 1: Configure Hardware
1. Connect your Arduino via USB.
2. Note the COM port assigned (check Device Manager).
3. Open **Tools > External Devices** in PlayIt Live.
4. Click **Add New** under **Hardware**.
5. Configure:
- **Type:** Serial Port
- **Name:** Arduino On Air Light
- **COM Port:** Select your Arduino's COM port (e.g. COM3)
- **Baud Rate:** 9600 (or match your Arduino's baud rate)
- **Data Bits:** 8
- **Parity:** None
- **Stop Bits:** 1
- **Flow Control:** None
- **Encoding:** ASCII
6. Click **OK**.
Check the Log panel for "Hardware started" and "Opened serial port connection" confirmation.
### Step 2: Create Named Outputs
**Output 1: Turn Light ON**
1. Click **Add New** under **Named Outputs**.
2. Configure:
- **Hardware:** Arduino On Air Light
- **Output Name:** On Air Light ON
- **Output ID:** ONAIR\_ON
- **Command:** `LIGHT_ON\r\n`
3. Click **OK**.
**Output 2: Turn Light OFF**
1. Click **Add New** under **Named Outputs**.
2. Configure:
- **Hardware:** Arduino On Air Light
- **Output Name:** On Air Light OFF
- **Output ID:** ONAIR\_OFF
- **Command:** `LIGHT_OFF\r\n`
3. Click **OK**.
### Step 3: Add Scheduled Event Actions
You can control the light using Scheduled Event Actions in clocks and scheduled events.
**Using Clocks:**
1. Navigate to **Manage > Clocks**.
2. Create or edit a clock for your live show (e.g. "Morning Show Clock").
3. Add a **Scheduled Event Action** at the start of the clock:
- **Action:** Trigger Output
- **Select:** On Air Light ON
4. Add your show content (music, links, etc.).
5. Add a **Scheduled Event Action** at the end of the clock:
- **Action:** Trigger Output
- **Select:** On Air Light OFF
**Using Scheduled Events:**
1. Navigate to **Manage > Scheduled Events**.
2. Create event: "Morning Show Start"
- **Time:** 6:00 AM (Daily)
- **Action:** Trigger Output, On Air Light ON
3. Create event: "Morning Show End"
- **Time:** 10:00 AM (Daily)
- **Action:** Trigger Output, On Air Light OFF
### Typical Workflow
1. **5:55 AM** - Automation playing overnight content.
2. **6:00 AM** - Scheduled Event Action triggers **On Air Light ON**. Command `LIGHT_ON\r\n` sent to Arduino. Light illuminates.
3. **6:00 - 10:00 AM** - Live show content plays.
4. **10:00 AM** - Scheduled Event Action triggers **On Air Light OFF**. Command `LIGHT_OFF\r\n` sent to Arduino. Light turns off. Automation resumes.
---
## Physical "Play Next" Button with Arduino
This example demonstrates how to use a physical button connected to an Arduino to control PlayIt Live playback. When the button is pressed, PlayIt Live skips to the next track in the playout log.
### Overview
An Arduino connected via USB has a physical button that sends a command to PlayIt Live when pressed. PlayIt Live receives this command as a Named Input and triggers an Input Trigger to play the next track.
**Hardware required:**
- Arduino connected to your computer via USB
- Physical momentary pushbutton connected to Arduino
- Arduino programmed to send serial commands when button is pressed
- Arduino configured for 9600 baud serial communication
### Step 1: Configure Hardware
1. Connect your Arduino via USB.
2. Note the COM port assigned (check Device Manager).
3. Open **Tools > External Devices** in PlayIt Live.
4. Click **Add New** under **Hardware**.
5. Configure:
- **Type:** Serial Port
- **Name:** Studio Control Panel
- **COM Port:** Select your Arduino's COM port (e.g. COM3)
- **Baud Rate:** 9600
- **Data Bits:** 8
- **Parity:** None
- **Stop Bits:** 1
- **Flow Control:** None
- **Encoding:** ASCII
6. Click **OK**.
Check the Log panel for "Hardware started" and "Opened serial port connection" confirmation.
### Step 2: Create a Named Input
1. Click **Add New** under **Named Inputs**.
2. Configure:
- **Hardware:** Studio Control Panel
- **Input Name:** Next Track Button
- **Input ID:** BTN\_NEXT
- **Command:** `PLAY_NEXT\r\n`
3. Click **OK**.
This input will be triggered when the Arduino sends `PLAY_NEXT\r\n` to PlayIt Live.
### Step 3: Create an Input Trigger
1. Click **Add New** under **Input Triggers**.
2. Configure:
- **Trigger Name:** Play Next when Button is Pressed
- **Input:** Next Track Button
3. Click **Add Action...**
- Select the action: **Play Next**
- Click **OK**.
4. Click **OK**.
### Signal Flow
1. **Physical Action:** DJ presses the button on the control panel.
2. **Arduino:** Detects button press and sends `PLAY_NEXT\r\n` via serial.
3. **Named Input:** PlayIt Live receives the command and matches it to "Next Track Button".
4. **Input Trigger:** "Play Next when Button is Pressed" activates.
5. **Action Executes:** PlayIt Live plays the next item in the playout log.
6. **Result:** Current track fades and stops, and the next track begins playing immediately.
---
## Satellite Feed Sync with Broadcast Tools Switcher
This example demonstrates how to use a Broadcast Tools ACS 8.2 Plus switcher to receive a GPI (General Purpose Input) signal from a satellite receiver, which triggers PlayIt Live to play commercials during local breaks.
PlayIt Software provides support for the External Devices feature and Named Input configuration only. For help with Broadcast Tools hardware configuration, wiring, and troubleshooting, contact Broadcast Tools directly at [support@broadcasttools.com](mailto:support@broadcasttools.com) or +1 (360) 854 9559. See the [Broadcast Tools ACS 8.2 Plus](https://broadcasttools.com/product/acs-8-2-plus-audio-control-switcher/) product page for the Installation and Operation Manual.
### Overview
Your station receives a syndicated program via satellite. The satellite receiver has a GPI output that sends a signal when the program ends and it is time for local commercials. You want PlayIt Live to wait for this signal before starting your commercial break.
**Prerequisites:**
- Broadcast Tools ACS 8.2 Plus properly wired to your satellite receiver's GPI output
- Serial connection established between Broadcast Tools unit and your computer
- Broadcast Tools unit configured with appropriate Unit ID, baud rate, and PIP mode enabled
- Verified that the Broadcast Tools unit is receiving the GPI signal from your satellite receiver
### Step 1: Configure Hardware
1. Open **Tools > External Devices** in PlayIt Live.
2. Click **Add New** under **Hardware**.
3. Configure:
- **Type:** Broadcast Tools
- **Name:** Satellite Receiver
- **COM Port:** Select the appropriate port
- **Baud Rate:** 9600 (or match your Broadcast Tools configuration)
- **Read Timeout:** 1000 ms
- **Write Timeout:** 1000 ms
4. Click **OK**.
Check the Log panel for connection confirmation.
### Step 2: Create a Named Input
1. Click **Add New** under **Named Inputs**.
2. Configure:
- **Hardware:** Satellite Receiver
- **Input Name:** Satellite Break Ready
- **Input ID:** SAT\_BREAK
- **Unit ID:** Your Broadcast Tools unit ID (typically 0 or 1)
- **GPI/PIP Input Number:** The input number where your satellite GPI is connected (e.g. 1)
- **Value Changes To:** 1 or 0 depending on your GPI signal type
3. Click **OK**.
### Step 3: Create an Input Trigger
1. Click **Add New** under **Input Triggers**.
2. Configure:
- **Trigger Name:** Satellite Break Continue
- **Input:** Satellite Break Ready
3. Click **Add Action...** and select **Play Next**.
4. Click **OK**.
### Step 4: Create a Clock
1. Navigate to **Manage > Clocks**.
2. Create a new clock or edit an existing clock (e.g. "Satellite Show Clock").
3. Add items to your clock in this order:
**Clock Start (Precise Timing):**
- Add a **Fixed Time Marker** at 00:00 (start of hour) or your show's start time. Type: Hard.
**Switch to Manual Control:**
- Add a **Scheduled Event Action**. Action: **Change Playout Mode**. Mode: **Automation OFF**.
**Initial Silence (waiting for break cue):**
- Add a **Break Note**. Duration: set to a long duration (e.g. 1800 seconds for 30 minutes). Notes: "Satellite show playing, waiting for break cue". Ensure the Segue checkbox is **unchecked** (red stop sign).
**Commercial Break:**
- Add your commercial break tracks/jingles. Ensure these have Segue **checked** (green arrow) for normal flow between commercials.
**Return to Silence:**
- Add another **Break Note**. Duration: set to cover the remaining satellite show time (e.g. 1800 seconds). Notes: "Satellite show resumed, local break finished".
**End of Show (Return to Normal Operation):**
- Add a **Scheduled Event Action**. Action: **Change Playout Mode**. Mode: **Automation ON**.
4. Save the clock.
### Step 5: Schedule the Clock
1. Schedule the clock at your show time (e.g. 2:00 PM) via **Manage > Clock Schedule**.
2. Switch **Log Scheduler ON**.
3. At the scheduled time, PlayIt Live will start the clock with precise timing and proper automation control.
### Complete Workflow
1. **2:00 PM** - Fixed Time Marker ensures precise start time.
2. **Automation switches OFF** - Ensures manual control and red stop signs are respected.
3. **First Break Note begins** - PlayIt Live outputs silence.
4. **Satellite show plays** - External satellite feed is live on-air.
5. **Break Note reaches end** - PlayIt Live stops at red stop sign and waits.
6. **Satellite receiver** - Detects end of program segment, activates GPI output.
7. **Broadcast Tools unit** - Detects GPI state change, sends data to PlayIt Live.
8. **Named Input triggered** - "Satellite Break Ready" receives the signal.
9. **Input Trigger activated** - Executes the "Play Next" action automatically.
10. **Commercial break plays** - Local spots air with normal segues between them.
11. **Return to silence** - Second Break Note begins, PlayIt Live outputs silence again.
12. **Satellite show resumes** - External satellite feed continues.
13. **End of show** - Automation switches back ON for normal programming.
---
# Built-in Remote Access Server
The Built-in Remote Access Server configuration window.
The Built-in Remote Access Server is a key feature of PlayIt Live that allows remote users to manage and interact with PlayIt Live from virtually anywhere. It can be accessed via the **File > Enable remote connections...** menu item.
The Remote Access Server provides remote users with an array of functionalities:
## Remote Studio
The [Remote Studio](/PlayItLive/218/remote-access/remote-studio) feature allows users to access the studio in real-time using a supported browser (Google Chrome, Microsoft Edge, or Mozilla Firefox). Remote users can perform the same actions as if they were using the main interface in the studio, such as starting and stopping players, dragging tracks into the playout log, and adjusting segues. They can also monitor audio in real-time and introduce their microphone into the mix. Remote Studio users can be restricted to certain times of the day when they can edit the playout log and start live audio.
## Remote Management
[Remote Management](/PlayItLive/218/remote-access/remote-management) of PlayIt Live data allows remote users to manage PlayIt Live data using a web browser. This feature allows them to access the system to make changes to the track library, clock schedules and playout log without being physically present in the studio or interrupting the on-air presenter.
## Remote Voice Tracking
[Remote Voice Tracking](/PlayItLive/218/remote-access/remote-voice-tracking) allows remote users to record voice tracks using a supported browser (Google Chrome, Microsoft Edge, or Mozilla Firefox) or PlayIt VoiceTrack (a Windows desktop application).
## PlayIt Live Control API
Control PlayIt Live programmatically using an HTTP-based API. This allows for automation and management of various PlayIt Live functions.
## Advanced Settings
There are various [advanced settings](/PlayItLive/218/remote-access/advanced-settings) including changing the port number and configuring an HTTPS secure connection. PlayIt Live can also automatically update your IP address to a static .playitradio.com address.
## Setting Up External Access
To help you set up your computer so you can access the remote server from the internet, you can click the **Help me set up external access** button and follow the [instructions](/PlayItLive/218/remote-access/setting-up-external-access).
---
# Advanced Settings
If you find these settings are disabled, you must first stop the server by clicking the **Stop Server** button in the top section.
### Server Port
This is the port used by the remote access server. By default, this is 25433. This should not need to be changed unless you desire a specific port number.
### Use HTTPS
With HTTPS, data between you and the connecting user will be encrypted. Without it, a "Not Secure" message will be shown on the web browser. Due to browser restrictions, HTTPS is required to use Remote Voice Tracking and Remote Studio in the web browser.
**Technical information:** When HTTPS is enabled, an SSL certificate for the registered hostname (see below) will be generated for you by PlayIt Software and installed on your machine. A self-signed certificate will also be generated for 'localhost' to be used on the local computer.
### Hostname
This is the hostname that will be used to allow other users to access your remote access server with a static (and potentially memorable) address. Leave the hostname and access code boxes blank before starting the server to use a random address. You can register your own custom address using the link. Once you have registered the hostname on that page, enter the hostname and access code that is provided to you into the corresponding boxes in this section.
Custom hostnames are only available to customers who have an active premium module subscription or lifetime purchase.
### IP Address
This section shows the external IP address that has been detected. This address will be used to automatically map your hostname with your IP address. If your IP address changes, your hostname will remain the same. If you wish to override the detected IP address (if it has been detected incorrectly), tick the **Override:** checkbox, enter the IP address and click **Save**.
### Registration Status
This section shows the status of the SSL certificate registration and IP address publishing. Typically SSL certificate registration and IP address (DNS) registration takes around 10 minutes after starting the server.
### Disable Updates
If you have multiple installations sharing the same hostname and access code in different locations, you can disable automatic updates on inactive installations to prevent them from overwriting the IP address mapping. Only the installation that is actively serving remote connections should have updates enabled.
---
# Setting Up External Access
The "Help me set up external access" section provides some assistance to allow others outside your network to access your computer.
To allow external access to your computer, follow these steps:
## Home or small office network
### 1\. Create a firewall rule
You will need to create a firewall rule to allow connections to the remote access server port. If you are using Windows Defender Firewall, you can click the **Create rule** button to automatically add this rule. However, if you are using a different firewall, such as McAfee, you will need to refer to its documentation to allow connections through the server port.
### 2\. Set up port forwarding
If you have a home or small office network, PlayIt Live will try to set up port forwarding for you using Universal Plug and Play (uPnP). However, you may need to set up port forwarding rules manually on your network router to route incoming traffic on the remote access server port to your PlayIt Live computer.
You will need to forward the TCP port, along with the name of your computer and its internal IP address, which are displayed on this window.
Since each router is different, specific instructions cannot be provided. You can click the **Help me with port forwarding** link for AI-assisted guidance tailored to your specific router brand and network setup.
## Corporate or school networks
For corporate or school networks, your IT administrator will need to:
- Allow inbound TCP traffic on the remote access server port (default 25433) through the network firewall.
- Configure port forwarding or a NAT rule to route incoming traffic on that port to the internal IP address of the PlayIt Live computer.
## Alternative: VPN tunnel services
If port forwarding is not possible, for example because your internet service provider uses Carrier-Grade NAT (CGNAT) or your network administrator does not permit it, you can use a VPN tunnel service as an alternative. Services such as [Tailscale](https://tailscale.com/), [ZeroTier](https://www.zerotier.com/), or [Cloudflare Tunnel](https://www.cloudflare.com/products/tunnel/) create a secure network connection between your devices without requiring any port forwarding or network firewall changes. Traffic is routed through the service's infrastructure, allowing remote users to connect to your PlayIt Live server as if they were on the same local network.
PlayIt Software cannot provide direct support for these services. Please refer to their respective documentation for setup instructions.
## Successful setup
Once you have set up your system correctly for external access, the window should look something like this:
---
# Remote Management
To access Remote Management, open a supported browser (Google Chrome, Microsoft Edge, or Mozilla Firefox) and go to the remote URL you set up when [setting up external access](/PlayItLive/218/remote-access/setting-up-external-access), then select **Remote Management**.
The remote management web interface works the same as that of PlayIt Manager. Please follow the [PlayIt Manager documentation](https://www.playitsoftware.com/Products/Manager/Documentation) for instructions on how to use the web interface.
The Remote Management web interface.
---
# Remote Studio
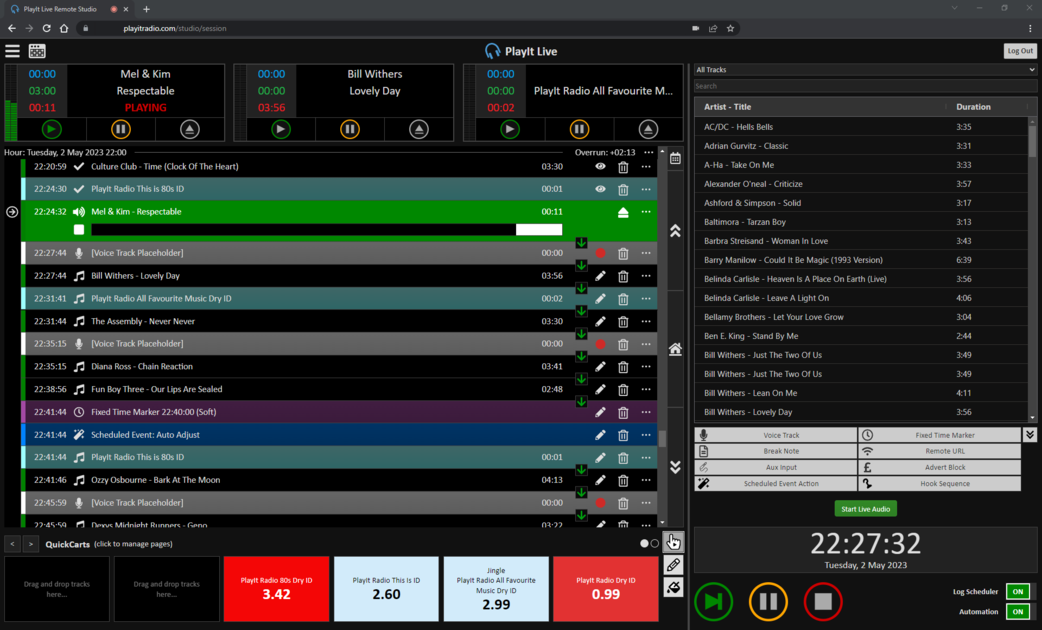
The Remote Studio interface displayed in a web browser, showing the playout log, players, and live audio controls.
PlayIt Live Remote Studio is a powerful, browser-based broadcasting solution that allows users to plan and present their shows remotely. This page will guide you through the process of setting up a new user, connecting to Remote Studio, and using its features.
## Setting Up a User for PlayIt Live Remote Studio
To allow a user to connect to PlayIt Live Remote Studio, follow these steps:
1. Open PlayIt Live and navigate to **Manage > Users**.
2. Click **Add New** to create a new user.
3. Enter the user's display name, username, and a password.
4. If you trust the user and want them to be able to broadcast any time, you can enable the **Is Admin?** option.
5. Otherwise, select the hours during which the user is allowed to broadcast using Remote Studio. They can log in anytime to plan their show, but can only go live during the specified hours (with a 5-minute buffer on either side).
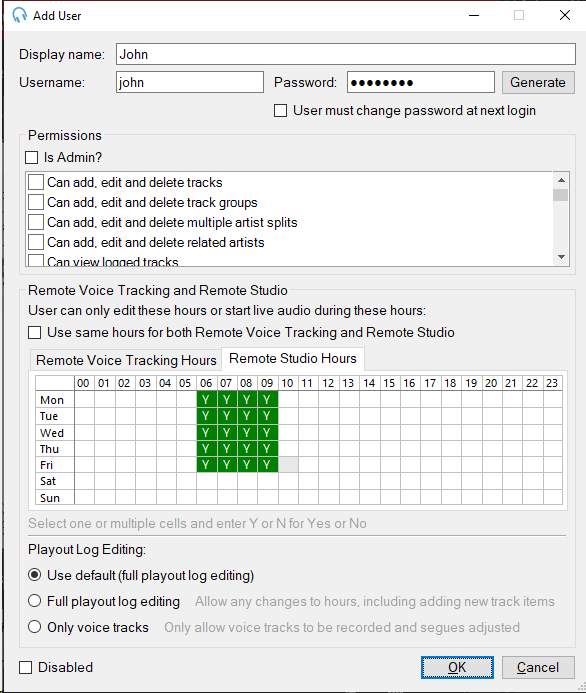
The Add User form with display name, username, password fields, a Permissions section with an Is Admin checkbox and individual permission checkboxes, and a Remote Voice Tracking and Remote Studio section with an hour grid. The Remote Studio Hours tab is selected, showing green 'Y' cells for Monday to Friday 06:00–09:00 indicating allowed broadcast hours. Below is a Playout Log Editing section with radio buttons.
Note: After their allotted time, the remote user will be automatically disconnected from live audio within 5 minutes.
## Enable Remote Connections
1. On PlayIt Live, go to **File > Enable remote connections...**
2. Expand **Advanced**, and ensure the **Use HTTPS** is ticked.
3. Click **Start Server**.
4. Click **Help me set up external access** to create a firewall rule and configure port forwarding rules.
5. At the bottom of this window you will see the address that can be used to access PlayIt Live remotely. Make a note of this address, as this is what you will give to remote presenters to plan and broadcast their show.
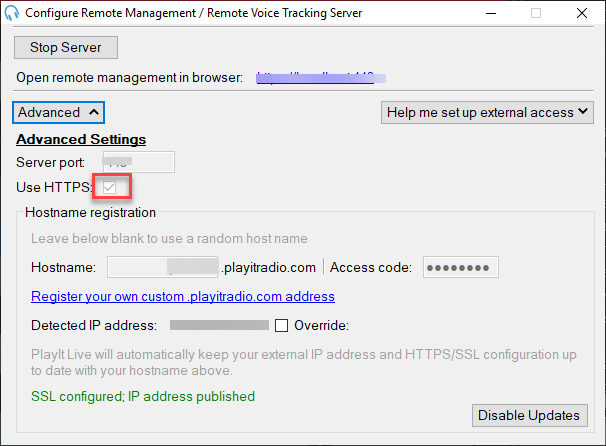
The Configure Remote Management / Remote Voice Tracking Server window with the Advanced section expanded, showing the Server port field, Use HTTPS checkbox ticked and highlighted, Hostname registration fields, and the detected IP address with SSL configured status.
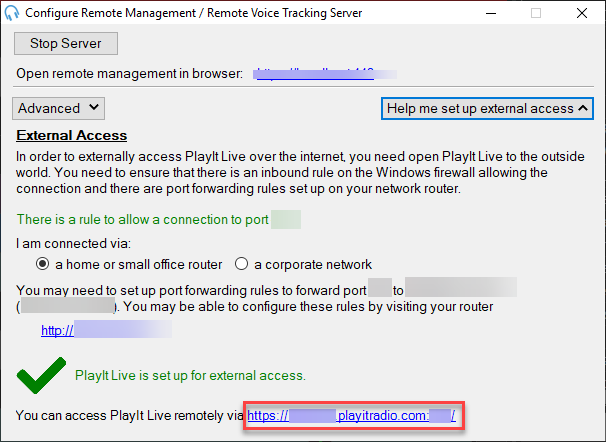
The Configure Remote Management / Remote Voice Tracking Server window with the Help me set up external access section expanded, showing firewall rule status, network type selection, port forwarding instructions, and the remote URL highlighted at the bottom confirming PlayIt Live is set up for external access.
Note: You can visit [https://www.playitsoftware.com/Account/Hostname](https://www.playitsoftware.com/Account/Hostname) to request your own, more memorable, playitradio.com hostname.
## Accessing Remote Studio
1. In a supported browser (Google Chrome, Microsoft Edge, or Mozilla Firefox), visit the URL as per step 5 of the Enable Remote Connections section.
2. Select **Remote Studio**.
3. Enter your **Username** and **Password** and click **Log In**.
4. Upon connecting to Remote Studio for the first time, you will be prompted to grant your web browser access to your microphone. You should click **Allow** to proceed.
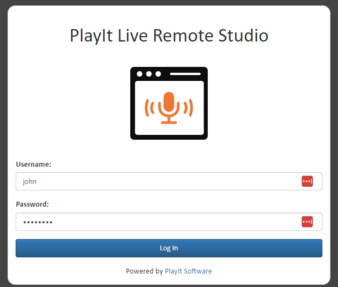
The Remote Studio login form with Username and Password fields and a Log In button.
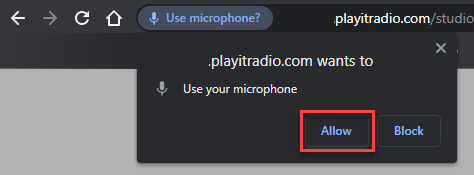
The browser permission prompt asking to use the microphone, with Allow and Block buttons. Click Allow to proceed.
## Remote Studio Interface and Compatibility
The Remote Studio interface is identical to the PlayIt Live interface, but it is presented in a web browser. This makes PlayIt Live accessible to those on various operating systems, including Windows, macOS, and Linux. Remote Studio is supported on the desktop versions of Google Chrome, Microsoft Edge, and Mozilla Firefox.
If you are familiar with PlayIt Live you will not require additional training, except for learning how to use the Live Audio feature.
## Going Live with Live Audio
When it's time for you to go live, you should click **Start Live Audio**. You will immediately hear the audio from the studio in real-time. To mute the monitored audio from the studio, click the green Speaker icon.
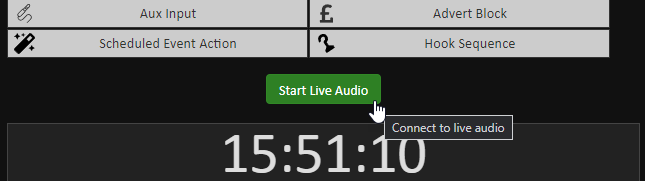
The bottom of the Remote Studio interface showing the special items toolbar (Aux Input, Advert Block, Scheduled Event Action, Hook Sequence) and the green 'Start Live Audio' button with a 'Connect to live audio' tooltip, above a large clock display.
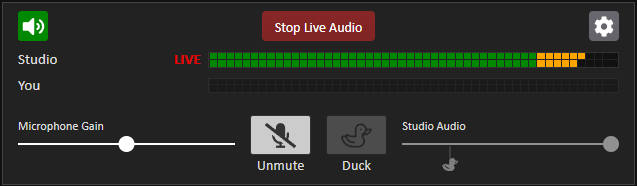
The Live Audio panel after connecting, showing the red 'Stop Live Audio' button, Studio Audio level meters with a LIVE indicator, the 'You' microphone level row, Microphone Gain slider, Unmute and Duck buttons, Studio Audio volume slider, and a settings cog icon.
## Live Audio Settings
You should check your audio settings to ensure your playback device, microphone device and duck duration are configured to your preference. Click the cog icon to access Live Audio Settings.
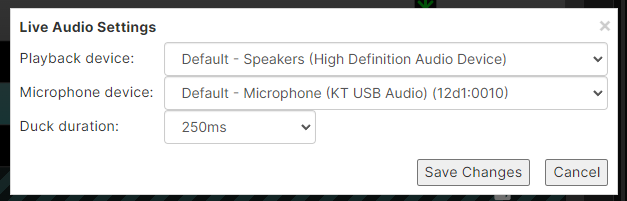
The Live Audio Settings dialog with dropdown menus for Playback device, Microphone device, and Duck duration (set to 250ms), with Save Changes and Cancel buttons.
The playback device is used to play audio from the studio and other presenters. The microphone device is used to send your own audio to the studio. You must ensure that this microphone feed is isolated and contains only your voice. Avoid using a combined audio mix that includes the playback audio, as this will lead to an undesirable echo effect. The duck duration is the amount of time it will take the studio audio to attenuate when the duck button is pressed.
## Live Audio
The audio levels from the studio are displayed for monitoring purposes. The row labelled "You" indicates your microphone levels. Greyscale levels mean the microphone is not live and not broadcasting.
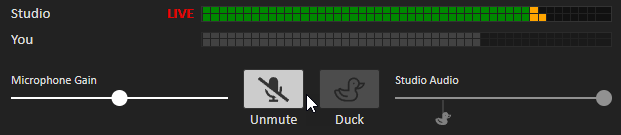
The Live Audio monitoring panel showing Studio Audio and 'You' microphone level meters in greyscale, with Mute, Duck, and Microphone Gain controls.
Click **Unmute** to activate your microphone and go live on air. A visual indicator at the top of the screen confirms that your microphone is live. To lower the volume of the studio audio and speak over it (e.g., to introduce a song), press the **Duck** button. You can adjust the ducking level by sliding the duck marker on the **Studio Audio** slider.
If your microphone is too quiet or too loud, use the **Microphone Gain** slider to adjust the volume. When your microphone is live, the levels will be shown in green, orange, and red colours.
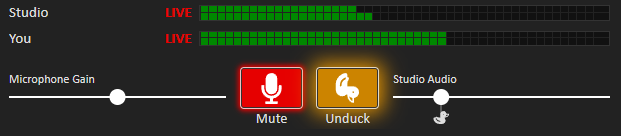
The Live Audio panel with the microphone unmuted, showing coloured level meters (green, orange, red) for the 'You' row, indicating the microphone is live.
## Multiple Presenters Joining Live Audio
PlayIt Live Remote Studio supports collaboration between multiple presenters during live sessions. The second presenter can connect in the same way as the first presenter. When connected, presenters can hear and talk to each other.
Presenters can use the purple **Walkie-talkie** icon to enable talkback functionality. This allows them to communicate with each other without the conversation being broadcast on air. Studio monitoring levels will be automatically attenuated when talkback is enabled.
When talkback is active, the audio levels will be displayed in purple as a visual reminder that talkback is enabled.
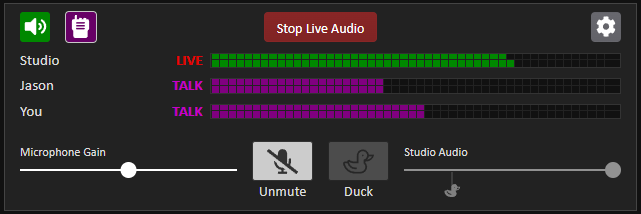
The Live Audio panel showing two presenters connected. The purple walkie-talkie icon is active and audio levels are displayed in purple, indicating talkback mode is enabled.
When you unmute your live microphone, the talkback feature will be automatically switched off to allow you to continue normal live broadcasting.
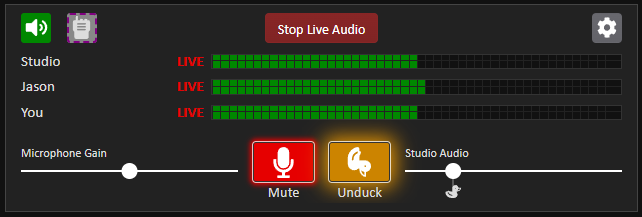
The Live Audio panel showing two presenters connected with their microphones unmuted. Audio levels are displayed in green/orange/red colours, indicating normal live broadcasting mode.
It is recommended that you assign a presenter who is responsible for handling control of playing tracks and ducking audio.
## Ending a Live Show
Once you've completed your live show, follow these steps to disconnect from Remote Studio:
1. Click the **Stop Live Audio** button to disconnect from the studio audio feed.
The 'Stop Live Audio' button used to end the live audio session.
2. Log out of Remote Studio by clicking the **Log out** button at the top right of the page.
The 'Log out' button at the top right of the Remote Studio interface.
## Performance
For best performance and audio quality, ensure that you have a stable and fast internet connection when using Remote Studio. We recommend an internet connection of at least 10Mbps. The live studio audio feed is a real-time feed (the latency is less than 100ms) and it is expected that you may hear the occasional dropout on unreliable connections. A wired connection is recommended over a wireless connection, if possible.
---
# Remote Voice Tracking
Remote Voice Tracking allows remote presenters to record voice tracks for upcoming shows from anywhere, using either a supported browser (Google Chrome, Microsoft Edge, or Mozilla Firefox) or PlayIt VoiceTrack (a Windows desktop application). This lets presenters pre-record their links between songs without needing to be in the studio.
Please refer to the Voice Tracking section of the documentation for [setup](/PlayItLive/218/main-window/remote-voice-tracking-setup) and [usage](/PlayItLive/218/main-window/remote-voice-tracking-usage).
---
# Remote Access Status
The Remote Access Status window shows every remote user currently connected to your PlayIt Live Built-in Remote Access Server. Use it to monitor live activity and force-disconnect individual users when needed.
To open the window, click **View connected users...** in the [Built-in Remote Access Server](/PlayItLive/218/remote-access/overview) configuration panel. This button is only available while the server is running.
The Remote Access Status window lists every active remote session, including the connection type, username, IP address, and how recently each user was seen.
### Session list
The main list view showing all active sessions with their columns.
### Log out
The **Log out** button, enabled when a session is selected in the list.
### Refresh
The **Refresh** button, which reloads the session list from the server.
### Close
The **Close** button.
## Understanding the session list
Each row in the list represents one active connection. The columns are:
Column
What it shows
**Type**
The kind of remote session: Remote Management, Remote Studio, or Remote Voice Tracking.
**User**
The user's username, or their display name if no username is set.
**IP address**
The remote IP address of the user's device. Not available for Remote Studio or Remote Voice Tracking sessions, which connect via a peer relay.
**Connected**
The date and time the session started, shown in your local time zone.
**Last seen**
How long ago the server last received activity from this session, for example `30s ago`, `5m ago`, or `2h ago`.
The list refreshes automatically when the window opens. Click **Refresh** at any time to reload the list.
## Logging out a user
To force-disconnect a user, select their row in the list and click **Log out**. PlayIt Live will ask you to confirm before closing the session. Once logged out, the user will need to log in again to reconnect.
Logging out a Remote Studio user will interrupt any live audio they are monitoring or presenting. Use this only when necessary, for example if a session appears stuck or a user should no longer have access.
## Session types
The **Type** column identifies which part of the remote access system the user is connected to:
- **Remote Management**: a web browser session managing the track library, clock schedules, or playout log via the Remote Management interface.
- **Remote Studio**: a browser-based presenter session, with access to the playout log, players, and live audio.
- **Remote Voice Tracking**: a voice tracking session, either via the browser or PlayIt VoiceTrack desktop application.
For a full description of each session type, see the relevant pages: [Remote Management](/PlayItLive/218/remote-access/remote-management), [Remote Studio](/PlayItLive/218/remote-access/remote-studio), [Remote Voice Tracking](/PlayItLive/218/remote-access/remote-voice-tracking).
## When no users are connected
When no remote users are connected, the window displays a message in place of the list.
If no remote users are currently connected, the session list is replaced with a message indicating there are no active sessions. The **Log out** button is disabled until a session is selected.
---
# PlayIt Live Control API
Through the PlayIt Live Control API, you can control PlayIt Live programmatically using an HTTP-based API. This allows for automation and management of various PlayIt Live functions.
You can find full documentation on the PlayIt Live Control API here: [https://www.playitsoftware.com/PlayItLiveAPIDocs](https://www.playitsoftware.com/PlayItLiveAPIDocs)
---
# Synchronising Data
PlayIt Live data can be remotely managed and synchronised to multiple PlayIt Live instances by using the dedicated remote management server, PlayIt Manager or the built-in remote management server in PlayIt Live. PlayIt Manager can be downloaded from [https://www.playitsoftware.com/Products/Manager](https://www.playitsoftware.com/Products/Manager). Details on how to use PlayIt Manager can be found on that page.
PlayIt Live can connect to a remote management server via a URL (Uniform Resource Locator). This is the base web address of your remote management server instance. For example: `http://:25432`. For more information on how to connect to your remote management server, see the Connect PlayIt Live page on the web interface.
## Connecting and disconnecting
When PlayIt Live connects to a remote management server, it switches to using a separate "synced" database to the normal "local" PlayIt Live database to store the remote data. When you first connect, you may notice all your tracks "disappear". This happens as you will now be using the empty "synced" database instead of the "local" one. While PlayIt Live is connected to a remote management server it synchronises changes and applies them to the database. This process will populate the data to match the ones seen on the remote management server. When changes are made via the remote management server the same changes will immediately be applied to PlayIt Live.
When you disconnect PlayIt Live from the remote management server, it will switch back to using the normal "local" database, and your previous local data will be displayed.
If for whatever reason you notice that data is out of sync, disconnect from the remote management server and connect again, except hold **Shift** while clicking the **Connect** button to clear your synced data and resync from scratch.
For more information on connecting to a server, see the [Connect to Remote Management Server](/PlayItLive/218/synchronising-data/connect-to-server) page.
## Data management restrictions
While connected to a remote management server it is not possible to manage PlayIt Live data directly from PlayIt Live. The only exception to this is the playout log: modifications made to the playout log via the main window will be synced to the remote management server.
## Multiple instances
When PlayIt Live instances are synced, only one machine can be the "on-air" machine. Only the "on-air" machine can play out audio and schedule items via the Log Scheduler.
When your machine is not the "on-air" machine, you can make it the "on-air" machine from options at the bottom right, if you wish. This will stop the current "on-air" machine from continuing playout and scheduling.
When tracks are playing on another machine, their status will be shown on your screen.
## Voice track synchronisation
Please note that voice track recordings recorded directly within PlayIt Live are not synced via the remote management server. Use PlayIt VoiceTrack to perform remote voice tracking.
## Track path substitutions
When PlayIt Live is connected to a remote management server it will be using tracks that were added to the remote management server. If the remote management server software is installed on a different machine to PlayIt Live, the track files added to that software will not be present on the PlayIt Live machine. In order to resolve this problem, **track path substitutions** can be configured from the Settings page on the remote management server. These are designed to substitute parts of the file path on the server with a file path that can be accessed by the PlayIt Live machine.
For example, the audio store on PlayIt Manager is `C:\ProgramData\PlayIt Manager\AudioStore`. A network share can be created by going to the folder properties and creating a share via Advanced Sharing...
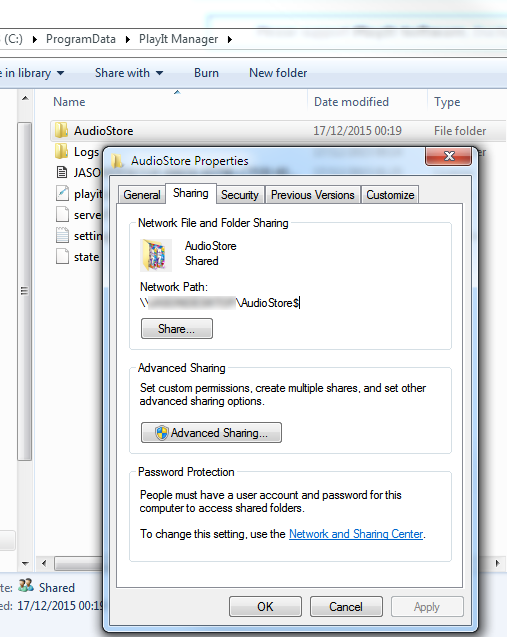
This will enable other machines on the network to access the audio files on the PlayIt Manager machine. On PlayIt Manager you should then add a track path substitution of:
> **From:** `C:\ProgramData\PlayIt Manager\AudioStore`
>
> **To:** `\\SERVER\AudioStore$`
When track data is synchronised to PlayIt Live, the track path substitutions will be applied when loading tracks for playout.
---
# Connect to Remote Management Server Window
### Server URL
Enter the URL of your PlayIt Manager server, or click **Browse...** to discover servers on the local network.
### Sync Key
Enter the sync key for your PlayIt Manager server. Click **Get Sync Key >** to open the server in your browser and retrieve the key.
### Connect
Click to connect to the specified server using the provided URL and sync key.
Hold **Shift** while clicking **Connect** to perform a full re-sync. Instead of fetching only the changes made since the last synchronisation, PlayIt Live re-downloads the server's entire data set and rebuilds its synced database from scratch. This is useful if this computer's copy has drifted out of step with the server.
**Warning:** A full re-sync clears the synced data on this computer and starts again from the server's copy. Any changes made on this computer that have not yet been synced to the server will be lost. The data on the server is not affected.
### Disconnect
Click to disconnect from the current server and switch back to the local database.
### Server Information
Shows the current connection status and synchronisation activity:
- **Status**: the connection state. **Connected** means PlayIt Live is linked to the server and syncing; **Disconnected** means you are working from the local database; **Connection lost. Trying to reconnect...** means the link dropped and PlayIt Live is trying to reconnect.
- **Last Change**: when the last data change occurred.
- **Last Sync Completed**: when synchronisation last finished successfully. If this is the same as or more recent than **Last Change**, all changes have been synced.
- **Last Change Notification Received**: when the server last notified this computer that there were new changes to pull down.
- **Last Sync Check**: when a Sync Check last verified that the data on this computer matches the server. Older servers that do not support Sync Check will show a message here instead.
- **Log**: a running log of recent synchronisation messages, useful for diagnosing problems.
When everything is working correctly, **Status** shows **Connected**, **Last Sync Completed** is at or after **Last Change** (so there is nothing waiting to sync), and the timestamps update regularly as you make changes.
### Close
Click to close the window.
---
# Spec Check Window
The Spec Check window can be accessed from **Help > Spec Check** in the menu bar.
PlayIt Live is a real-time audio playout and scheduling system. As such, it requires dedicated resources to operate smoothly, otherwise you may experience skips, glitches or freezing. Please ensure your system meets the minimum, and ideally recommended, specifications defined at [playitsoftware.com/Products/Live/Specs](https://www.playitsoftware.com/Products/Live/Specs).
You can use this window to automatically scan your CPU and memory to determine if your system is compatible.
## System Meeting Recommended Requirements
When your system meets the recommended requirements, all items show a green check mark.
## System Not Meeting Minimum Requirements
When your system does not meet the minimum requirements, items that fail are marked with a red cross.
---
# About PlayIt Live
The About window can be accessed from **Help > About PlayIt Live** in the menu bar.
### Current Version
Shows the currently installed version of PlayIt Live.
### New Version Check
When a new version is available you will be notified with a link to download the latest version.
### Up Time
Shows how long the software has been running. The time is shown in the format days:hours:minutes:seconds.
### OK Button
Click the **OK** button to close the window.