
Remote Studio
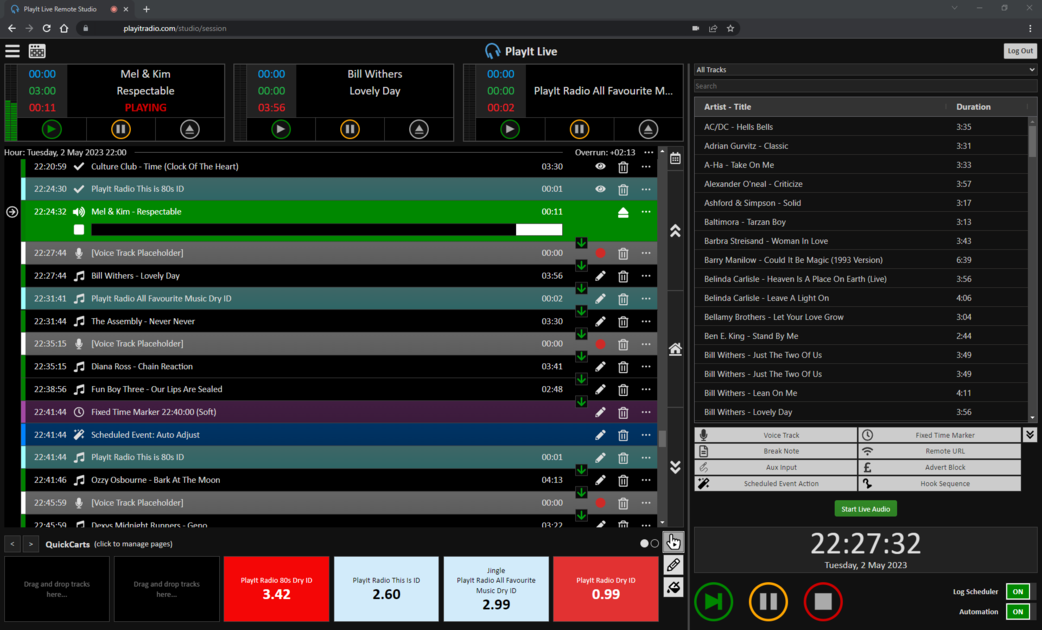
PlayIt Live Remote Studio in a web browser
PlayIt Live Remote Studio is a powerful, browser-based broadcasting solution that allows users to plan and present their shows remotely. This page will guide you through the process of setting up a new user, connecting to Remote Studio, and using its features.
Setting Up a User for PlayIt Live Remote Studio
To allow a user to connect to PlayIt Live Remote Studio, follow these steps:
-
Open PlayIt Live and navigate to Manage > Users.
-
Click Add New to create a new user.
-
Enter the user's display name, username, and a password.
-
If you trust the user and want them to be able to broadcast any time, you can enable the Is Admin option.
-
Otherwise, select the hours during which the user is allowed to broadcast using Remote Studio. They can log in anytime to plan their show, but can only go live during the specified hours (with a 5-minute buffer on either side).
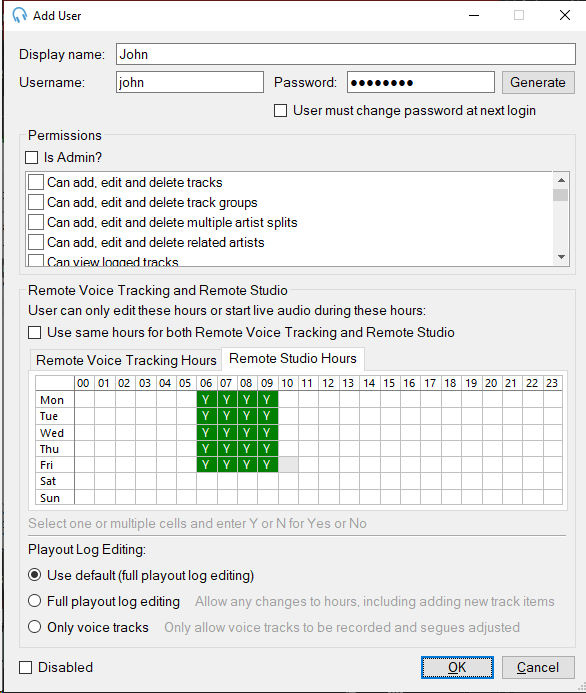
Note: After their allotted time, the remote user will be automatically disconnected from live audio within 5 minutes.
Enable Remote Connections
-
On PlayIt Live, go to File > Enable remote connections...
-
Expand Advanced, and ensure the Use HTTPS is ticked.
-
Click Start Server
-
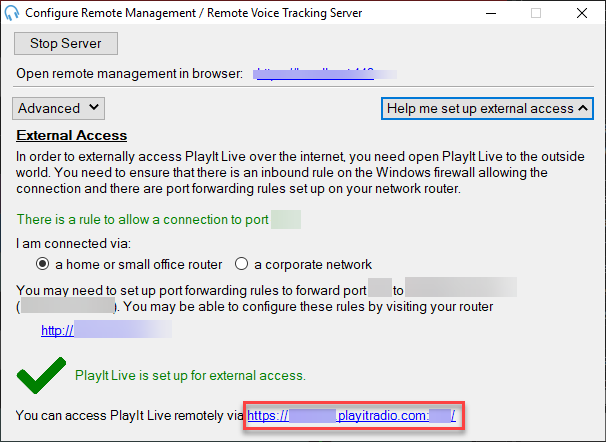
Click Help me set up external access to create a firewall rule and configure port forwarding rules.
-
At the bottom of this window you will see the address that can be used to access PlayIt Live remotely. Make a note of this address, as this is what you will give to remote presenters to plan and broadcast their show.
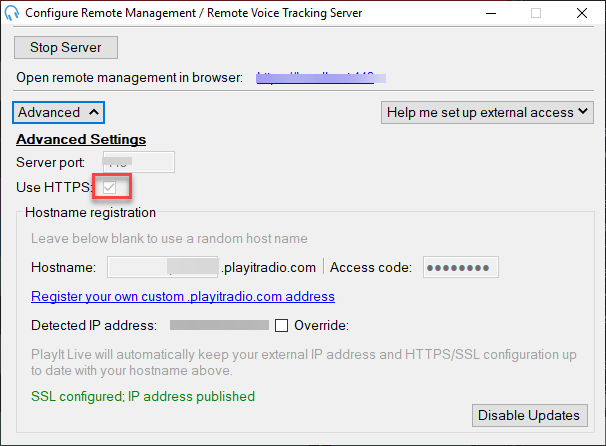
Note: You can visit https://www.playitsoftware.com/Account/Hostname to request your own, more memorable, playitradio.com hostname.
Accessing Remote Studio
-
In a Chrome-based browser, visit the URL as per step 5 of the Enable Remote Connections section.
-
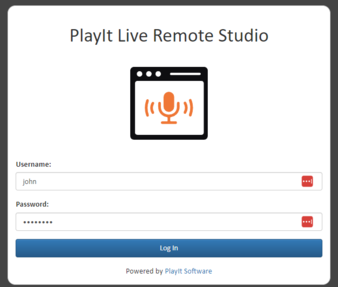
Select Remote Studio
-
Enter your Username and Password and click Log In
-
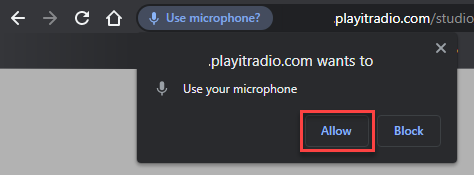
Upon connecting to Remote Studio for the first time, you will be prompted to grant your web browser access to your microphone. You should click Allow to proceed.
Remote Studio Interface and Compatibility
The Remote Studio interface is identical to the PlayIt Live interface, but it is presented in a web browser. This makes PlayIt Live accessible to those on various operating systems, including Windows, macOS, and Linux. Remote Studio currently works only on Chrome-based browsers.
If you are familiar with PlayIt Live will not require additional training, except for learning how to use the Live Audio feature.
Going Live with Live Audio
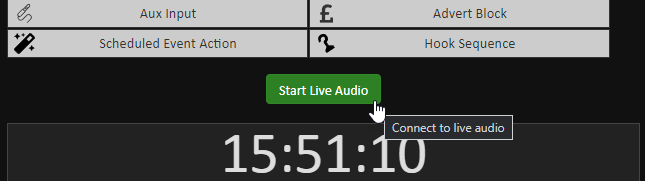
When it's time for you to go live, you should click Start Live Audio. You will immediately hear the audio from the studio in real-time. To mute the monitored audio from the studio, click the green Speaker icon.
Live Audio Settings
You should check your audio settings to ensure your playback device, microphone device and duck duration are configured to your preference. Click the cog icon to access Live Audio Settings.
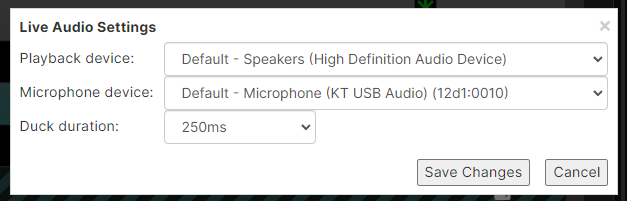
The playback device is used to play audio from the studio and other presenters. The microphone device is used to send your own audio to the studio. You must ensure that this microphone feed is isolated and contains only your voice. Avoid using a combined audio mix that includes the playback audio, as this will lead to an undesirable echo effect. The duck duration is the amount of time it will take the studio audio to attenuate when the duck button is pressed.
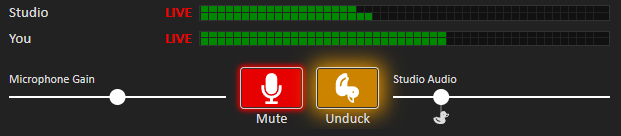
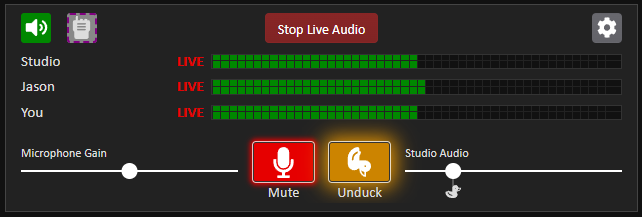
Live Audio
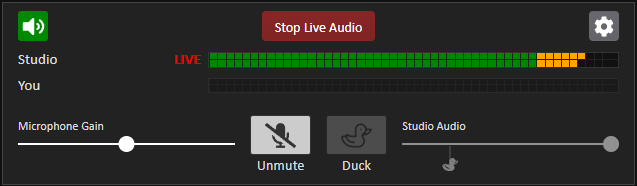
The audio levels from the studio are displayed for monitoring purposes. The row labelled "You" indicates your microphone levels. Grayscale levels mean the microphone is not live and not broadcasting.
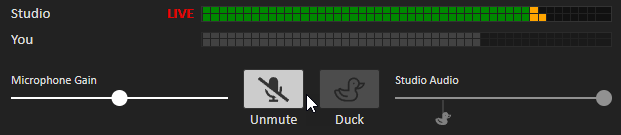
Click Unmute to activate your microphone and go live on air. A visual indicator at the top of the screen confirms that your microphone is live. To lower the volume of the studio audio and speak over it (e.g., to introduce a song), press the Duck button. You can adjust the ducking level by sliding the duck marker on the Studio Audio slider.
If your microphone is too quiet or too loud, use the Microphone Gain slider to adjust the volume. When your microphone is live, the levels will be shown in green, orange, and red colours.
Multiple Presenters Joining Live Audio
PlayIt Live Remote Studio supports collaboration between multiple presenters during live sessions. The second presenter can connect in the same way as the first presenter. When connected, presenters can hear and talk to each other.
Presenters can use the purple Walkie-talkie icon to enable talkback functionality. This allows them to communicate with each other without the conversation being broadcast on air. Studio monitoring levels will be automatically attenuated when talkback is enabled.
When talkback is active, the audio levels will be displayed in purple as a visual reminder that talkback is enabled.
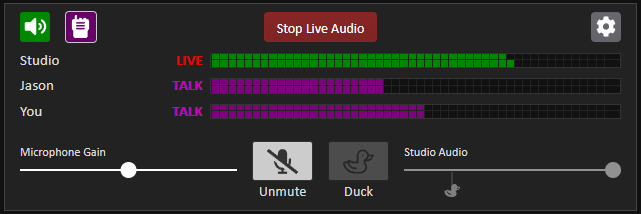
When you unmute your live microphone, the talkback feature will be automatically switched off to allow you to continue normal live broadcasting.
It is recommended that you assign a presenter who is responsible for handling control of playing tracks and ducking audio.
Ending a Live Show
Once you've completed your live show, follow these steps to disconnect from Remote Studio:
-
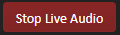
Click the Stop Live Audio button to disconnect from the studio audio feed.
-
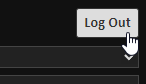
Log out of Remote Studio by clicking the Log Out button at the top right of the page.
 PerformanceFor best performance and audio quality, ensure that you have a stable and fast internet connection when using Remote Studio. We recommend an internet connection of at least 10Mbps. The live studio audio feed is a real-time feed (the latency is less than 100ms) and it is expected that you may hear the occasional dropout on unreliable connections. A wired connection is recommended over a wireless connection, if possible.