×
Menu
Index

Edit Track Window

Edit Track Window
 
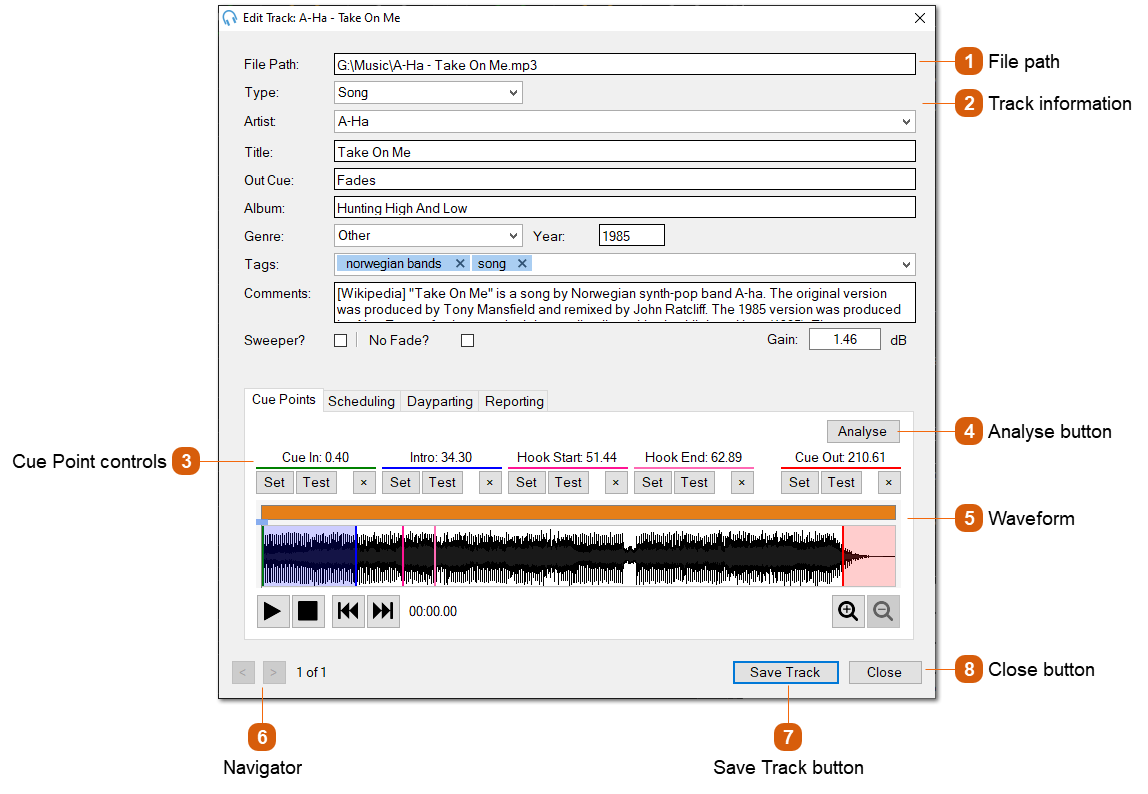
The track editor is used to change the information stored on each track imported into PlayIt Live.
 
1

File path

1. File path
 
This displays the location of the audio file on the file system. This cannot be changed once the track has been added.
2

Track information

2. Track information
 
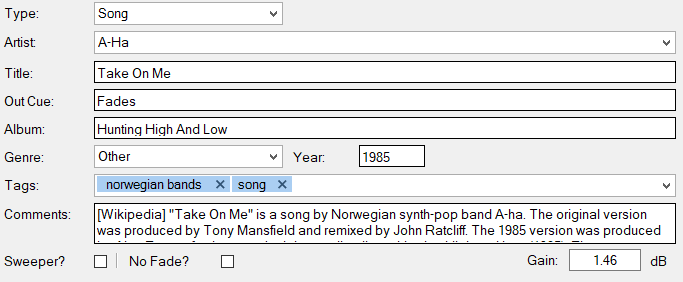
This area allows you to change the information stored on the track. Artist, Genre and Tags information will attempt to auto complete if there is similar information on other tracks in order to help keep data consistent.
 
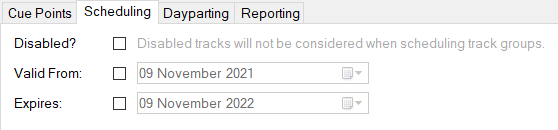
Under the Scheduling tab you can also find the Disabled, Valid From and Expires fields.
Disabled: Disabled tracks will not be considered by the scheduler when scheduling track group items.
Valid From: Tracks will not be considered by the scheduler when scheduling track group items if the scheduling time is before the Valid From date.
Expires: Tracks will not be considered by the scheduler when scheduling track group items if the scheduling time is after midnight on the Expires date.
 
 
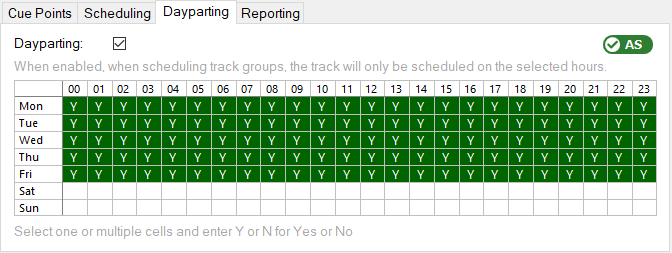
Under the Dayparting tab you can define at what times of the week the track can play. This is useful if you want to prevent a track from being played at the weekend, for example.
 
The Dayparting feature requires the Advanced Scheduling module. A green indicator shows this is licensed. If this is shown in red, click the indicator to purchase or start a trial of the module.
 
Under the Reporting tab you can change the ISRC (International Standard Recording Code) and record label for the track. These can be used to report tracks to licensing and royalty collection agencies. You can export these via Manage > Logged Tracks.
3

Cue Point controls

3. Cue Point controls
 
The Cue In point is the position in seconds where the track should be started by a player.
The Intro point is the position in seconds where the vocals start on the track.
The Hook Start point is the position where a hook in a hook sequence will start.
The Hook End point is the position where a hook in a hook sequence will end, if the full hook is used.
The Cue Out point is the position in seconds where the track is considered to have finished. When this point is reached in Live-Assist mode, the players will being fading out this track and start playing the next track. The players count down the remaining time to this point.
 
Use the Set button while listening to the track to set the point to the current position. Use the Test button to listen to the track from the set position. Click the × button to reset to the default position.
4

Analyse button

4. Analyse button
 
Click the Analyse button to automatically detect the Cue In and Cue Out points based on the silence at the start and end of the track. The sensitivity of the analysis can be configured from Settings.
5

Waveform

5. Waveform
 
The waveform shows the volume of the audio track over time. Overlaid on the waveform are the Cue In (grey), Intro (blue) and Cue Out (pink) points that are set above. Double-click on the waveform to start playing at a different position in the track. Use the Play and Stop button to control playback and the Back and Forward buttons to jump to the start or end of the track. Use the Zoom buttons to zoom in and out of the waveform if you need to set a more precise cue point. You can also zoom in and out with the mouse wheel while hovering over the waveform.
6

Navigator

6. Navigator
 
Use the navigator to easily move to the previous and next track displayed in the list. Note, before moving between tracks, any changes to the current track will be saved.
7

Save Track button

7. Save Track button
 
Click the Save Track to confirm changes to the current track.
8

Close button

8. Close button
 
Click the Close button to discard changes to the current track.